Constructing A Battery Box DIY Lithium Battery
Renovating a 1970 Avion truck camper is more than just a matter of a fresh coat of paint or shiny new appliances. After a half-century of exposure, this classic camper needs refurbishing from the subfloor up, including the electrical system. Shorts due to old wiring are a common cause of fire in old RVs, but that’s a little less likely with the completely new electrical system that we have installed. Along with new, marine-grade wires and durable connections, we are building a DIY lithium battery to power the entire system. With the cells in hand and associated hardware all together, we are missing one final piece: the battery box.
Defining Our Goals
Battery boxes serve many purposes. Like any box, it is a means of storage. It securely houses the battery cells, a battery management system (BMS), and electrical connections that make up the battery. Along with keeping components in, the box also keeps hazards out by protecting the cells not only from impacts but also electrical shorts.
Beyond the typical role of a battery box, we also have our own specialized needs. Since this is a battery that will be in our home on wheels, it will be subject to the bumps and jostling of the trails we travel. So the box will need to include a shock-resistant design to protect the batteries. Along with functional needs, we also have an aesthetic preference. With all the custom work we have put into these batteries, we want to be able to display them for educational purposes when we give tours of our camper. We want the box to double as a display case, laying bare the guts of our homemade batteries.
All of this means that any run of the mill retail case simply won’t do. Like everything else, we will build it ourselves.
The Design
If you look at most batteries used in RVs, you’ll see a fairly standard exterior: a positive and negative terminal peaking our of a plastic box wrapped in branding and instructions. It is, in essence, a black box. Electricity goes in to charge the batteries and is stored until it is drawn out to power something else. We want our box to be durable, supportive, and transparent. To do this, we first dig into what materials will balance our need for strength with transparency.
Choosing Materials
Most battery boxes are made of molded plastic. This is a simple and budget-conscious solution. It could serve our purposes. But molding plastic is something better managed on the assembly line. We want to make a box using materials that we can work with our own tools and skills.
Plexiglass
While plexiglass hasn’t been part of our build process up to this point, I have a history using it on past projects. It is a common material for RV windows and other clear surfaces subject to impact. This makes plexiglass the obvious choice for the display sections of our battery box so that people can see the batteries.

Aluminum
We also want a solid section to bind the batteries in place. We settle on staying true to the camper’s roots by making an aluminum case. Now, as I discussed when choosing a material for bus bars for this battery, aluminum is a highly conductive material. While aluminum’s light weight and strength are ideal for housing a battery, it is critical that we this metal as far from the battery terminals as possible to avoid electrical shorts. Happily, this challenge also inspires a larger solution.

Silicone Rubber
Rubber is a common insulator for electrical circuits. It is also used as padding to lessen sharp impacts. As soon as we settle on making an aluminum case, we decide to line the interior with rubber as both an insulator, shock absorber, and means to ensure a snug fit for the batteries in the case without damaging the cells.

Drawing it Together
The materials are all falling into place. And with it, so is the design of the box. There will not be a single hinge. Instead, we will take advantage of aluminum’s flexibility to pull away from the side walls while installing the battery cells and then securing them together to bind the batteries in place. After sketching out several potential designs and identifying shortcomings, we settle on a final layout and start ordering the materials. Fortunately, we can use a scrap aluminum sheet from our Avion build. But extruded aluminum bars, rubber, and plexiglass solvent need ordering.
Assembling the Case
After all the research into materials and design, assembling the case is remarkably straight forward. We are already an experienced riveting team, having buck riveted thousands of bonds while refurbishing our Avion truck camper. The greatest challenge is to ensure that the case is as precise a fit as possible. Which means we frequently paused to test fit different parts of the case as it comes together.
Cutting and Riveting the Aluminum Base
The aluminum portion of the battery box effectively composes three out of the six sides of the battery box. Sheet aluminum sides are secured together with aluminum bar edging and aluminum rivets. The long bottom aluminum side edges are T-bars to increase the stability of the box and add an outer lip for mounting the box to the camper floor. The short bottom edges are right-corner-bars which will be the mount points for the plexiglass cover. One side has an additional T-bar on the base which divides the battery cell section of the box from the BMS section.

Applying the Silicone Rubber Strips
Rather than insulating the entire case with a sheet of rubber, we decide to use thick and hard silicone rubber strips. These will help insulate the battery from the case, add shock resistance, snuggly hold the battery in place but also protect the battery cells from uneven interior created by the row of rivets that will be holding the aluminum case together, and the gaps between rubber strips will act as air gaps to help keep the batteries cool.


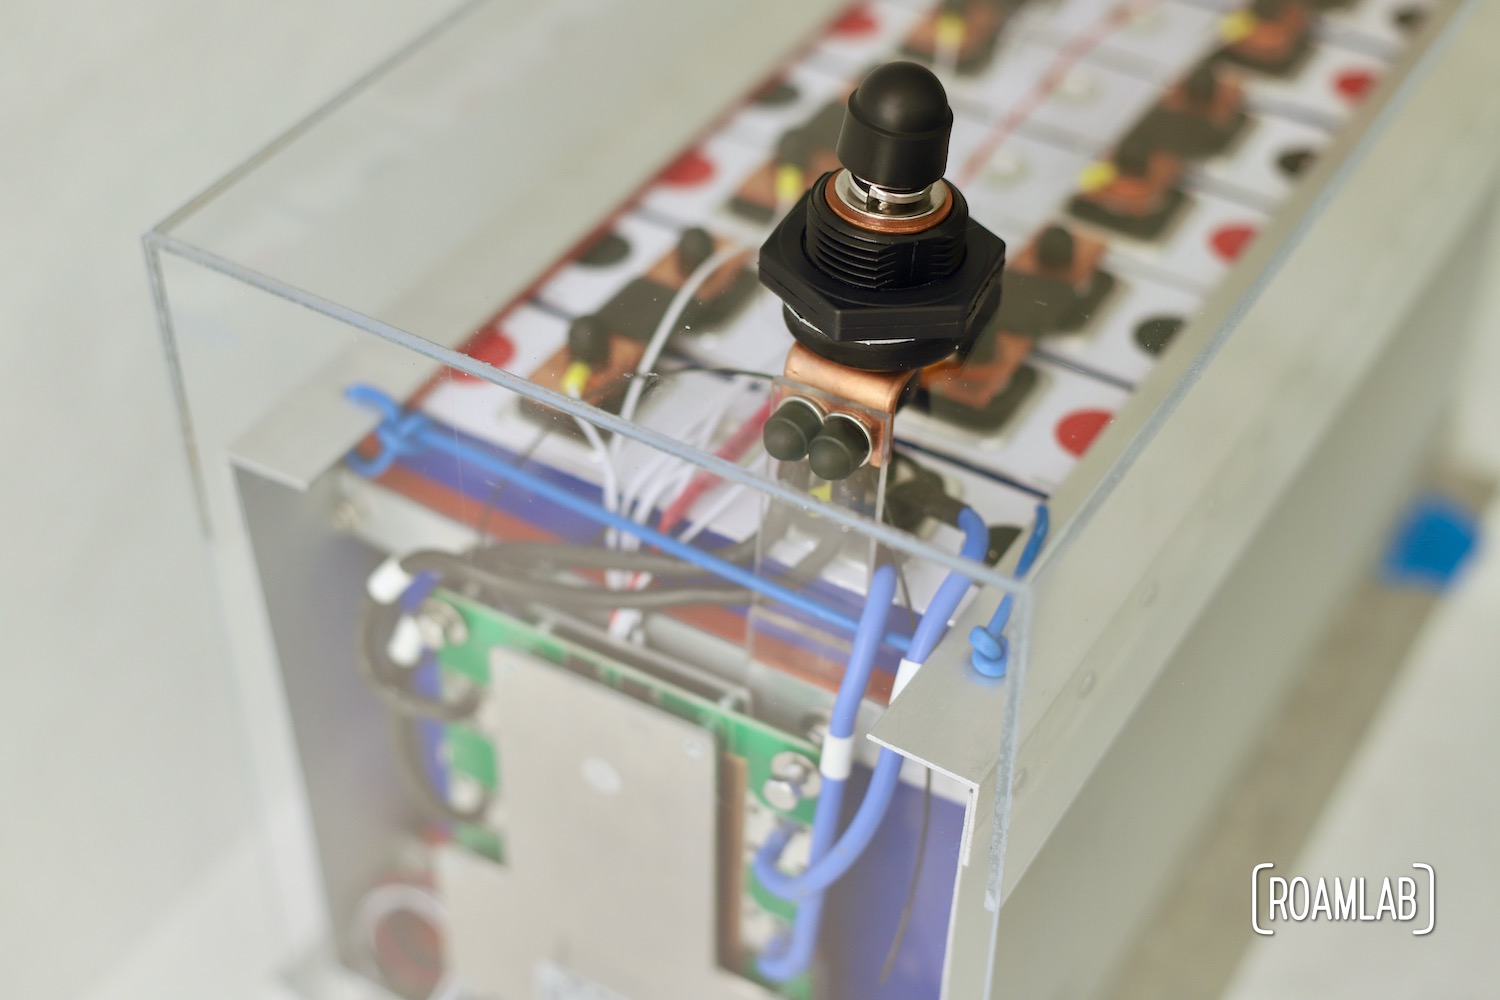
Building Plexiglass Cover
Our final step is to assemble the plexiglass cover. Plexiglass is an impressively durable material, but it can also melt and crack when not properly cut. So, we buy a fine tooth saw blade to cut the plexiglass and occasionally paused when the blade gets hot and starts melting the plexiglass rather than just cutting it. It is critical to have a perfectly even edge when binding connecting piece of plexiglass. So cutting it is a meticulous process.
We are similarly cautious when cutting holes for the power terminals in the top of the box. In this case, there is a little melting but we succeed in avoiding any cracks.


Acrylic Solvent
While we could use some other material to frame the edges of the plexiglass and connect the pieces, we want this to be a single plexiglass piece to maximize viewing. So, we use a quick curing acrylic solvent to weld the pieces together. After allowing 24 hours for a full cure, we are ready to assemble the battery in the case.


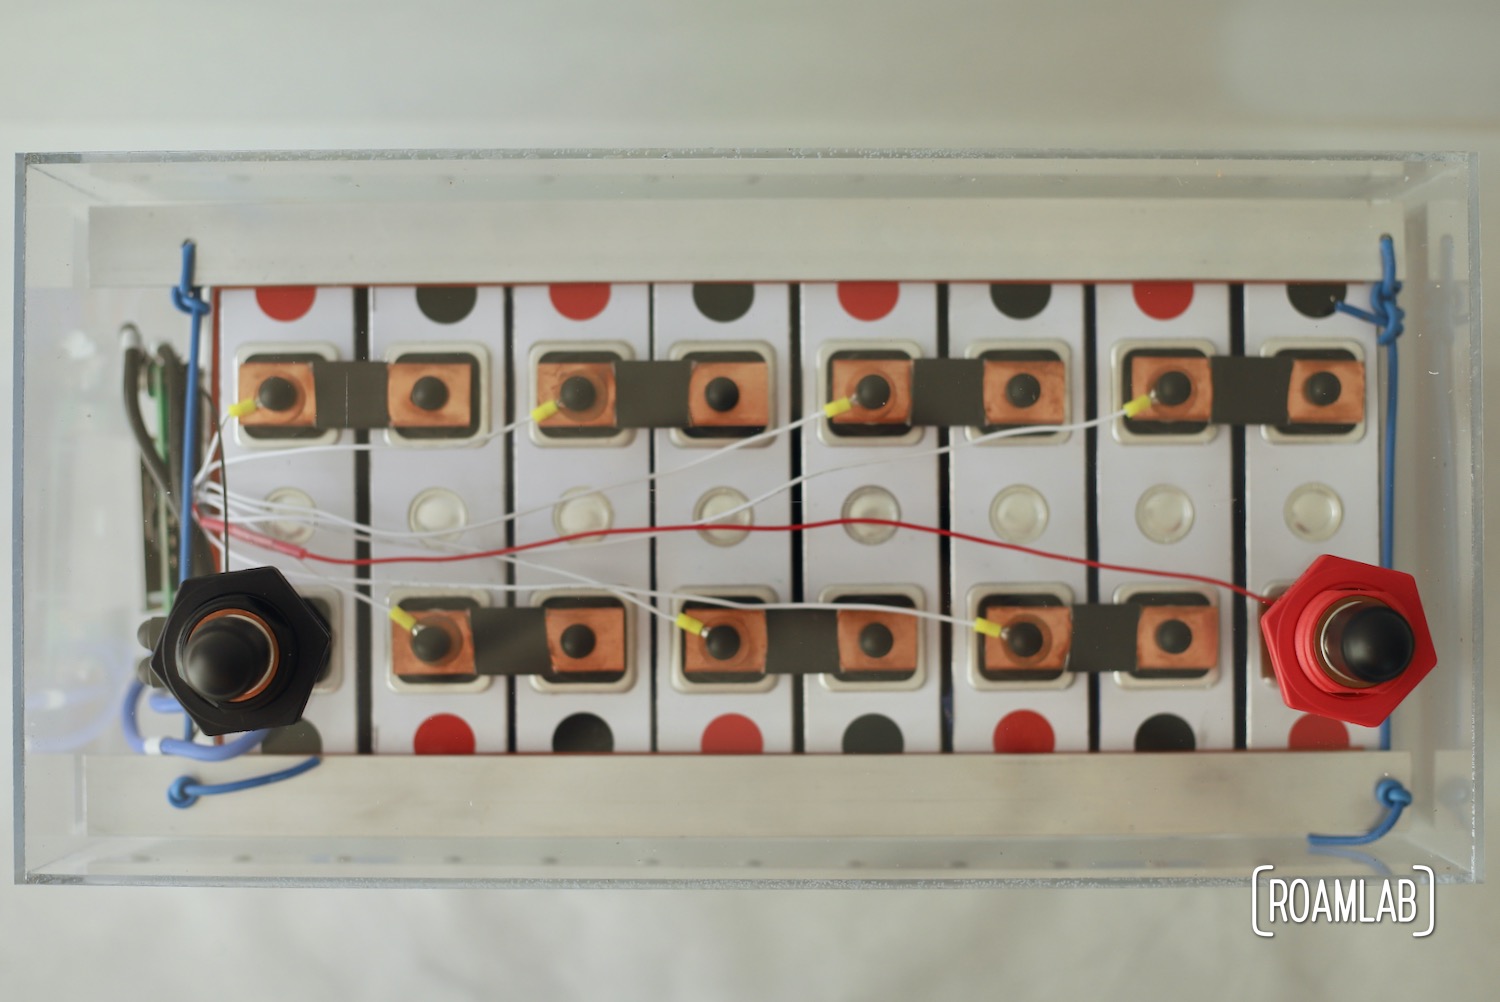
The Completed Case
There’s not much left to say. Here’s the final case:


A Coda
This is not the first plexiglass box I have made and I have had past problems with sides splitting. So I am very careful with this new plexiglass box, fearing that too much strain may lead to a critical failure and counting on its final storage space to act as structural protection so that the plexi is mainly meant to prevent accidental shorts. But our first trip with the batteries is before I have a chance to build that seat storage. Instead, we set a plank over the electrical system. The plank does double duty, supporting our experimental air conditioning unit. (More on that later)
For this relatively short trip, the plan is to remove the airconditioning unit when we are driving and then set it up when we are stationary. Even so, one day, short on time, we rush out with the air conditioner in place. We drive slowly and carefully monitor the unit. But we don’t realize anything is wrong until the unit has disappeared from sight. By then the problem is clear and we are both horrified: the air conditioner must have fallen on the batteries! Frankly, we are surprised when we jump into the back to discover that, while the airconditioning unit has fallen on the batteries, there isn’t even a noticeable dent in the plexiglass. The boxes turn out to be more than my pessimistic imagination had hoped.
There you go: the boxes have survived their first trial with flying colors. I can’t wait to properly install them once we have solidified our final design.


Grant
That looks great! Very professional!
Lexi
Thanks, Grant!
Putting it together is so satisfying.
Byron
Helpful content wonderfully produced by someone of skill.
What battery terminal posts are those you’re connecting from your Ubar through the plexi?
Thanks!
Byron
Lexi
Thanks Byron,
We bought some simple terminal connectors through Amazon [Product Link]. Terminals get expensive at that size and these were one of the more wallet-friendly options with the specs we needed. These have held up well since we built the batteries over a year ago.