Installing A Modular Rail System Our First Time Hand Riveting
We constantly debate what we will or will not mount along the side of our truck camper. What type of awning do we want? Do we need a attachment point for a solar shower? And, most importantly, how are we going to mount a screen for outdoor movie night?
In the end, we agree to install a rail system on the camper. This will allow modular mount points adjustable to our needs
Working in Tight Spaces
This entire project revolves around working in tight spaces. Rather than relying on tear-able aluminum sheet, we decide to continue our technique adopted when reinforcing the roof and add internal C-channels to support the rail. Mounting and riveting the channel itself all required a special degree of dexterity.
Interior Braces
The rail is specked for holding up to 2,000 lbs. Of course, that’s only the case if the thing it is mounted to can do the same. Aluminum sheet, on its own, is not up to handling this type degree of stress. So, in keeping with out latest trend while reinforcing the Avion roof, we mount interior braces on the of the camper inside, where the rail will be mounted. The process is almost the same, but even more awkward as we contend with the curve of the walls and window frames to properly access the rivets with the air hammer and the bucking bar.


Countersunk Rivets
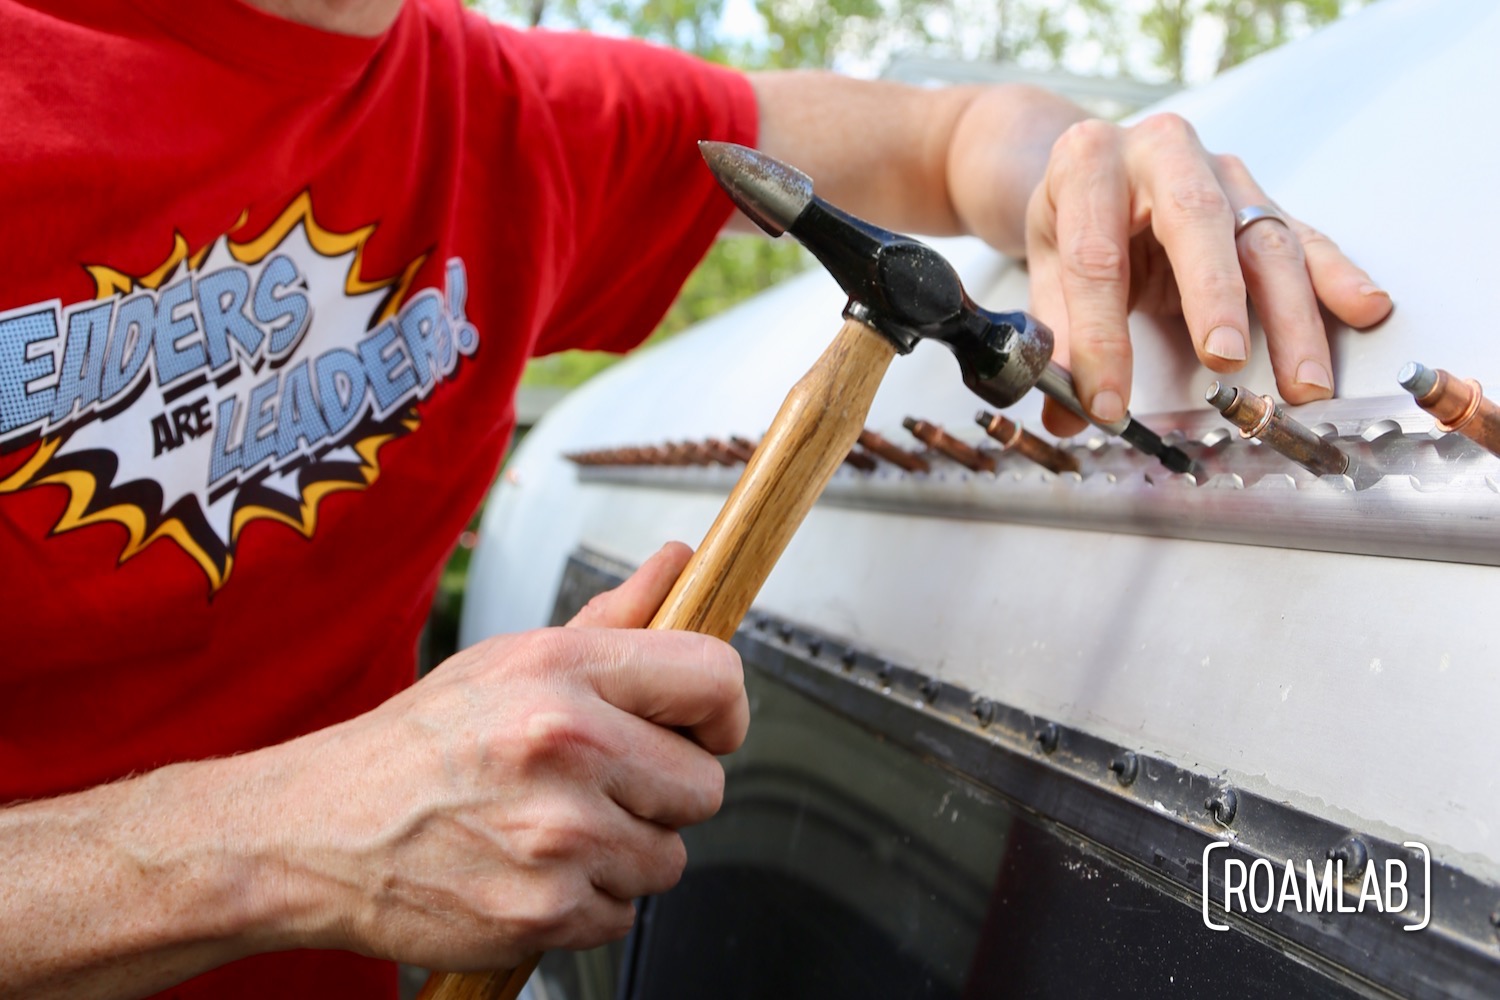
This is also the first time we have contended with counter sunk rivets. We usually use brazier head rivets. This domed head is iconic among most aluminum campers and classic aircraft. It is preferred due to the smooth form factor and limited need for prepping a surface (drill a hole the size of the rivet’s shaft and you are off to the races.) However, mounting this rail requires the rivets to be inside a channel which must remain smooth. The brazier heads take up too much space and would limit where the mounts could be set, moved, and removed. So, for the first time, we have to use countersunk rivets.
Countersunk rivets have a trumpet shaped head. This means that they lie flush with the sheet metal that they are riveted into but they require the extra step or a countersunk hole for them to be riveted into. I have a little bit of experience in drilling with a countersink bit when I made a reinforcement bar as part of the bed extension. That was using screws, however. This time, we are riveting. And not just any riveting at that….
Hand Riveting
Mounting the rail itself proved to be an even greater challenge than the interior brackets for the same reason: access. The rail’s mount points are surrounded by a scalloped channel. This is how hooks can be set, moved, and removed. But it also makes for very limited access the the rivets themselves. We don’t have any flat attachments for the air hammer that are small enough to fit in this space. In the end, we improvised, re-purposing a cylindrical steel tool with a flat base to be the contact point with the rivet head. Then we riveted old school: with a hammer.


All Together Now!
With the rail in place, the sky is the limit. As a first use of the rail, we hook in a screen for an outdoor drive-in movie. Do you have any ideas for creative uses of a rail system?


D.O.M.
In aviation parlance, that rail is referred to as “seat track”. I just scored a scrap 18 foot piece last night at work. It will be the basis for the rooftop rack on my 4runner. There are all sorts of latch-ey goodies that interface with that track. Btw, where did you source yours?
Lexi GoForth
Oh, that is an excellent perk of the job! We bought ours from Mac’s Custom Tie Downs where it’s referred to as a VersaTie Aluminum Track. But the longest piece we could buy was 8 feet. Quite the difference between industry and general consumer! That turned out to be the deciding factor in how long we wanted the track to be.