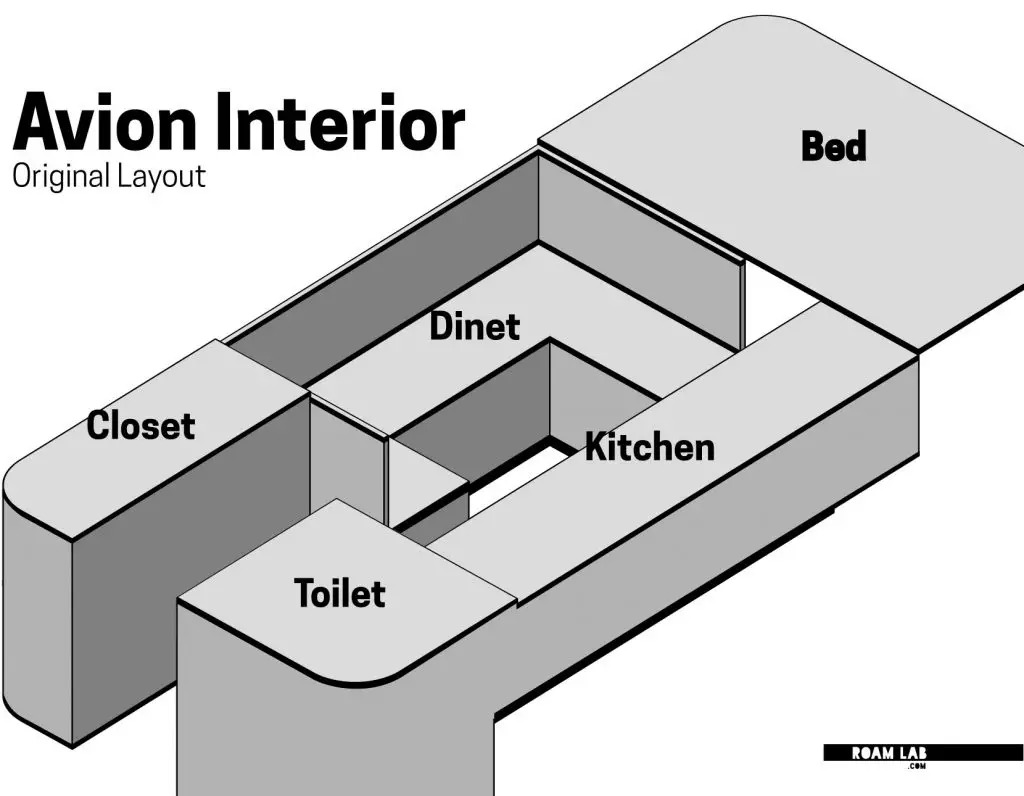
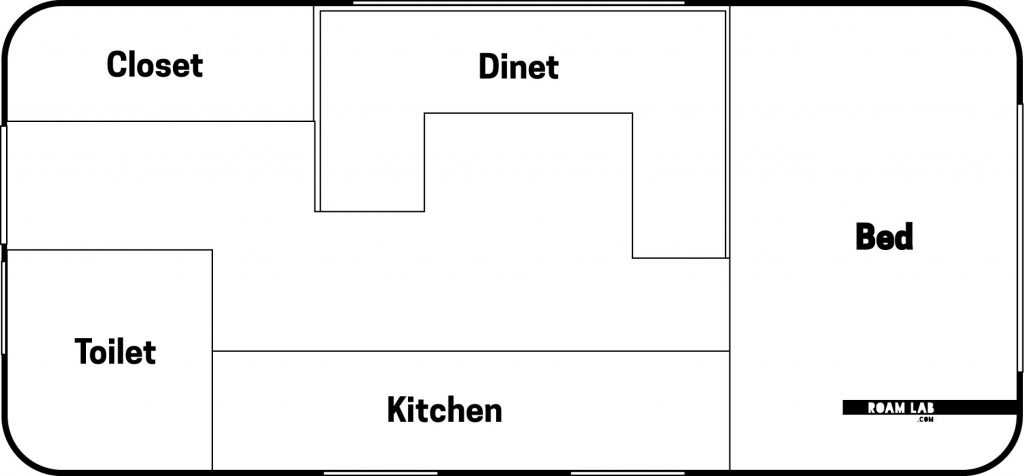
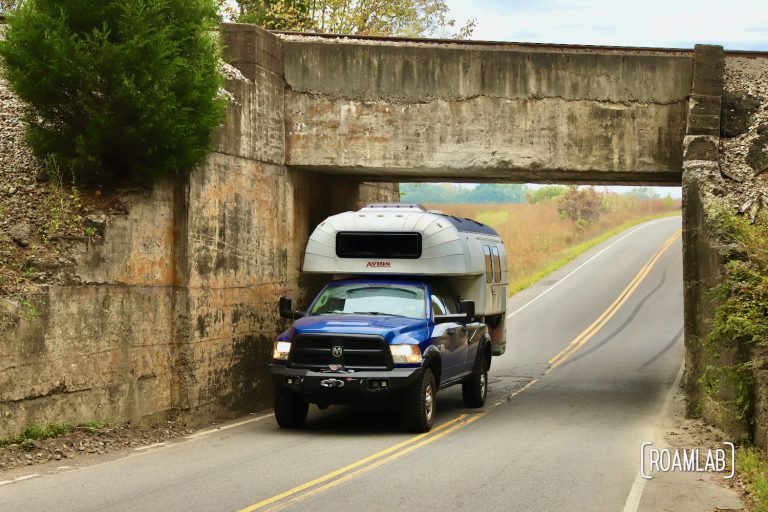
This project has been a long time in the making. When we buy our 1970 Avion C11, we know that the truck camper’s full bed aligned east-west will not work for our full-time intent. It’s too small for two adults and one of us would have to climb over the other to get out of bed. Initially, we struggle to conceive of a method to form a queen-sized bed by merely altering the interior arrangement of the camper. While we can introduce sliding or folding out bed extensions, we can not agree on a solution that won’t require us to regularly make and break down a bed or block the interior windows. Thus, we reluctantly agree to extend the cabover.
Many owners with east-west beds have considered it, but few have ever extended the cabover of their camper to turn it into a north-south bed. There’s plenty of reasons: time, expense, expertise, shifted center of gravity, or necessary reinforcement requiring a gut job—to name a few. But we are already set to replace the base and bulwark of the cabover. So adding a few inches isn’t quite as big of a deal as it might seem.
Then again, fundamentally altering the proportions of a truck camper will always be a big deal. It’s our biggest renovation project to date and our first time defiating from the original proportions of the camper. We spend quite a bit of time balking at such a change. But finally, when it is time to put up or shut up, we don’t want to have to deal with crawling over each other in the middle of the night. So, extension it is.
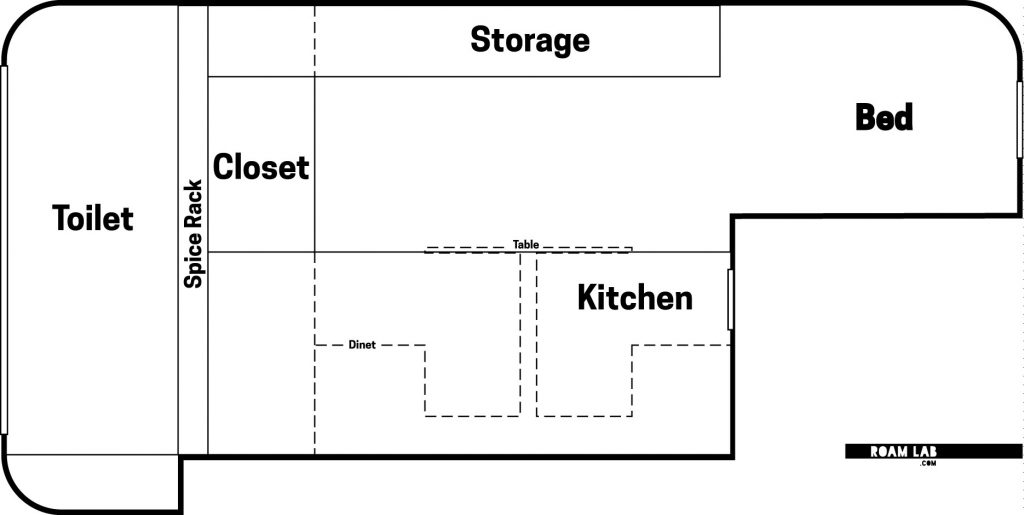
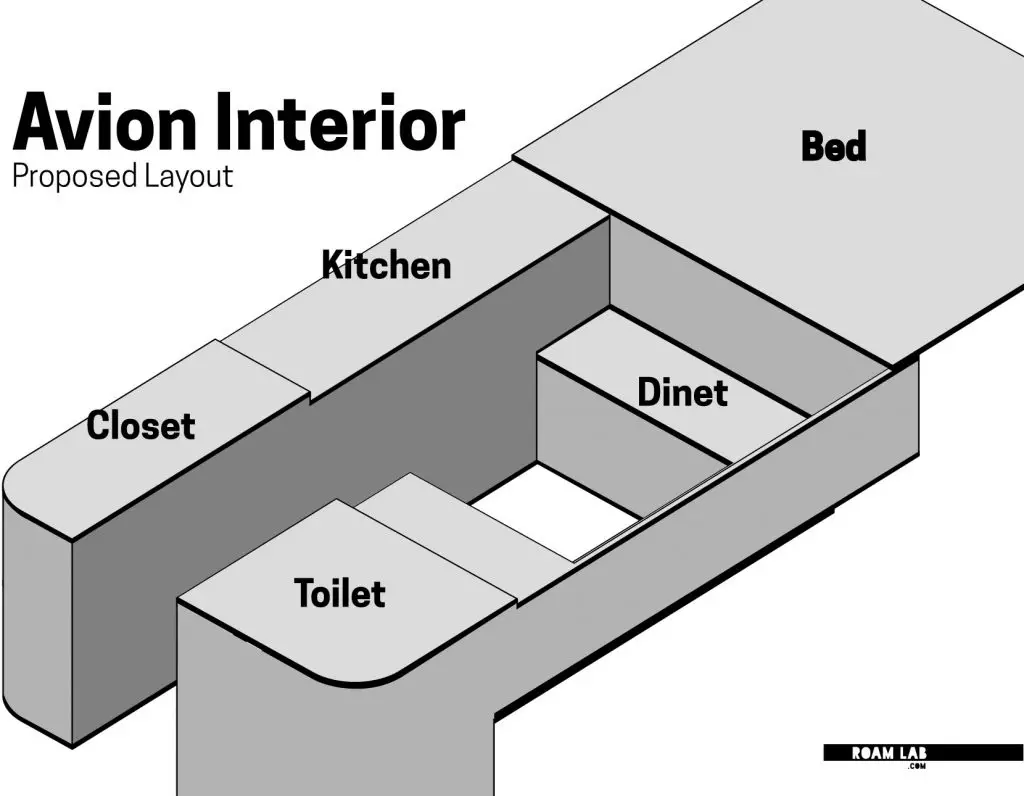
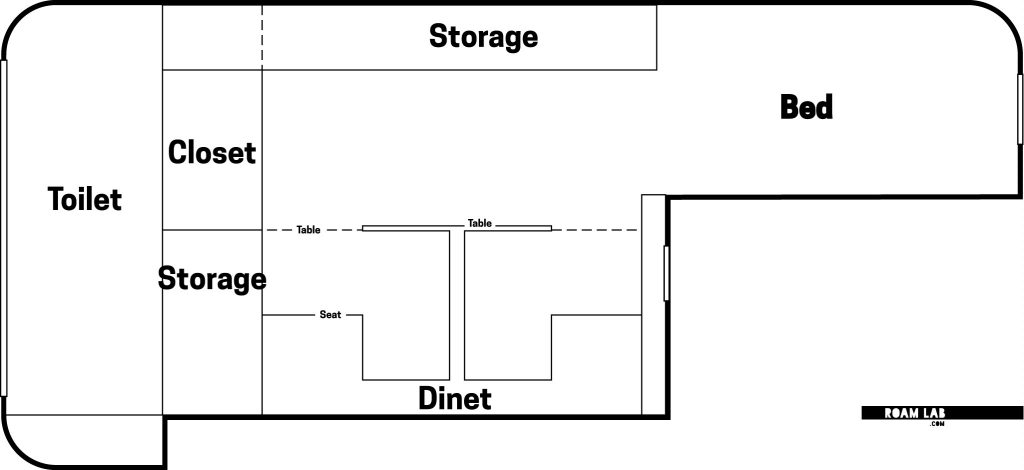
The Plan
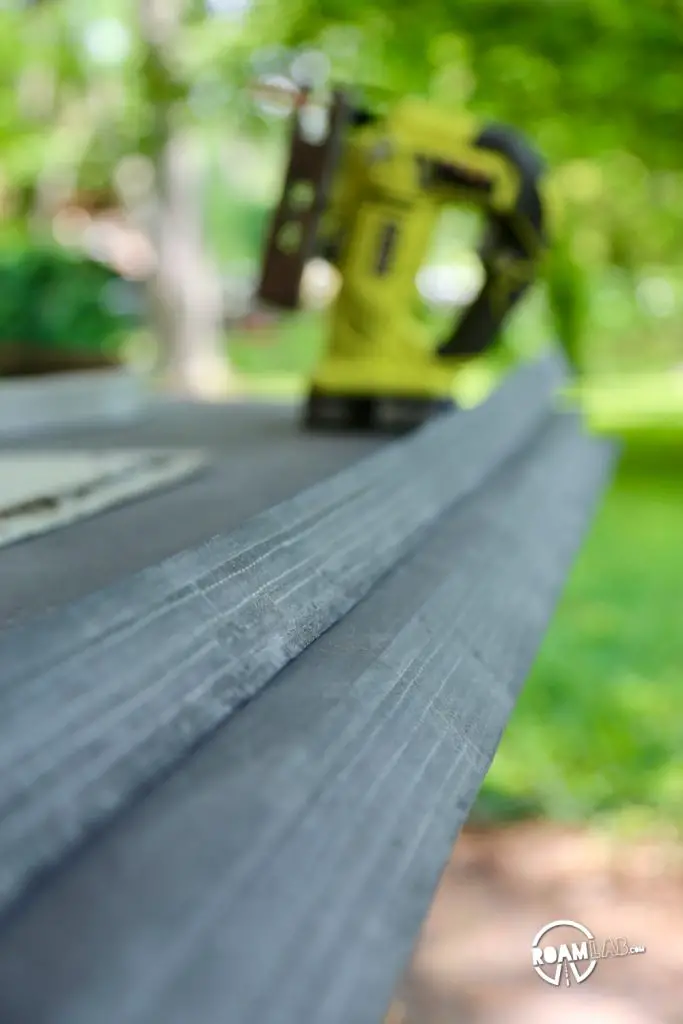
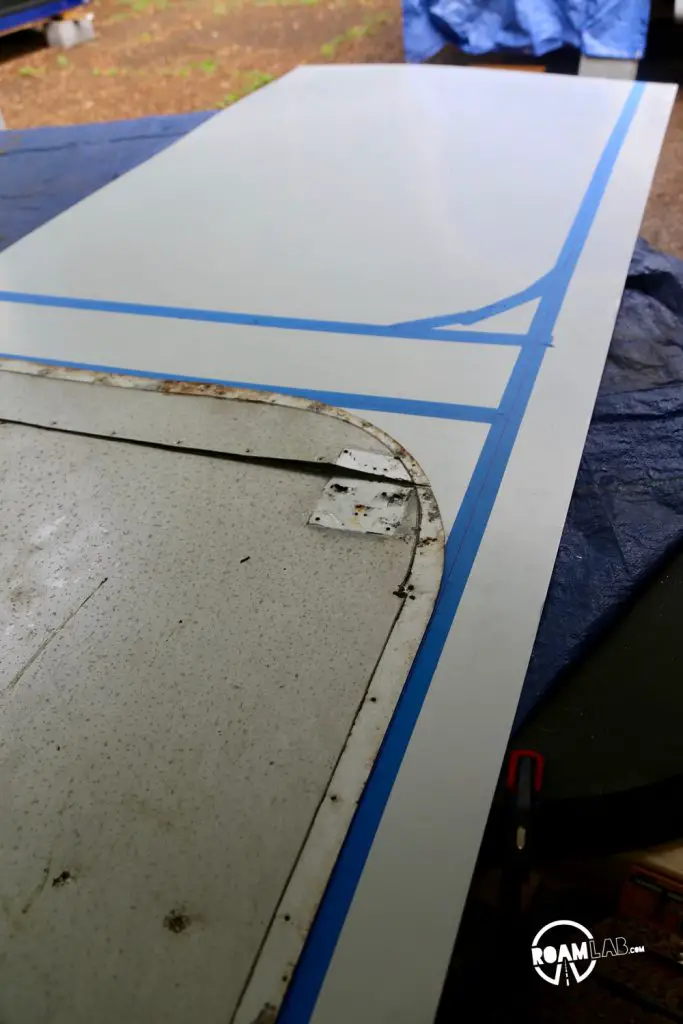
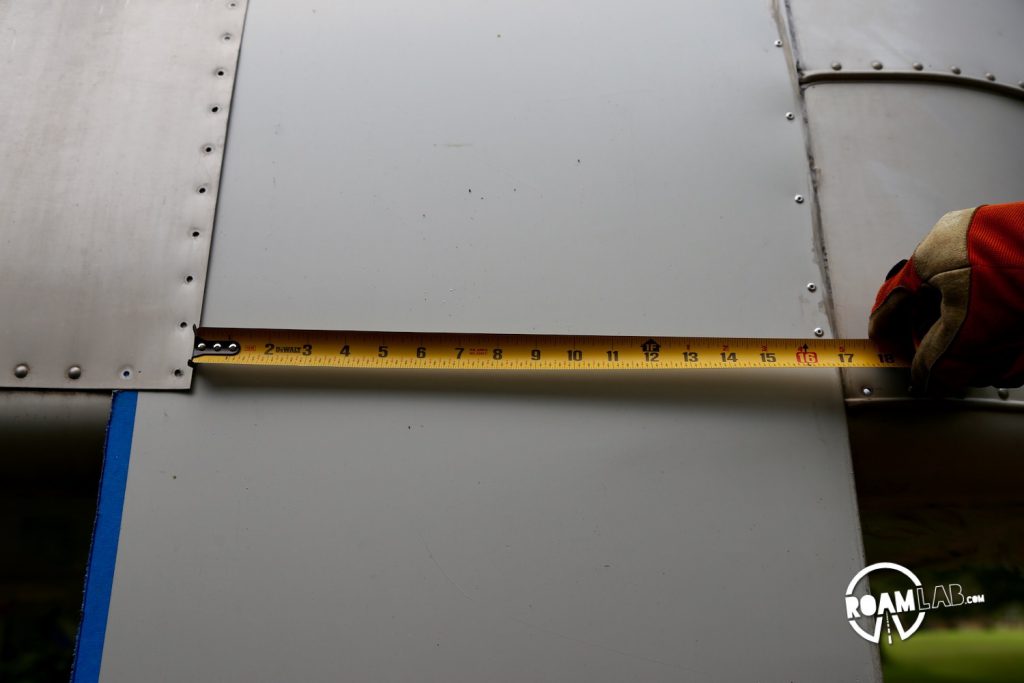
A standard queen size bed is 60 inches wide by 80 inches long. The current cabover bed measures 88 inches long by 52 inches wide. To construct a queen-sized bed running north to south, we have to add 28 inches. Ideally, we add those 28 inches to the camper interior. Unfortunately, that would mean covering up portions of the windows, which we don’t want to do. Fortunately, we have space for ten of those inches to be built into the body of the camper. The remaining 18 inches, however, will be added to the cabover by extending the nose of the rig.

Building The Truck Camper Bed Base
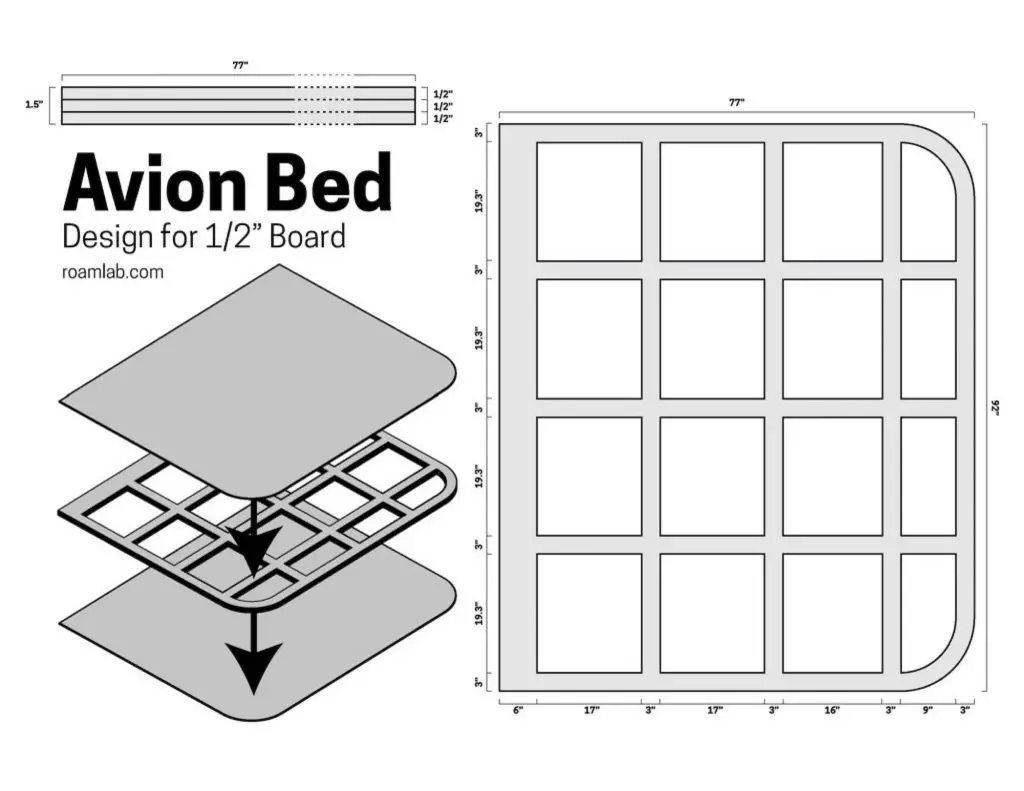
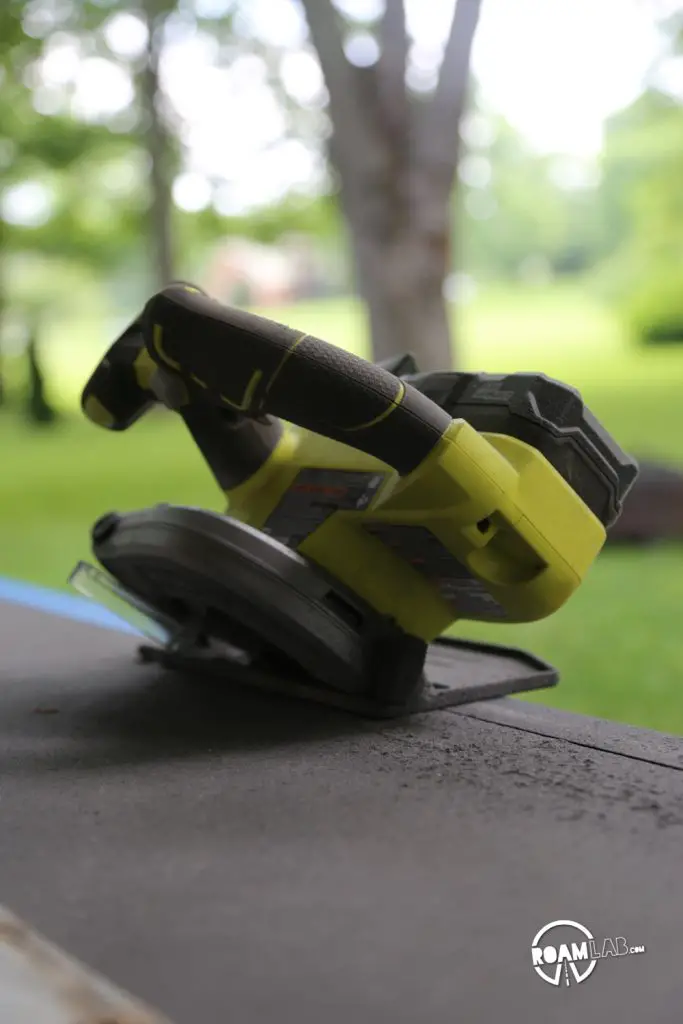
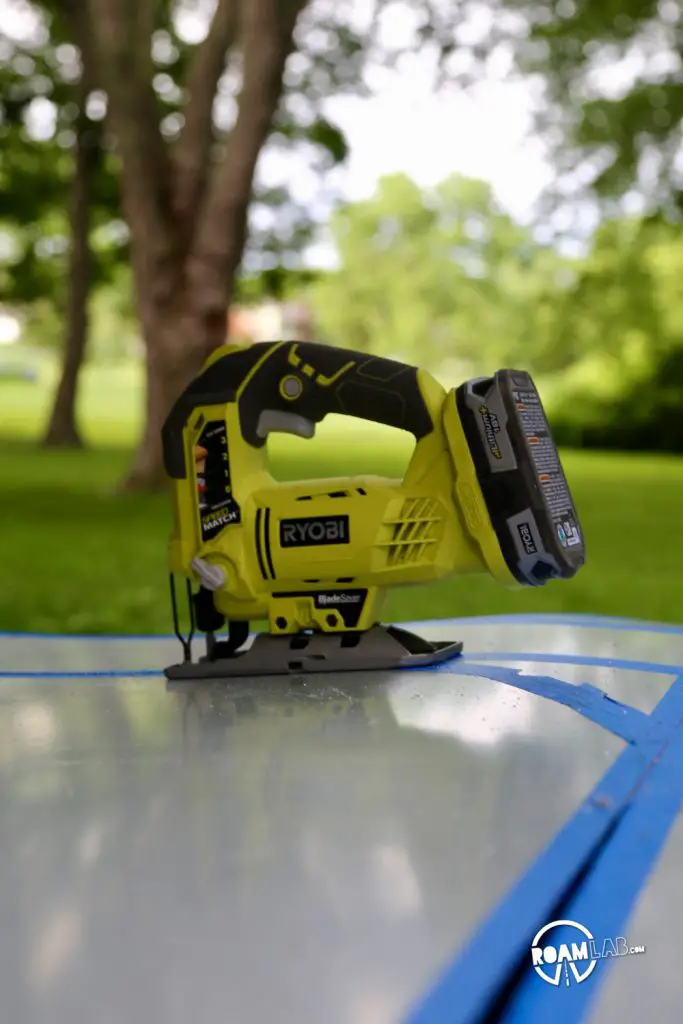
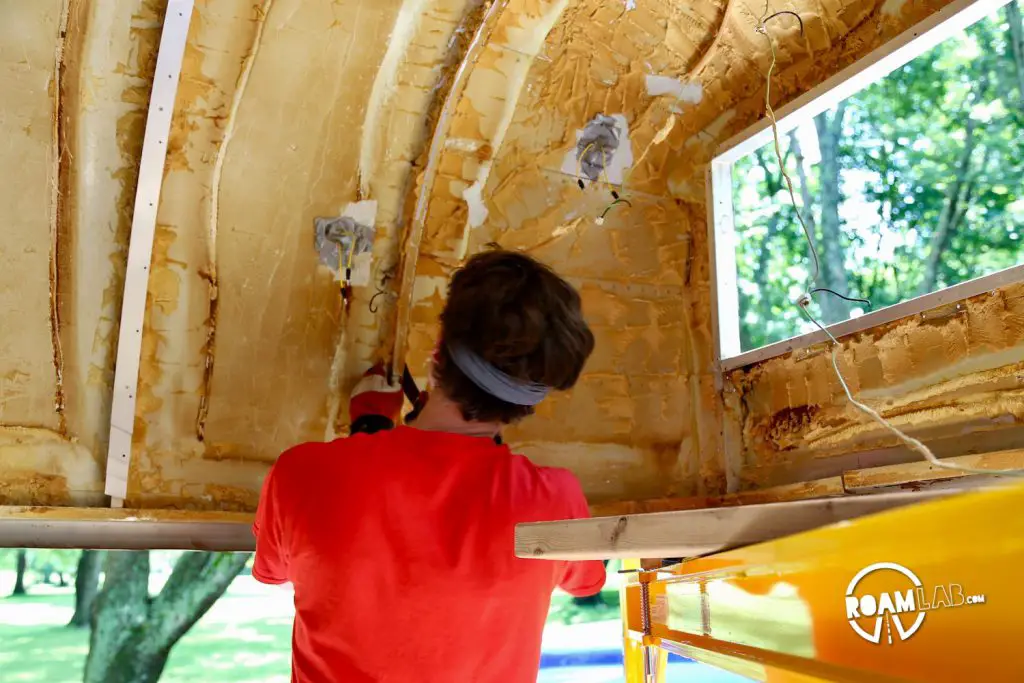
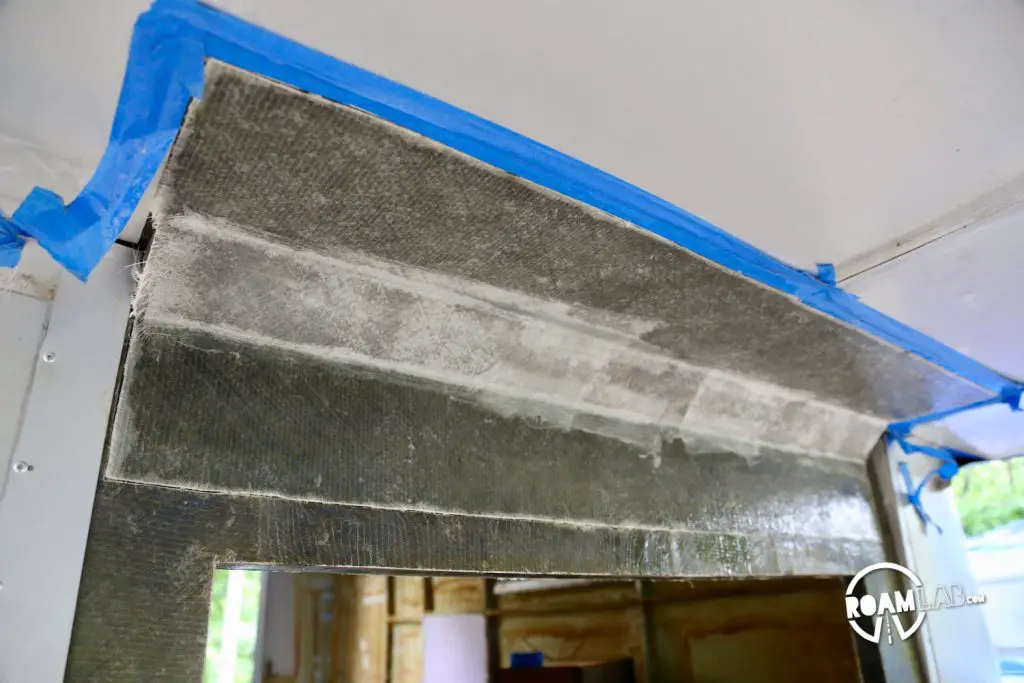
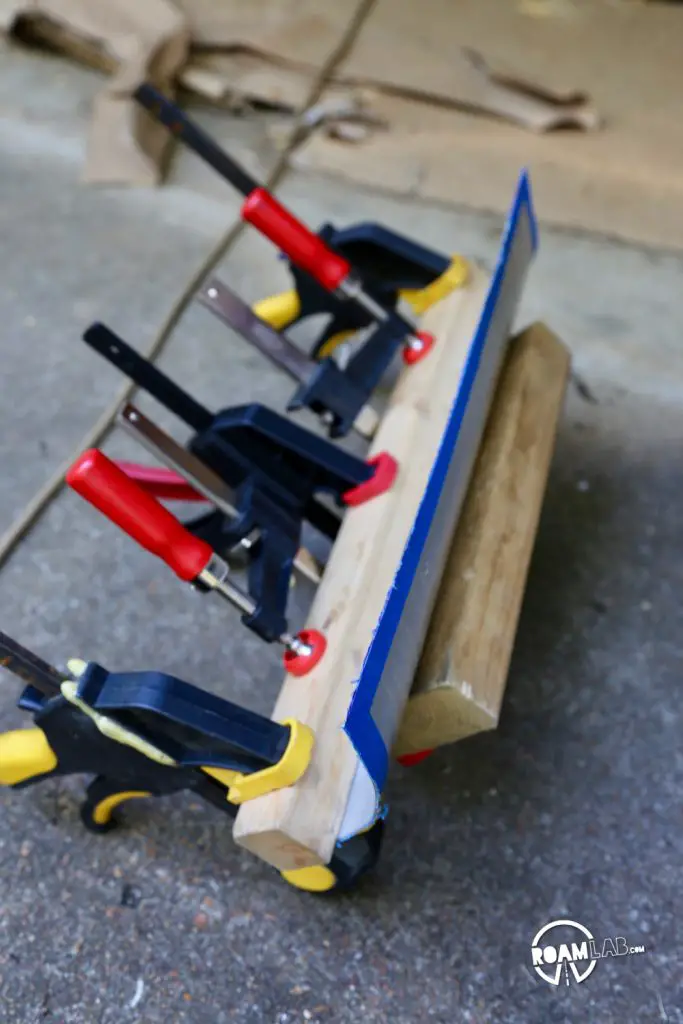
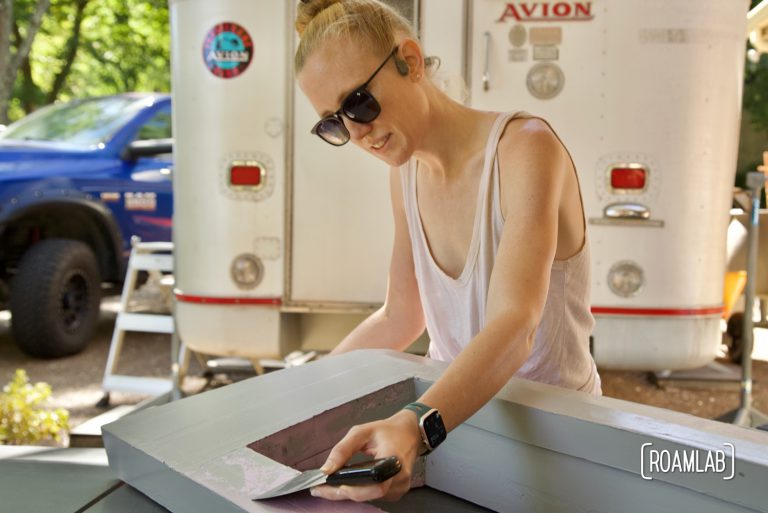
Before even removing the original pieces, I begin building out the replacement bed base. This is the floor section of the cabover that will sit directly above the truck cab and supports the mattress. My approach and materials mirror my work on the wings and the camper floor. Sandwiching the fiberglass and foam takes three and a half days of measuring twice, cutting once, and lots and lots of glue.
Finishing the Bed
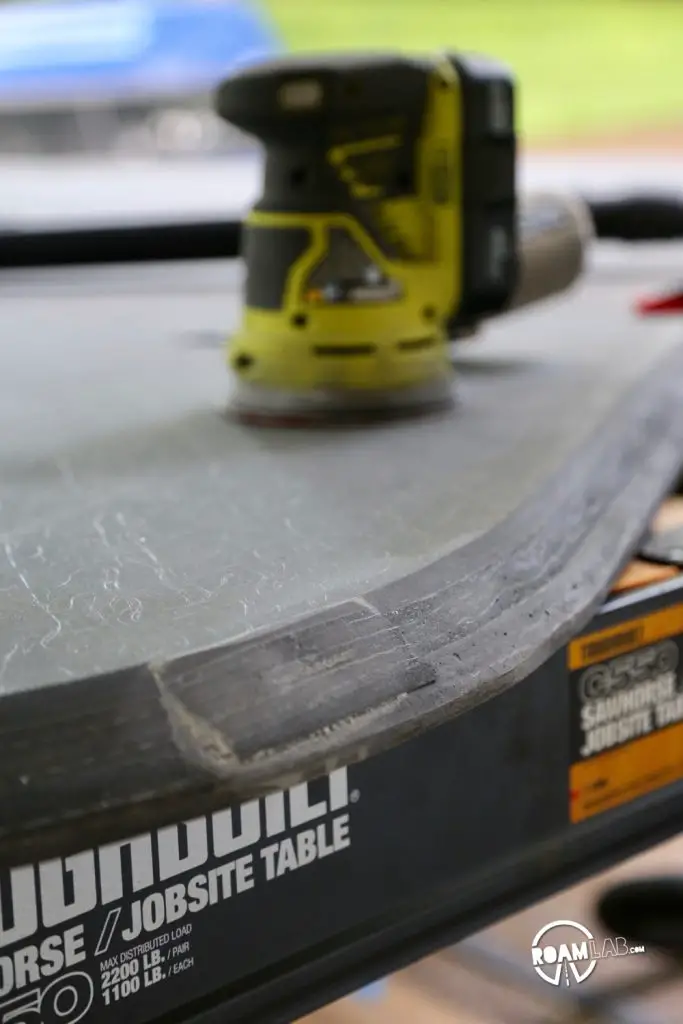
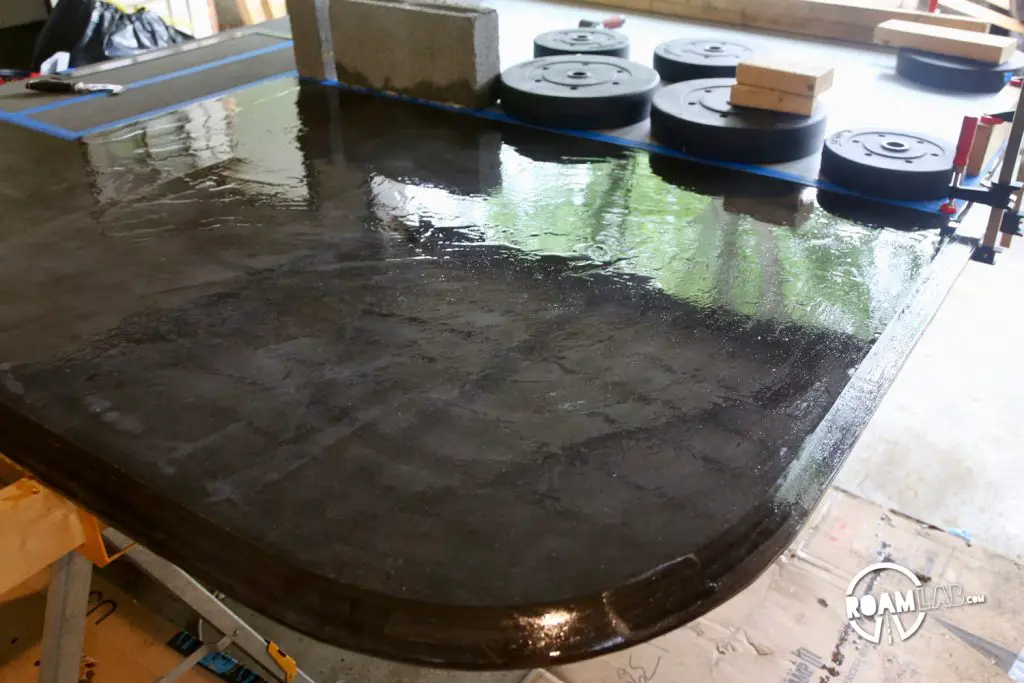
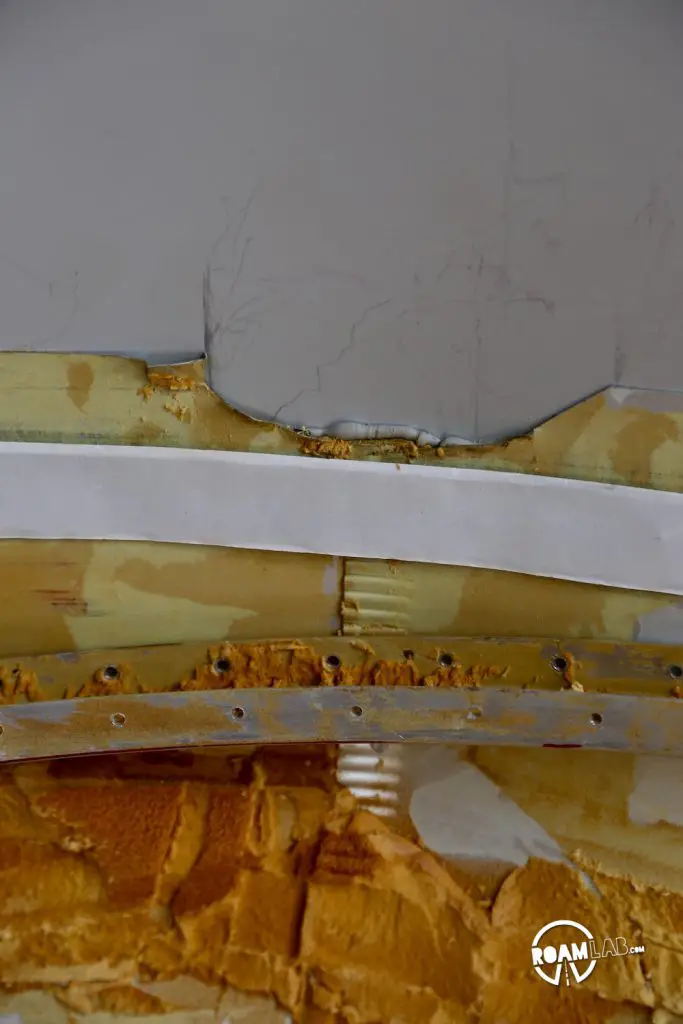
The original bed base is made of plywood and foam with a layer of finish to protect the wood from rot. There is a layer of aluminum screwed in place below the bed base as part of the camper’s aluminum exterior. We similarly seal our fiberglass base with epoxy but take the extra step to use a thickened epoxy to glue the aluminum to the base.
For the interior side, we finish the base with fiberglass cloth. We overlooked this step in our floor and wings, which I regret.1 The fiberglass cloth makes the surface more resilient against bumps and dings. We finish with a layer of white paint.

Break Down
Despite already effectively gutting the camper long ago, there are still some details left to our breakdown. One point of contention is where to place the extension. In one corner: advocating cutting a new seam for the extension right where the cabover first splits from the main body of the camper is “The Clipper Cowboy.” In the other corner: advocated of wholesomeness and minimalist intervention, pushing to reuse the preexisting seam at the very tip of the camper is yours truly—my apologies to the many random people we have dragged into this debate.
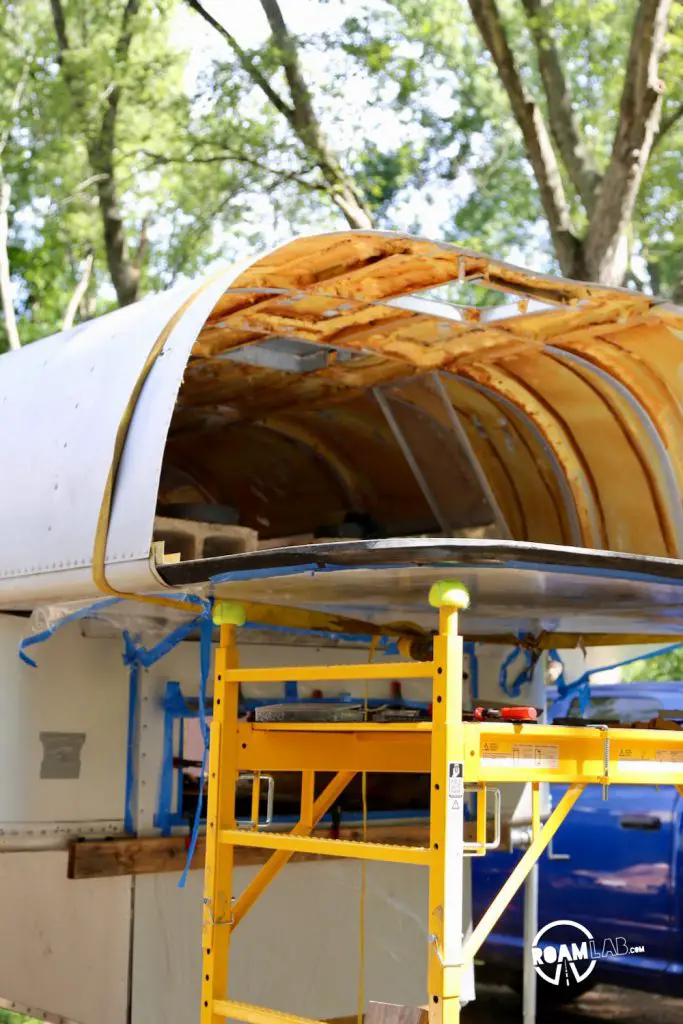
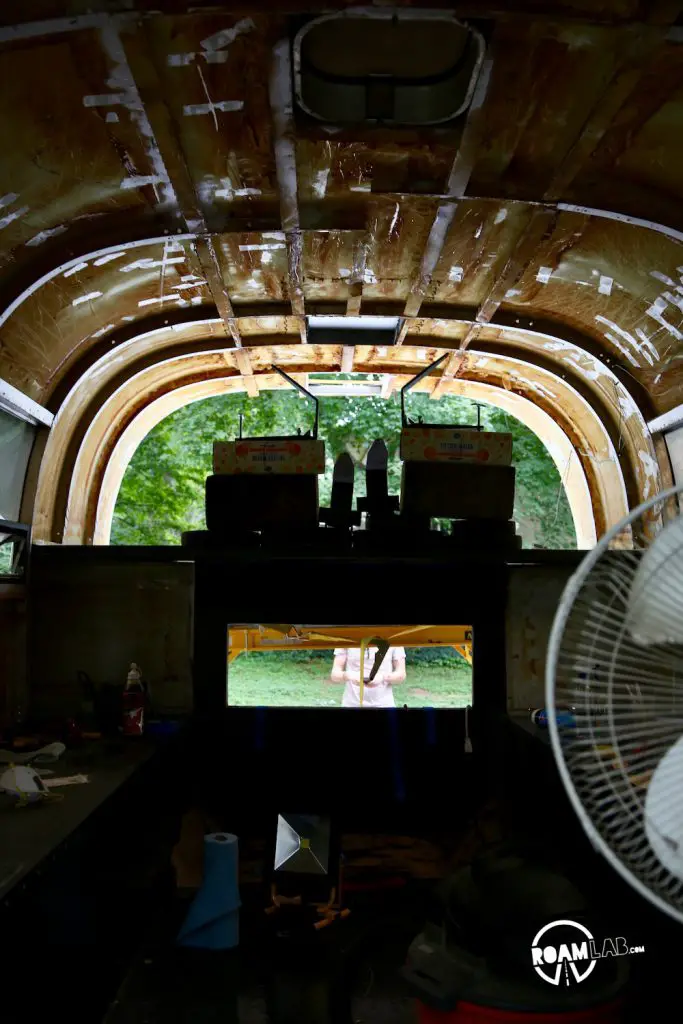
In the end, I prevail and we remove the rivets attaching the nose of the cabover to the rest of the camper along with the old, rotten wood of the original cabover base and bulwark.
All Together Now
Installing the Cabover Base
If The Base Fits…
Sometimes, it isn’t desirable to be flexible. Or moreover, it’s essential to be aware of when things are flexing. It isn’t until I already reshape the mounting point on the bulwark for the new cabover base that I discover that the adjustments I have just concluded are based on a warped sense of space.
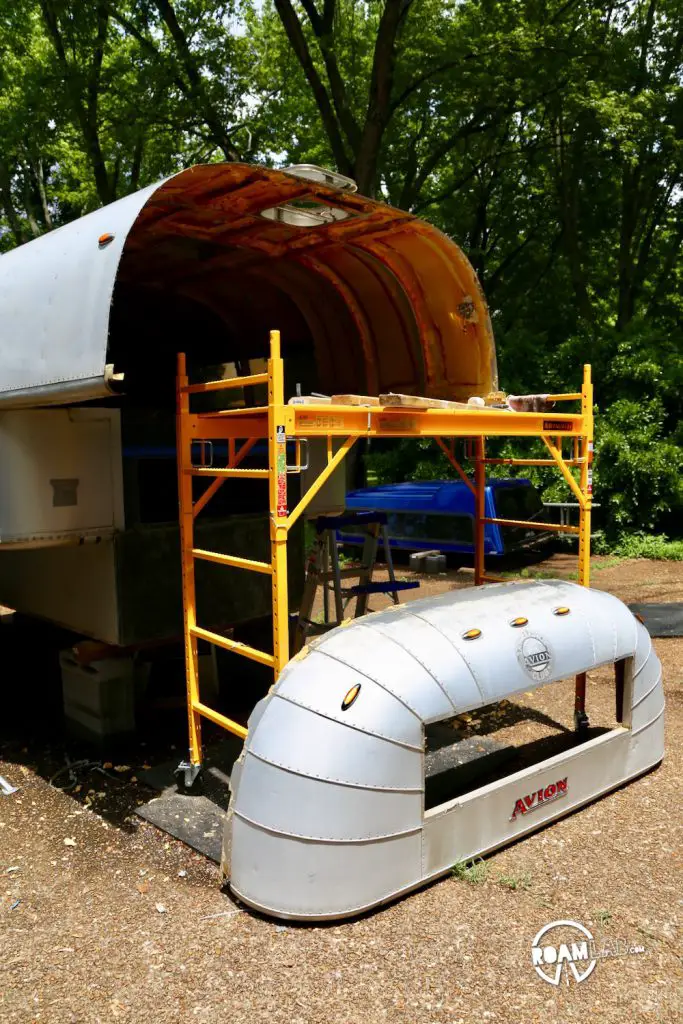
To properly align the camper body with the new cabover base, we use a scaffold to support the bed section. The camper is lifted by jacks to match the height of the platform. While focusing on reaching the desired height and pitch, I overlook that the jacks are applying unnatural pressure on the aluminum portion of the body, squeezing the side sections.
Identifying what appears to be an overly severe shaping on the bulwark, I reform the edges of the cabover base and a portion of the bulwark meant to connection bulwark to the cabover. In retrospect, the building up and then shaving down of this section was thoroughly avoidable if I had noticed the warping. Yet, in the end, I believe this results in a firmer base.
There We Go!
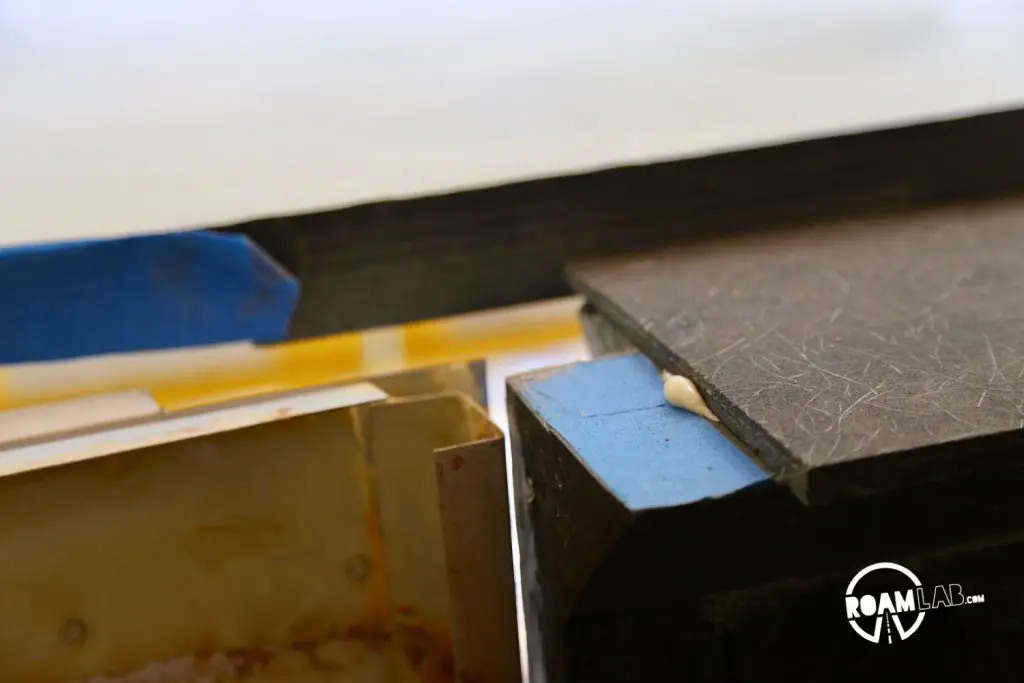
Finally, after many a test and adjustment (adding an extra two days to our build), the cabover base slides into place with the bulwark. At least, the fit is close enough that I empty a bottle of glue into the gap and pile a bunch of cinderblocks on the base where it meets with the bulwark to press the pieces together as the glue cures. If this bond ever fails, it will not be for lack of adhesive.
After allowing a full 24-hours for the adhesive to cure, we move on to the fiberglass mat portion of the show. Learning from my earlier trials applying the mat to the bulwark, I roll three layers of epoxy on the bare fiberglass-foam composite where it joins the bulwark and cabover base. I allow the epoxy to get tacky between each application. This process enables the epoxy to permeate the composite for a firm hold. Better yet, when the epoxy-hungry mat is applied, it adheres to the tacky epoxy as I roll additional layers of epoxy to completely wet down the fabric. While I do experience some minor struggles with gravity, the mat is far less inclined to peel away as I work it into place.
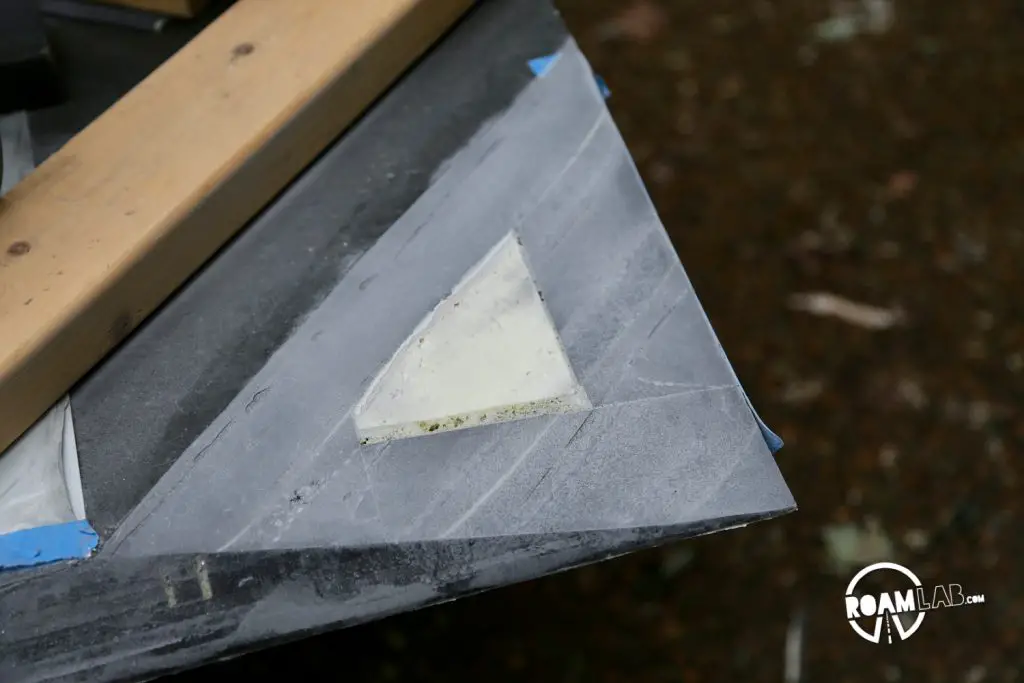
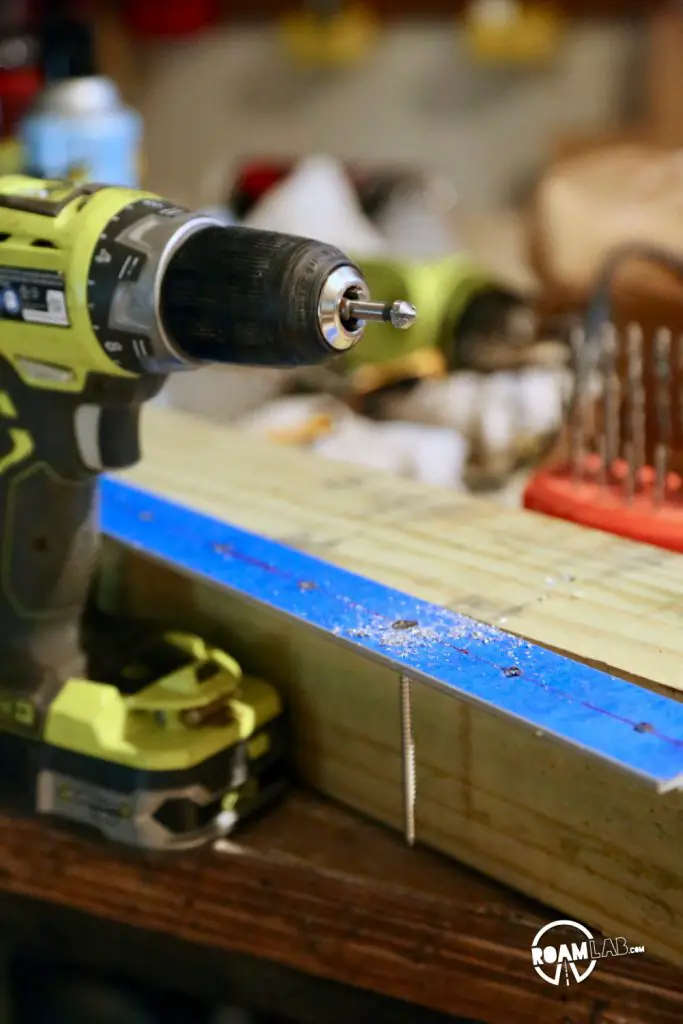
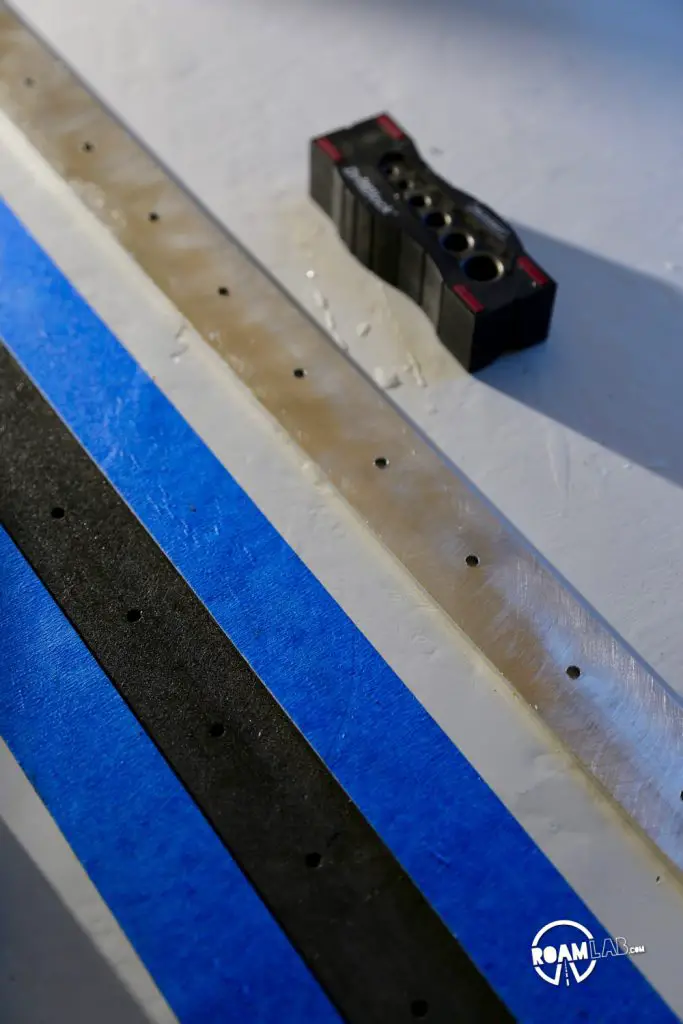
Call it precaution. Call it overkill. But we add one last piece to secure the cabover base to the bullwark. In this step, we have carved out a layer of fiberglass composite from the interior side of the base, running parallel to where it joins the bulwark. Here, we embed a bar of aluminum using epoxy and very long screws drilled through the base and into the bulwark.
Installing the Nose & Extension
A Little Side-trek Into Fixing up the Nose
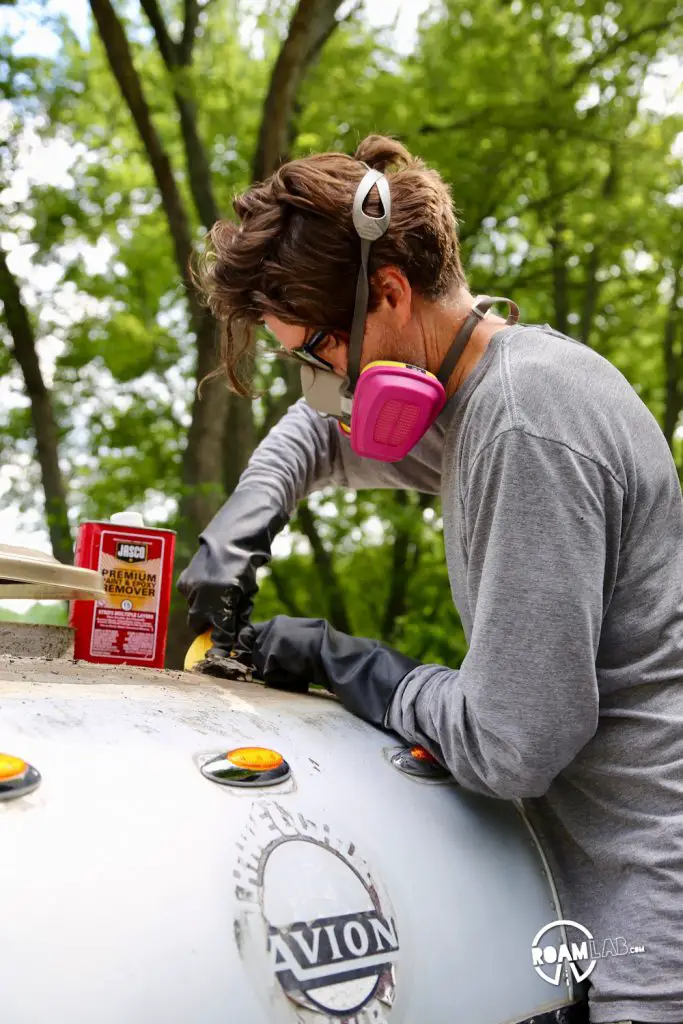
Clearance lights are a legal requirement for vehicles over a certain height. We are over that height. So, when we rushed onto the road last winter, we cut a few corners in the installation process of said lights. For instance, we didn’t patch up the gaping holes left by the previous clearance lights. Now, with the nose off of the camper, we take advantage of the easy access to patch over the last holes and securely reinstall the new lights.
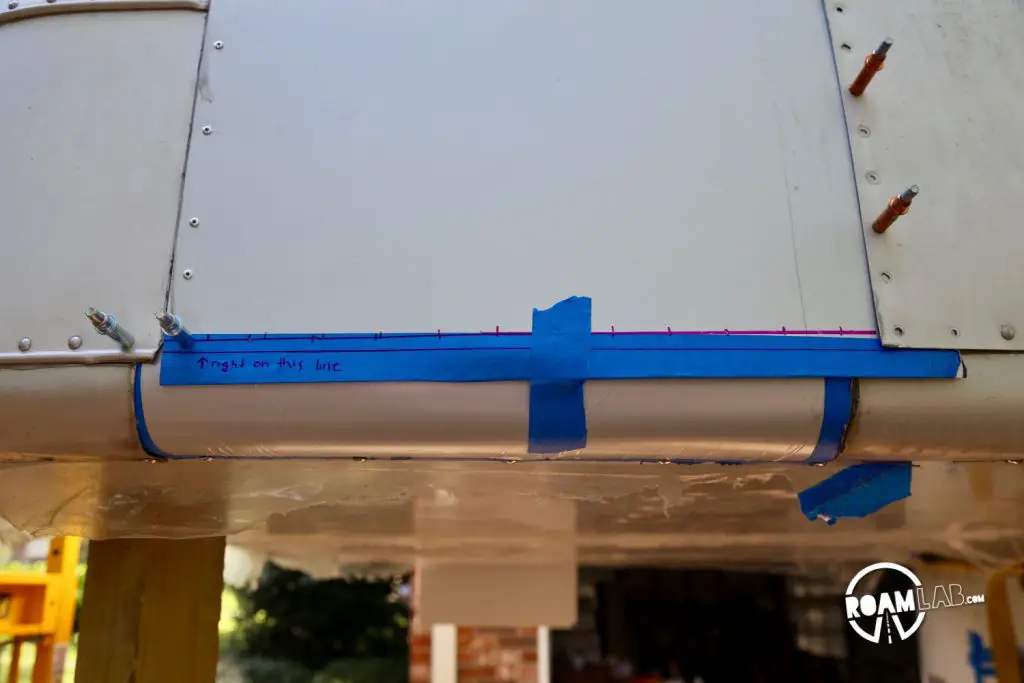
Attaching the Aluminum Roof Extension To The Nose
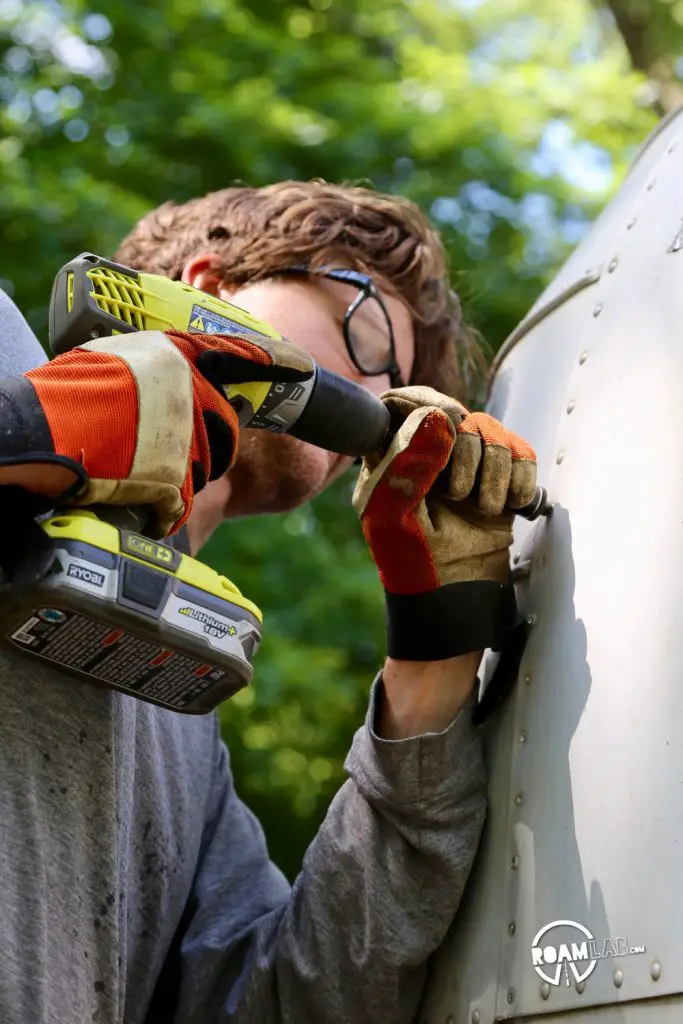
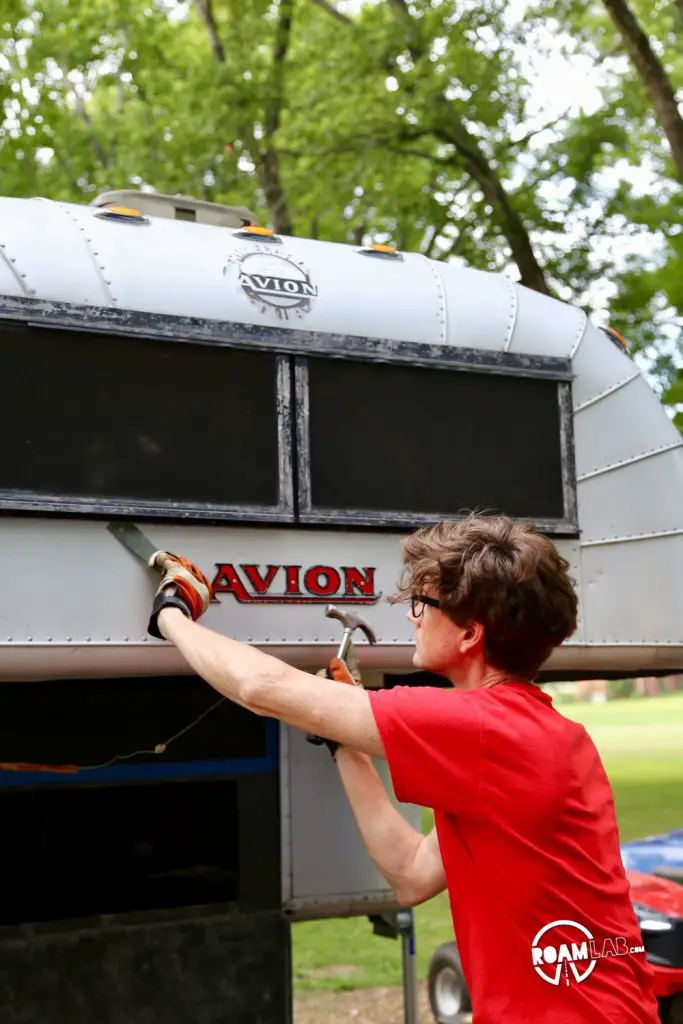
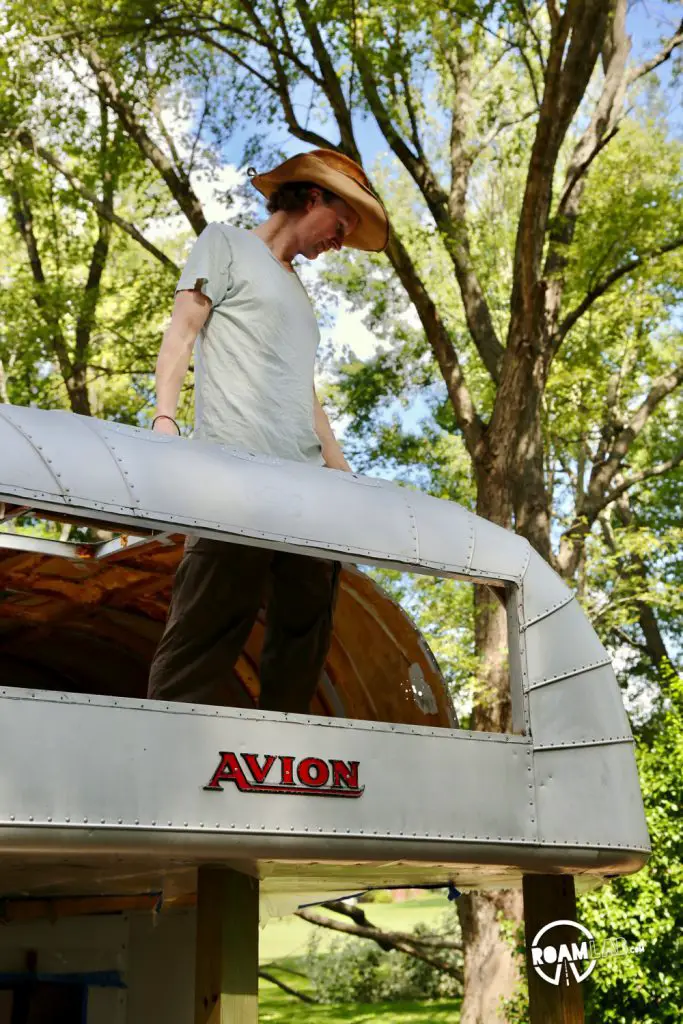
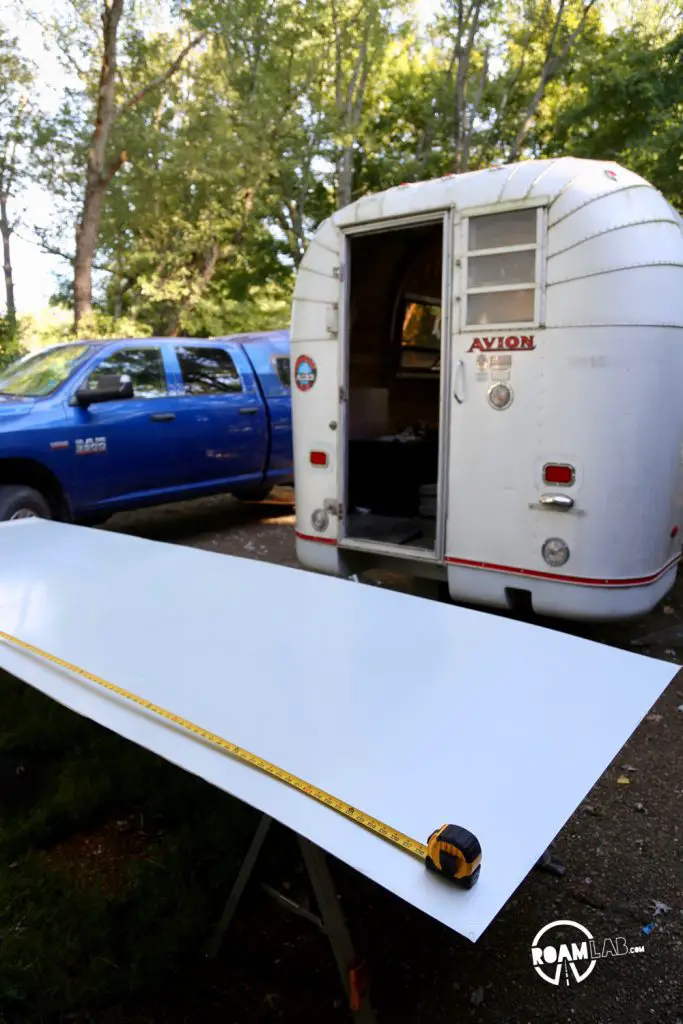
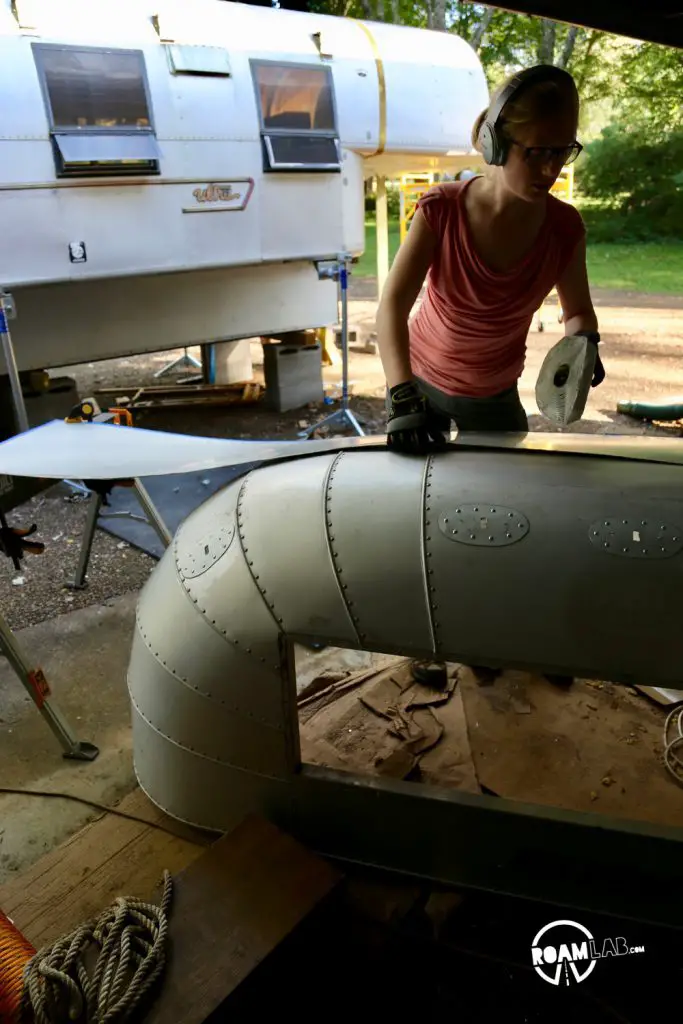
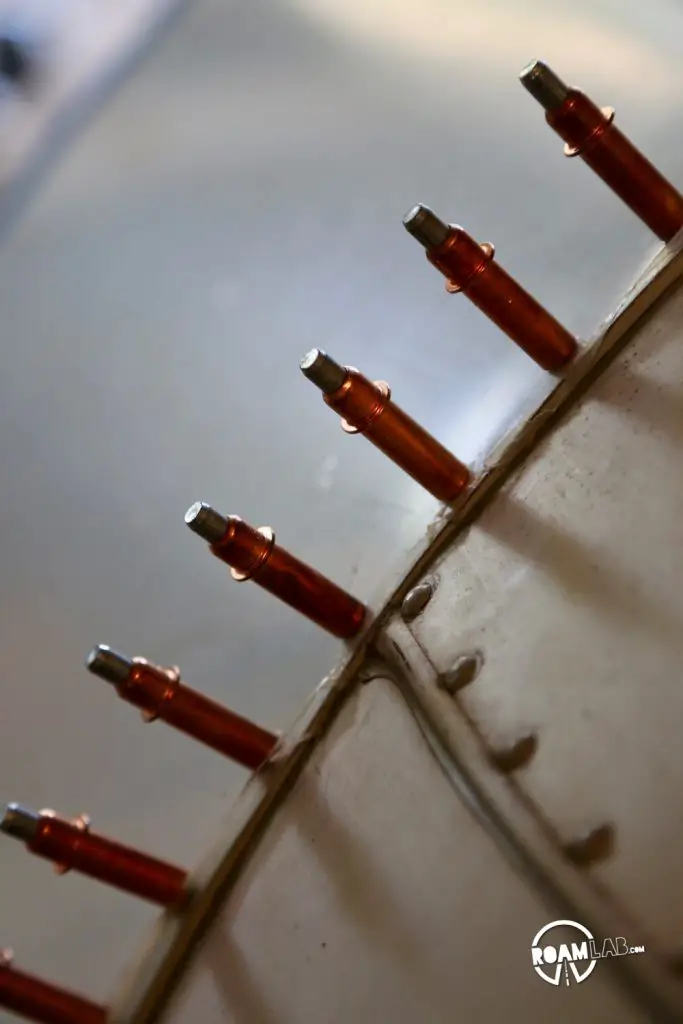
The aluminum roof extension is conceptually a simple step. I just cut a sheet of 94×19″-inch aluminum and rivet it in place. The challenge is fitting the aluminum sheet along the curve of the Avion. We want a snug fit from the original aluminum body and the new extension.
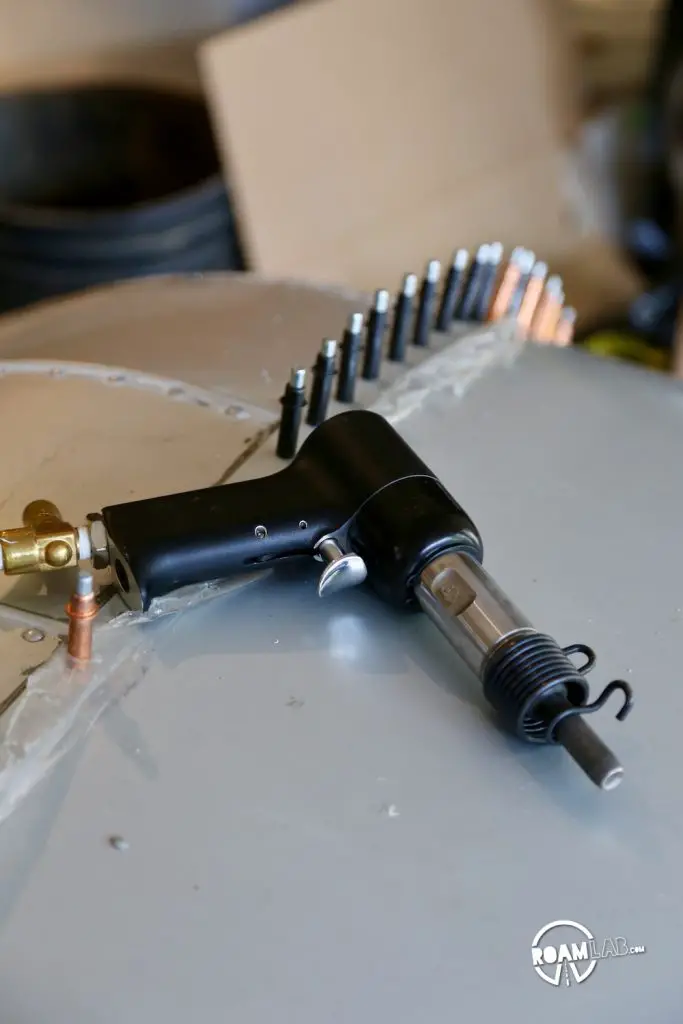
It is nice that the first step—riveting the extension to the nose—can be completed at ground level. While we have done some riveting in the past, the 97 rivets it takes to bind the extension to the nose is our first, extended plunge into buck riveting. Previously, I had hammered, and Cowboy bucked. This time around, we find be are better suited to opposite roles. No Rosie the Riveter for me. After acclimating through the first half of the rivets, we find our stride.
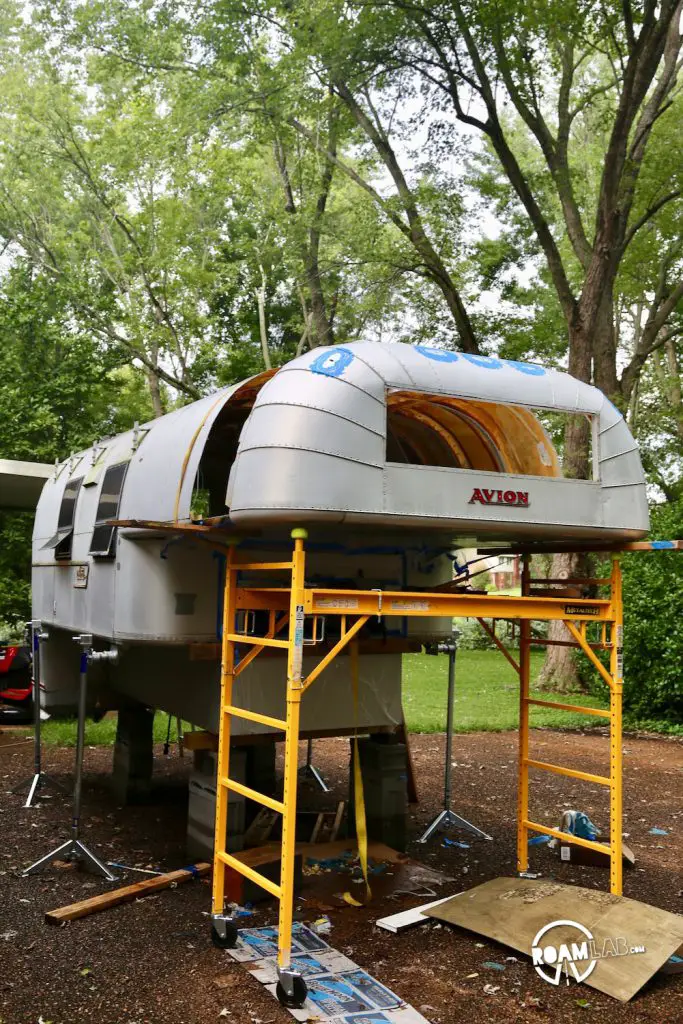
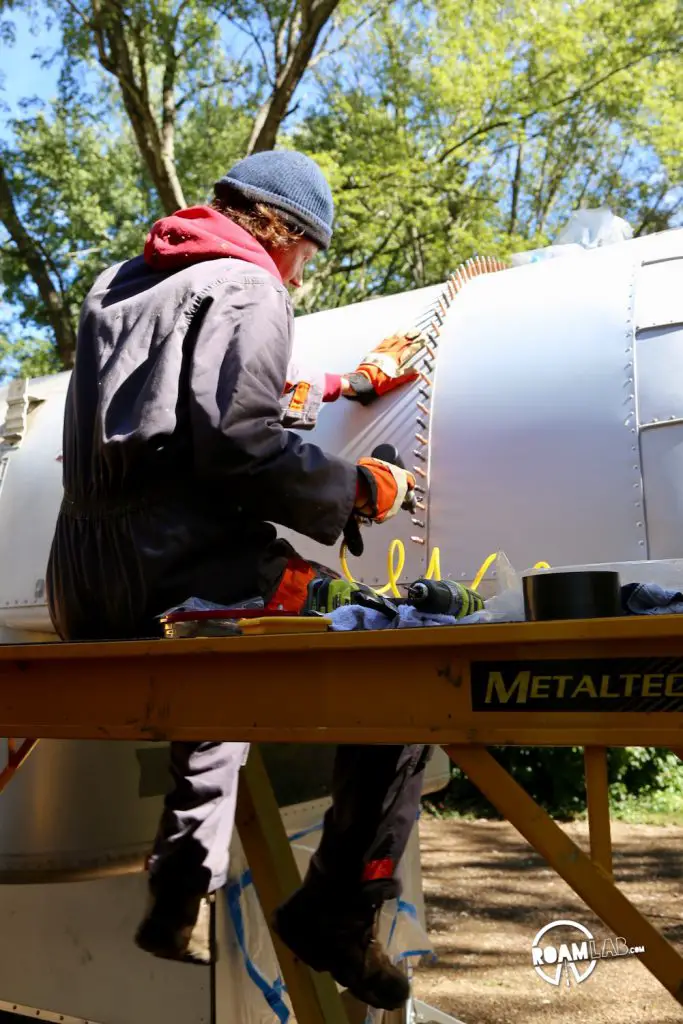
The Final Piece In Place
For our grand finally, we present an areal act. Watch as Cowboy sores over the cabover with his (mostly) flawless riveting, and I contort into all manner of shapes as I attempt to hold up a steady bucking bar from the cabover interior. Another 97 rivets later, we are ready for the road.

Conclusion
In the end, like so many build projects, this is a project dominated by preparation. Wherever we attempt to rush and cut corners, we pay for in time spent in fitting and adjustments. Even with the many redundancies that I have included in this build, I am planning to add further interior aluminum supports where the cabover base pushes into the interior.
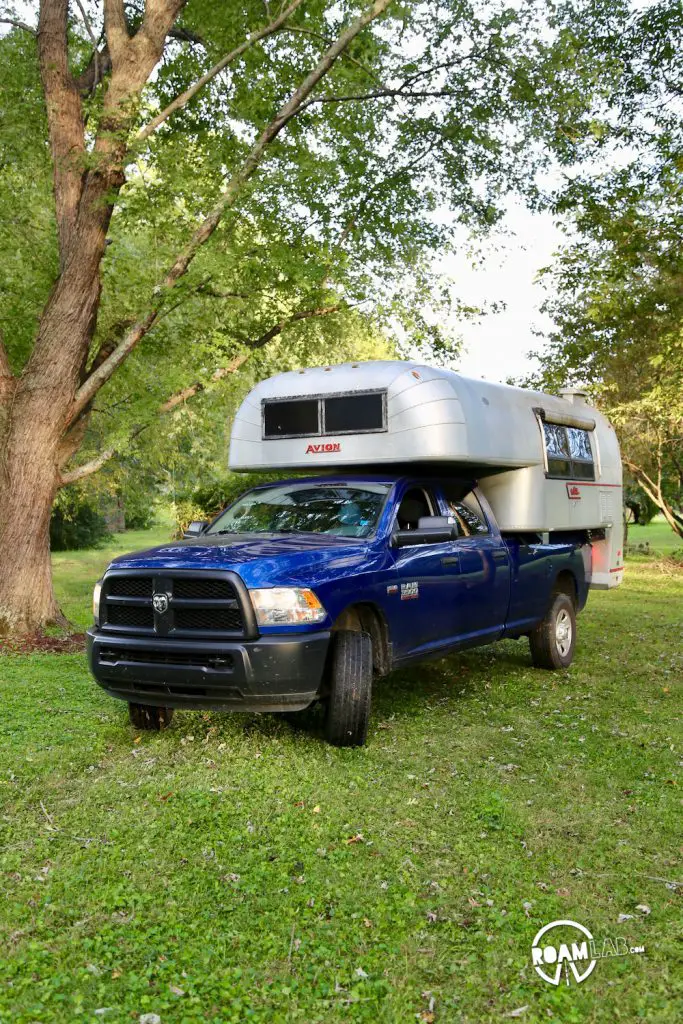
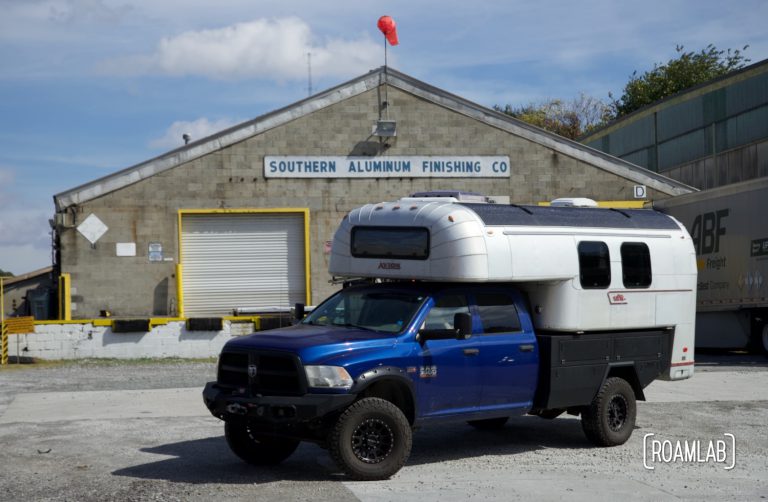
But here’s what counts: this last weekend, we drove the Avion to a campground and slept in the cabover for the first time since we bought it. Until this point, we have been too skeptical of its structural integrity to so much as sit on the cabover. Whatever challenges the future of this build may hold, we have completed the phase that gave me the least confidence. Everything else feels much more attainable.
Next up: leak hunting and a very special addition to the roof.
Resources
1 In fact, we later revisit the floor in our post Reinforcing the Truck Camper Floor.
2 TACO Marine Project Boat Part 7 – Replacing the Transom A step by step demonstration of replacing a structurally critical section of a boat with a Coosa and fiberglass.

Very nicely done!
Did you end up with a rib at both the front and rear edge of the new piece? Perhaps your camper, having a longer cabover than my ’65, had an extra rib. I’m left with a fairly long space between the ribs now, but I’m going to add a couple of horizontal pieces like those on the ceiling and I think once the interior panels are in it will be plenty strong enough.
I think you made the right choice in adding the new piece just behind the nose.
Did you use anodized aluminum? It looks like a good match to the original shell.
Yes. I made the second rib out of aluminum scrap. It’s not as solid as the original ribs but it definitely makes a difference!
Pretty impressive work! that is hard to do and requires a lot of diligence to get it done. Nice choice of materials as well.
Thanks Gary! It’s been a long time coming but really has been a game changer for us! I’m happy to report that it has been holding up well!
Very nice website thank you for sharing ! Would you be able to post interior pictures and sourcing for you fiber board?
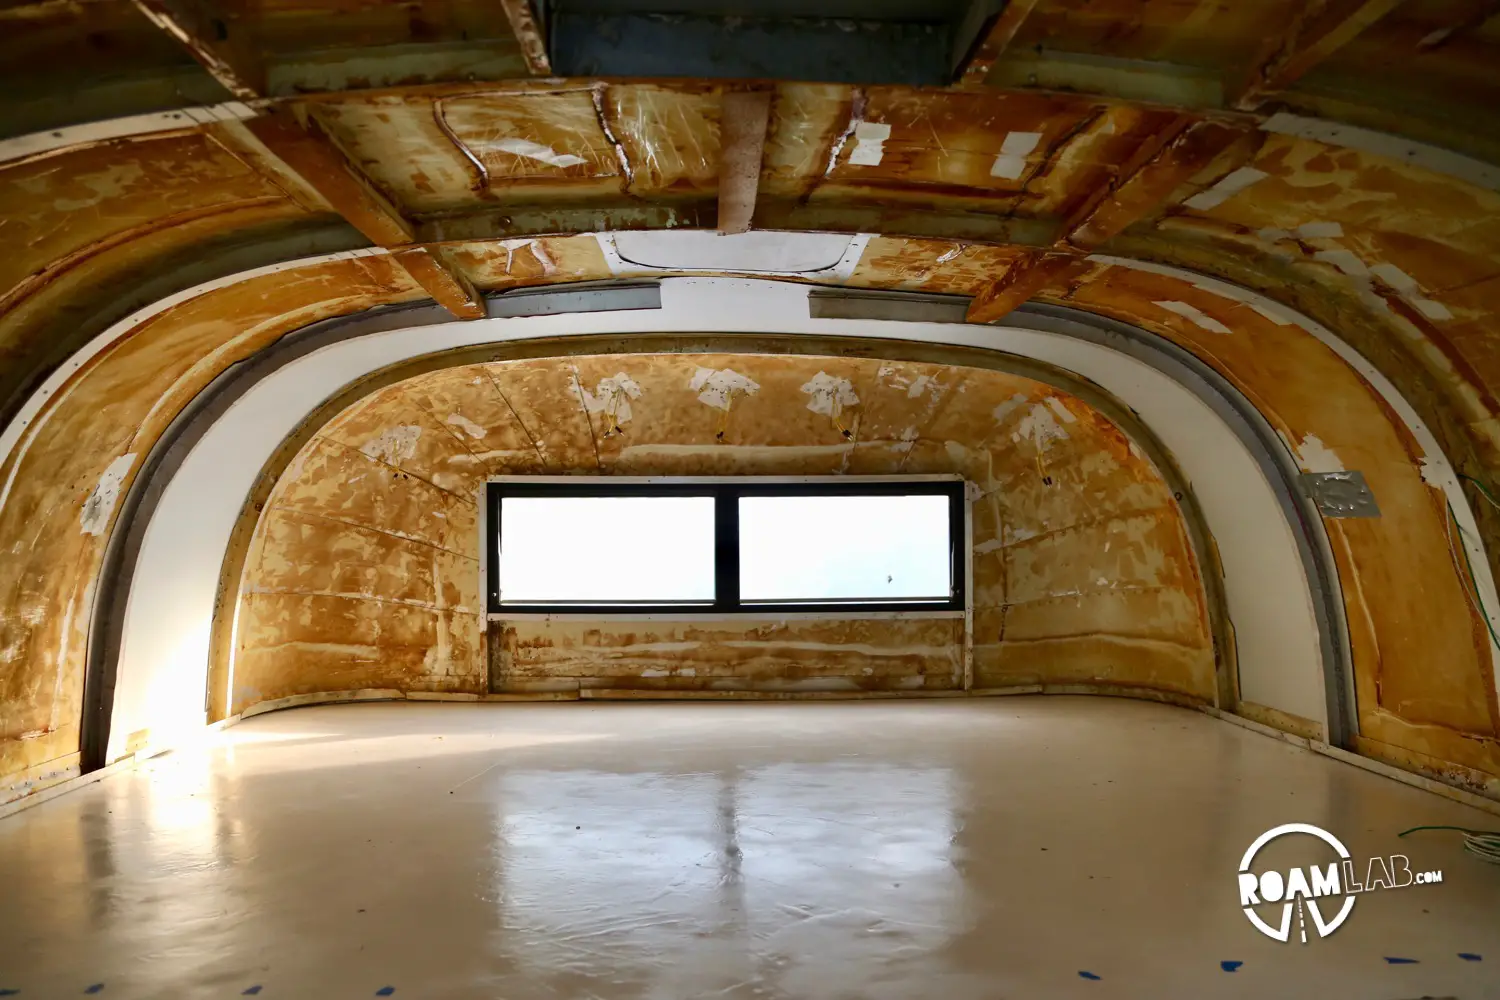
Hi Colin! The top picture on the post is from the inside. You can see the lighter band of aluminum which is the new addition. Is there something in particular you are looking for? As for the board, while there are a variety of fiberglass-foam composite boards on the market, we used Coosa.
*That* is beautiful! I thought I was the only one thinking about doing this. I’m glad to see you did it. Nice job, too. I work on airplanes by trade and you do nice work.
Thank you so much! Most of this is new to us so we are always grateful for feedback!
Howdy folks! Huge admirer of your work. Having done a couple custom rv builds, I know the patience, diligence, and good planning it takes to do it right.
Currently I am turning a ‘67 Avion H25 into an art studio for my lovely lady, and have a ‘63 C10 waiting in the wings for a complete custom restructuring.
I’m curious where you sourced the fiberglass sheet that replaced your plywood subfloor?
Thanks for the awesome blog, and any helpful info.
Johannes
Hi Johannes,
That’s so cool! I can’t wait to see what you do with you C10. We sourced our fiberglass from a local distributor, Advanced Plastics. They have many locations. Granted, there may be a different distributor more convenient for you.
Thanks for sharing all this. Do you think a SXS pulling a very tiny tear drop trailer could do the entire Rimrocker, Montrose to Moab and back? If you tell me how, I could include a picture of my set up.
Hi John! I think that depends on the pulling power of the SXS and the clearance of the teardrop. The road is rough with lots of bolders but our biggest challenges had to do with clearance and tight switchbacks (a problem you shouldn’t have) Also, we tackled the trail in early summer, and the water level was low. So if you’re planning to tackle it in the fall, you should be golden. But I’d be concerned if you wanted to cross in the spring.
Wow, impressive work. Thanks for the details as I may be in your path for the same reasons: standard queen mattress and where you don’t have to climb over each other to get into or out of bed. That joint where the base of the cabover meets the bulwark would seem to be the high stress area, under compression and tending to buckle from weight in the cabover. More ribs and maybe longerons in the roof would seem to help, and you added the ribs. https://en.wikipedia.org/wiki/Longeron Also the structural spray foam/glue will make almost a T-beam panel out of the roof. I’m thinking of aircraft construction. Avion would seem to be monocoque aircraft with just ribs and skin. Here’s a good discussion of monocoque vs semi-monocoque which does have longerons: https://iflyamerica.org/maintenance_airplane_fuselage.asp Adding some longerons to the cabover might be a good idea but also hard to do, maybe impractical. Interesting challenge.
… or reinforcing the skin around the bed/bulwark joint, which you did with the fiberglass and aluminum strip. I need to study your photos more.
I’ve been thinking about adding some more support under the 10-inch overhang where the bed extends into the main living space. Possibly some aluminum bars. But it could also be an excessive redundancy.
Hi Bruce,
Thank you very much. You are right about the joint. The stress where the cabover meets the bulwark was evident before we did any work on the camper ourselves. Part of the exterior 0.04″ thick aluminum sheet was beginning to tear along the joint. That could have partially been due to the extensive rot and wear in the bulwark and cabover. It was so bad that we didn’t use the cabover until after we replaced the bulwark and cabover wood. Since then, we have taken on some very rough trials and I have not yet observed any notable stress there. Of course, time will tell. It’s had me painfully aware of future potential failures at that point.
Your note on longerons is fascinating. While the original Avion interior doesn’t quite have formal longerons (as I understand them) they do have bent aluminum sheet spacers running fore to aft in a similar arrangement. As far as I can tell, they are meant to secure the inner and outer aluminum skins. They do give a little strength, but we actually reinforced them a couple of years ago because I like to walk around on the roof. The upside: I can walk on the roof with less risk of damaging it. The downside: they are highly effective thermal bridges. Either way, I suppose this unintentionally approaches the function of longerons?
Either way, I appreciate the references. You have given me quite a bit to think about.
Lexi
What is the source for the butyl tape you use in the shell lap joints?
Hi Bruce, we order our butyl tape on Amazon: https://amzn.to/3vzb7US
What Coosa board did you choose? Bluewater 26? 20? Or the Nautical line? No matter, it’s not cheap.
You chose to layer up 1/2″ panels x 3. Looking just at pricing of 48×96 inch panels the 1/2 is $350, 3/4 is $375 and 1.5 is $700 (Hamilton Marine just now). Add that up for a 1.5″ panel and its $1050/$750/$700 for 3/2/1 layers. So I am wondering about your decision process to inform mine.
With more layers glued together I would guess screws have more to grip into (the stacked up surface layers are more solid than the core?) and would likely be stronger overall but maybe two x 3/4 is also good and less expensive. The Bluewater 20 material is much lighter but I have not done a structural analysis to know what is “strong enough”.
Thanks…
Hi Bruce,
Yeah, the Coosa is pricy. We bought it years back so the prices have changed.
The three layers allow us to use mostly foam board in the middle layer to increase the R-value, decrease the weight, and cut back cost. In the case of the cabover section itself, we used 1/4″x1″x1/4″ to make the section lighter since most of the 1″ section is foam board.