Bowen Customs Truck Camper Bed Installation 2015 Ram 3500 Truck Mod
It’s been a long and snowy road to our custom truck bed installation, but it looks like we are finally here. Our 122-square-foot home on wheels has a lot of upsides, but storage isn’t one of them. Yet, a quick peek under our truck bed shows a vast amount of unused space between the exterior sheet metal and the inside of the wheel well where our camper sits. So we’ve been researching truck bed storage solutions for years.
We already have a good sense of what we want so our first instinct is to see what it takes to make one ourselves. However, we quickly realize we have neither the skills nor the tools to fabricate our ideal solution. Modifying an off-the-shelf truck bed is also an option but we can’t find one that has the low center of gravity low we want for carrying a truck camper.
Fortunately, at the August 2021 Overland Expo Mountain West, we meet Brent Bowen of Bowen Customs. Brent is eager to work with us and is not the least bit intimidated by the scope of this project. His team specializes in custom aluminum truck beds and seems to instinctively grasp the challenges and potential of this concept. Kudos to Brent for being willing and able to take on this project.
Granted, building something custom on that scale takes time, and it isn’t until early February that we roll into Denver, Colorado for the truck bed installation, just in time for one of Colorado’s legendary winter storms. After a few weather-related delays we finally drop off our 1970 Avion C11 truck camper and 2015 Ram 3500 at the Bowen workshop.
Of course, we aren’t the types to just abandon our beloved adventuremobile. So, while the truck and camper get some upgrades, we hang around to document the process, run errands, and pitch in ourselves.

Removing the Truck Bed
Before we can install the new truck bed, the old one has to go. I’ve never seen our truck without the bed, and watching the bed slowly rise up on the hydraulic lift is awesome. After unbolting the truck bed from the frame, the truck is driven into the lift. The bed is braced by the lift arms and strapped on for extra security. Then, with occasional checks to make sure nothing gets damaged, the lift slowly separates the bed from the frame.


Clearance Issues
But we have a little hitch. Turns out that our truck is a little larger than the standard frame. The lift can’t clear the bed above the truck tires. (Probably our recent tire upgrade from 33″ to 35″ tires.) That’s when I pipe up with a suggestion: “what if we air down the wheels?” I have never seen (and hope never to see again) the tires so low. But as a testament to our new BF Goodrich KO2 tires and Method wheels, the tires stayed on the rims as we slowly drive the truck forward and leave the bed suspended in the air.


A not-so-fun aside: We have been plagued with a leaky vent line. With the bed off, we finally see what happened: the line is completely severed from the tank. Evidence of rodents nibbling around the point of detachment gives us a clue of who may be to blame. A reminder of the unwelcome guest we hosted back before we even had the Avion truck camper.

Assembling the Truck Bed
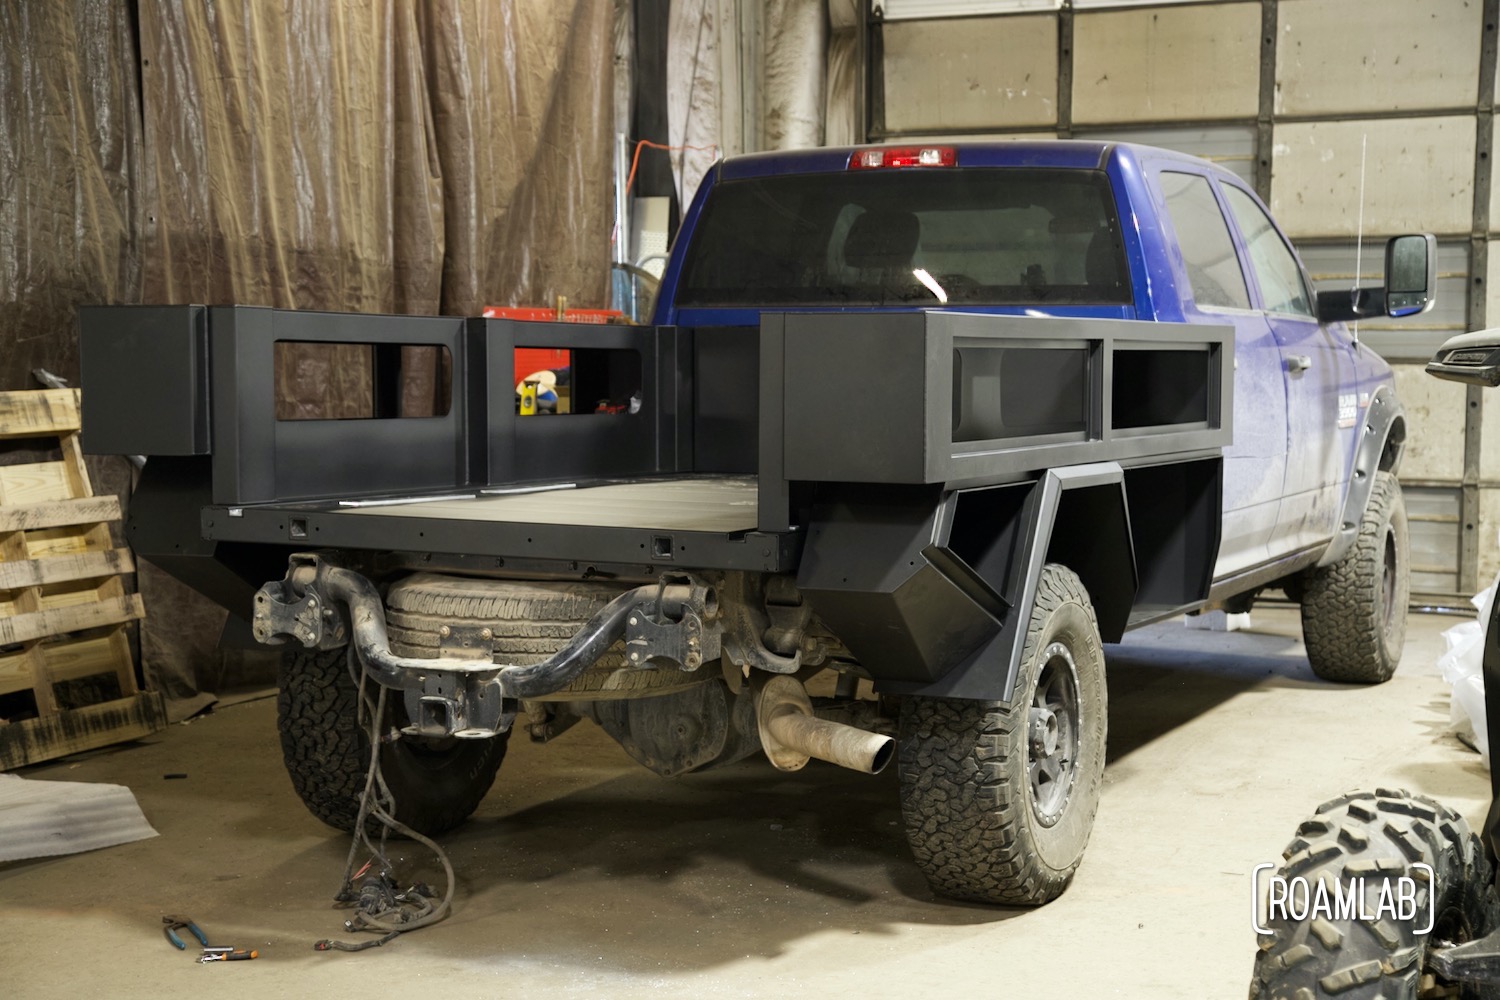
With the factory bed off, it’s time for our new truck bed installation. Unlike some beds that are completely welded together, Bowen’s modular bolt-together design allows the bed to be assembled on the truck frame. It’s remarkable to see how each component of the new bed helps reinforce the structure of the whole. First comes the truck bed deck, which bolts onto the truck frame. Then the upper row of storage boxes bolted to each side. I continue to marvel at the elegant welds along the edges of these boxes.

Lower Storage
Next come the lower boxes and wheel fender. I think these are a true testament to the sleek style that we’ve seen in other Bowen builds. It certainly stands out in these angular boxes. Rather than simple rectangular boxes, these truly optimize the space around the wheels for extra storage and a downright elegant design.


Detail Work
With the deck and boxes in place, it’s easy to forget that there’s still a lot left to consider this truck bed installation complete and roadworthy. But, along with brake light wiring, the deck and boxes need a few final touches.
Tie Downs
The Bowen design leaves two grooves down the deck and behind the storage boxes for an airline-style L-track. This modular rail can be used to secure any range of items stored in the bed, but it’s here with one primary purpose in mind: the truck camper tie downs. We’ll go into more detail on the mounting system later, but the track’s install is particularly notable because of the bolts that secure the track in place: they travel through the truck frame for extra support.
So, when we clip in a set of single stud fittings with a ring to hook the camper in place, we are clipping into the frame itself.


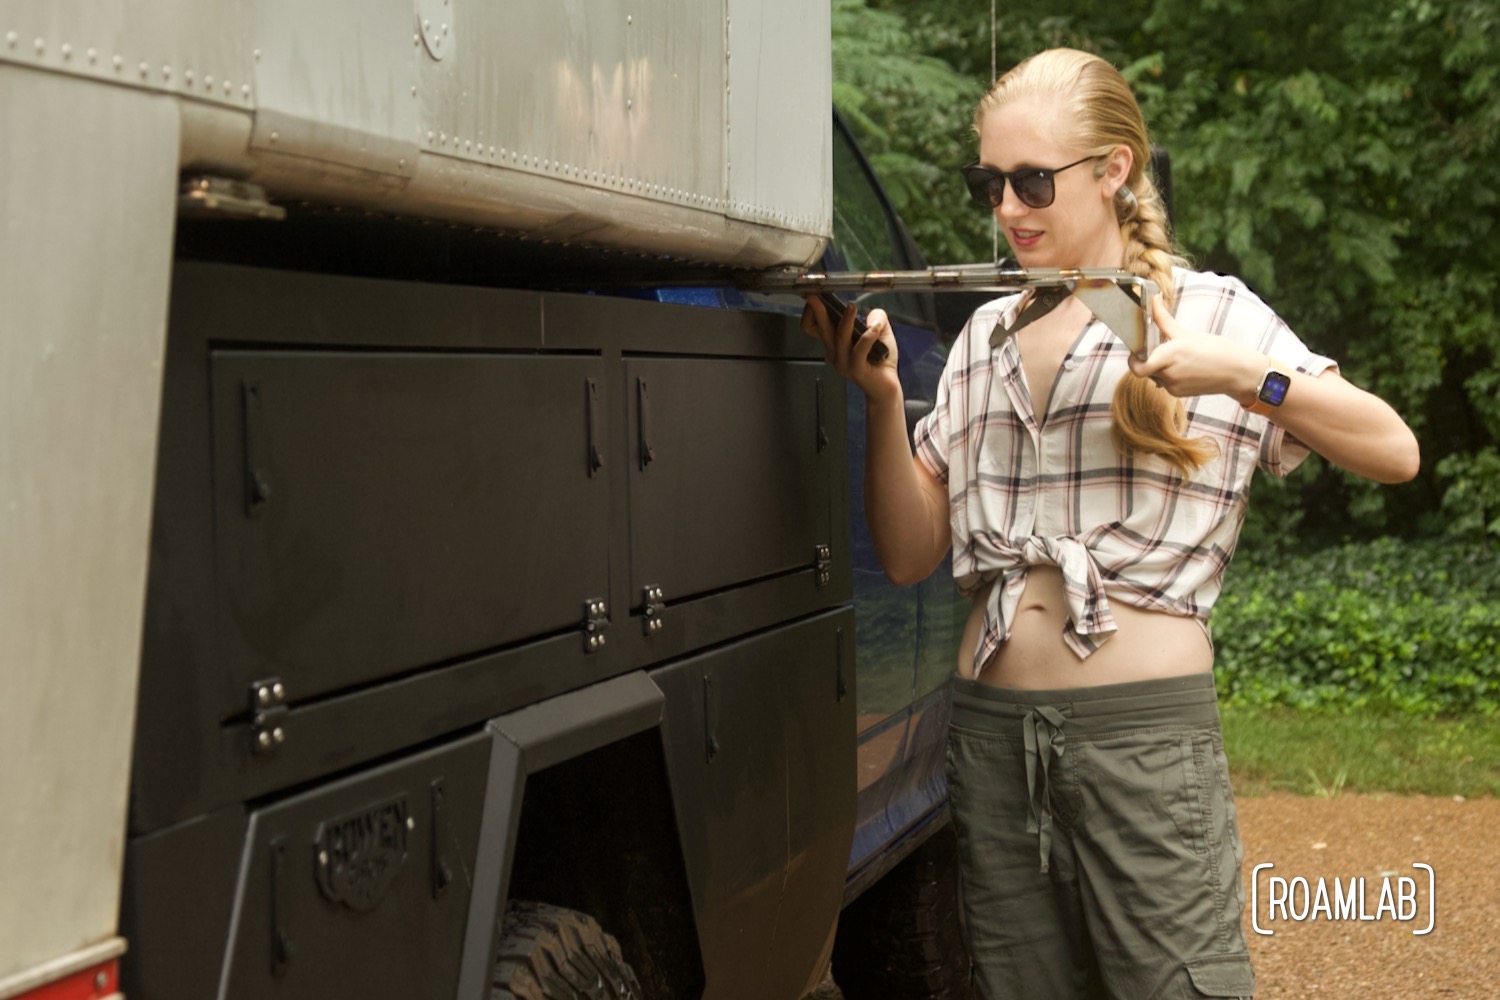
Storage Doors
Like much of the truck bed design, the storage doors and hinges are bolted to the boxes. The lower edge of each door is hinged for an easy line of sight. Better yet, cables keep the doors level so that we can set items on them while organizing the interior storage.
And now that the doors are installed we can not only secure them closed but we even have keys to lock them.

We Lend A Hand
In between taking pictures and video of the build, we get to lend a hand with the assembly process. We might not be able to weld, but we certainly can attach the weather stripping to the storage doors.

Making the Truck Bed Road Worthy
We can get a little distracted by the novel parts of the bed, namely, the storage boxes. But there are a few must-haves that we also have to consider such as the fuel fill and brake lights. Even for these, Bowen has novel solutions. The brake lights are composed of two recessed strip lights. The effect is fantastic. Meanwhile, the fuel fill is concealed in the lower driver-side box.


Tweaking the Wheels
This truck bed is the product of a near-constant back and forth for measurements, concerns, and general tweaks. As much as we attempt to anticipate any problems with the design (which usually came down to jack or mount points) there’s always bound to be some surprise. So, despite our many iterations and tests of the bed design, we are surprised to discover that the new (slightly wider) bed now is too wide for the rear wheels. Sure, nothing looked wrong when aligned straight with the bed, but the tires can rub against the bed when turned.
After some back and forth about our options, we agree to add 2-inch spacers to each rear wheel. Truthfully, we were worried about widening the stance of the truck. It can improve the stability of the rig but spacers increase the strain on the wheels and can look a little too showy on casual rigs. That said, the two inches are just the right amount and perfectly aligned the wheels with the truck bed and fenders.


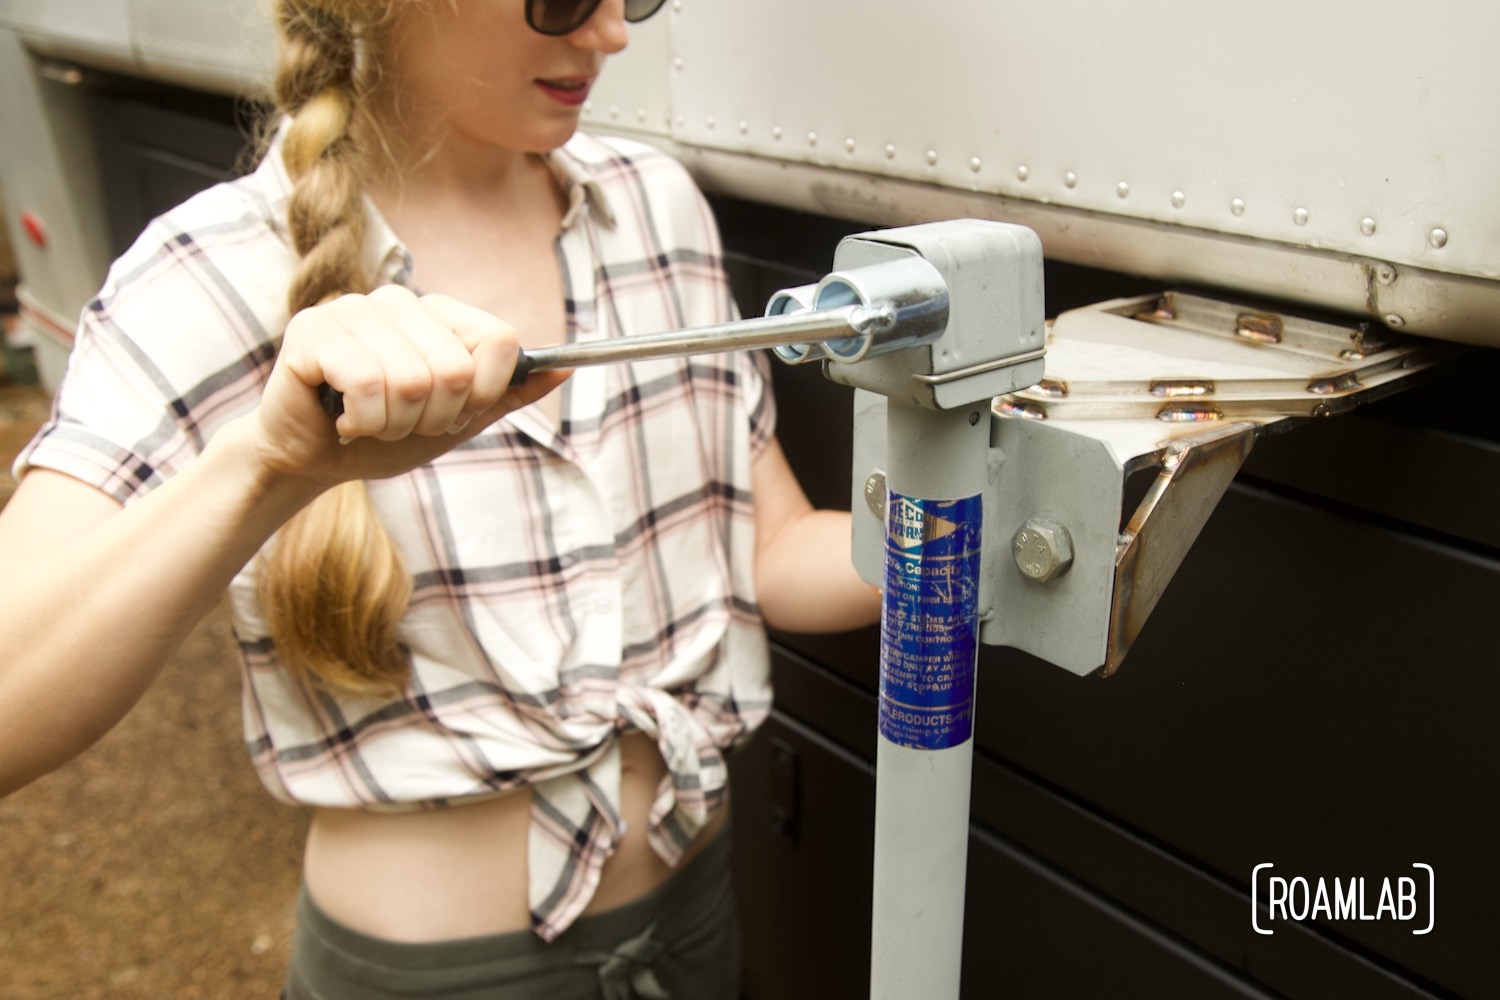
Installing the Tie-Down Jack Point
As we addressed in our article about Designing a Custom Truck Bed, our original jack points and tie-downs on our camper no longer work with the new truck bed design. Fortunately, we kill two birds with one stone with the design of custom tie-down jack points. These stainless steel mount points allow us to securely tie the camper to the truck bed and lift the camper. Best of all, the quick release mechanism allows us to remove the jack points when they aren’t in use so that they won’t get in the way of the truck bed storage doors. And, hey, the whole rig looks a lot slicker without the jack points sticking out.
Here’s a task that suits us well. Chris and I are both a lot more comfortable doing any modifications to the camper ourselves. So we pick up our ratchets and drill drivers and remove the old jack points and tie-downs and install our new combos.
When designing this hardware, we measured the original jack points so that we could reuse all the holes that were already drilled into the truck bed. In the end, we only drill eight new holes—to reinforce the inner tie-down extension. Eight holes may seem like a lot to some. But compared to the 36 holes that were already drilled for the original jack points and are now being reused, 8 isn’t much at all.


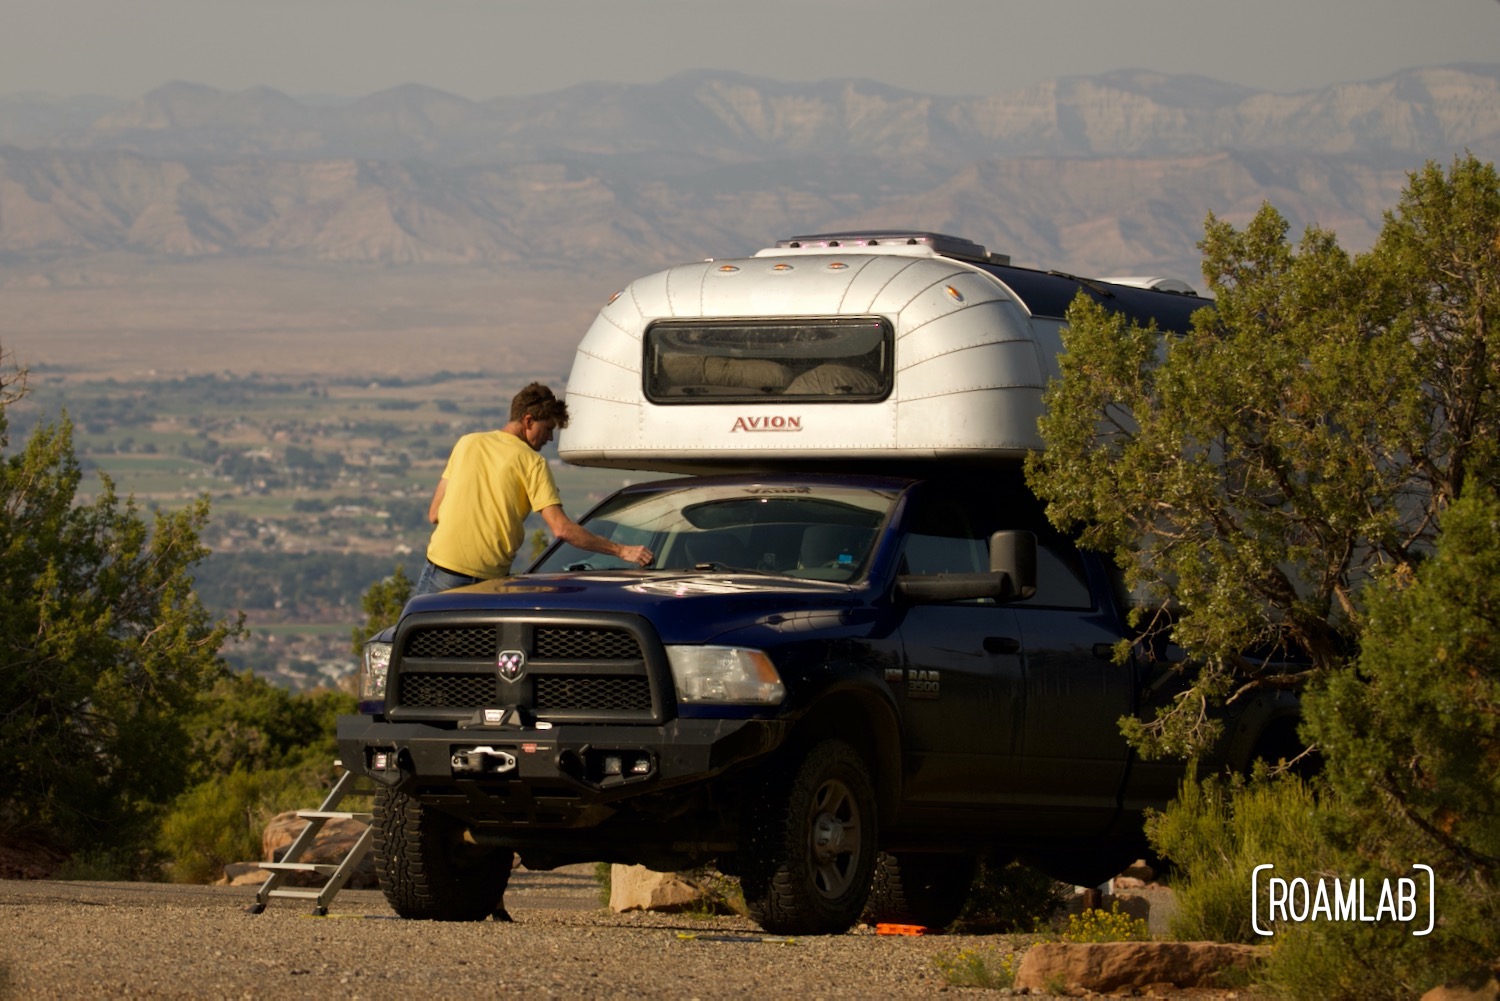
Truck Bed Installation Complete
With the bed mounted on the truck, we can consider this truck bed installation complete. Now it’s time to mount the camper and get on the road. Are you ready for a tour of the final result?


Mark
Can’t help but wonder what would something like this cost. What did you do with the old bed? How did the new bed compare with the old one weight-wise? The tire clearance was an issue with the insides of the tires, not that you have rear wheel steer I hope! And painting – are you planning on painting the bed to match the cab? This would have been a good time to make mods to the spare tire well to try and fit a larger tire in there if you are still dealing with that issue.
Sorry, I have lots of questions today. I really like this bed though. I have to go back and look to see if you made a change to the rear bumper with the new bed.
Ok, done (for now)
Lexi Goforth
Hi Mark,
You certainly do have a lot of questions. Let me see how well I can respond.
You’re right, custom truck beds certainly aren’t cheap. Then again, most aluminum truck beds that we found gave us a bit of sticker shock.
We tried selling the old truck bed but honestly couldn’t drum up much interest. Blue isn’t a color most people are looking for and it had a lot of wear and tear.
As for the wheel spacers, we’ll be reassessing that situation in the future. We have front-wheel drive but when we are on rough terrain we certainly use 4-wheel drive as well. So I’m not sure if we’ll want to mirror the rear spacers on the front wheels in the future.
Regarding paint, we decided not to paint the bed the same color as the truck because, stylistically, it is more similar to the angular matte black Warn Ascent front bumper than the smooth Ram body. Instead, we are planning to paint the lower portion of the truck cab with truck bed liner in the coming days. So that should help tie the bed and cab together.
We definitely did take this opportunity to get a good look at the spare tire storage. I admit, I still wonder if we should get creative and fit a tire with our new dimensions there. But even though we technically sized up the tires, they have a very similar circumference to the factory spare. So we are sticking with that for now, at least.
And yes, the rear bumper remains a bit of an open question for us. We’ve always had to remove the factory bumper because of the Avion’s overhang but we are looking at building a low-profile bumper that we could leave on even when the camper is mounted.
I hope that clarifies some of your questions!