Trimming a stock bumper to fit on a custom truck bed
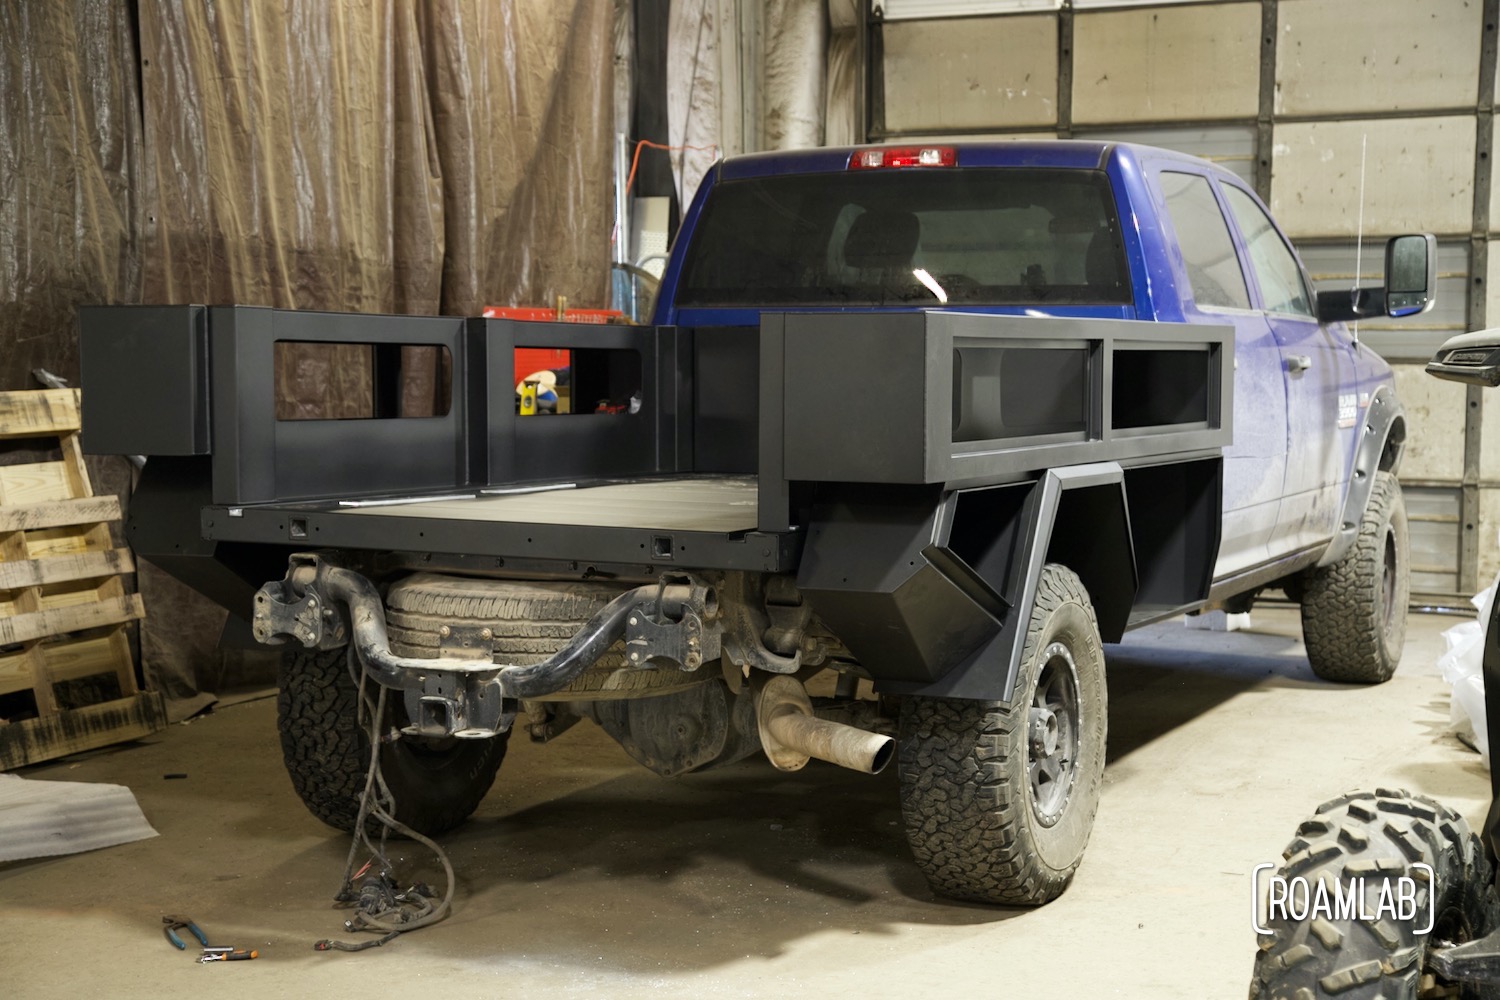
Custom truck beds are a trendy modification for truck camper owners. We just installed our Bowen Customs truck bed at the beginning of the year. But like many custom truck bed owners, we now have a new problem: our factory bumper. Factory truck bumpers are designed to fit the contours of the truck bed and protect the vehicle in case of a collision. Now that we have replaced our truck bed with a different model, we need to trim the original truck bumper to fit the new bed.
Those familiar with our truck and camper may wonder why we need a bumper at all. When our camper is mounted, it completely covers the end of the truck bed and doesn’t even leave enough space for a bumper. But we use our truck for more than just travel, and when we are running errands, we need a bumper to protect our truck bed and display our license plate. With a custom truck bed, it’s simpler to trim the bumper we already have than to try to source a new one that might be compatible with our unique bed.

Trimming the Bumper
Trimming a factory truck bumper to fit on a new truck bed can seem like a daunting task, but it is actually a relatively straightforward process. Above, you can see the bumper we trimmed to fit our new Bowen Customs truck bed. As you can see, it’s not a perfect fit, but it’s much better than before. We need a few tools and supplies to complete this project, but the majority of the work can be done in an afternoon.
What We Need:
- Ruler or straight edge
- Permanent marker
- Pneumatic cut-off tool
- Handheld grinder tool
- Gloves and eye protection
- Cleaning rags
- Paint for metal surfaces

A few notes of caution:
We are not professionals. We have done a lot of metal work but rarely something as thick and resistant as a bumper. So, we are entering this project with caution. It’s easier to remove metal than it is to replace, so we take conservative cuts and check the fit often.
Trimming a bumper sends off a lot of sparks and metal shards. Be safe, and be sure to wear gloves and eye protection. The last thing we want is to cause permanent damage over such a trivial project.
A truck bumper is meant to be sturdy, but it isn’t immobile. The length of it can flex depending on how it is supported. So we make sure that there isn’t some improper pressure warping the bumper when planning out our next cut or else we might wind up over trimming the wrong areas.

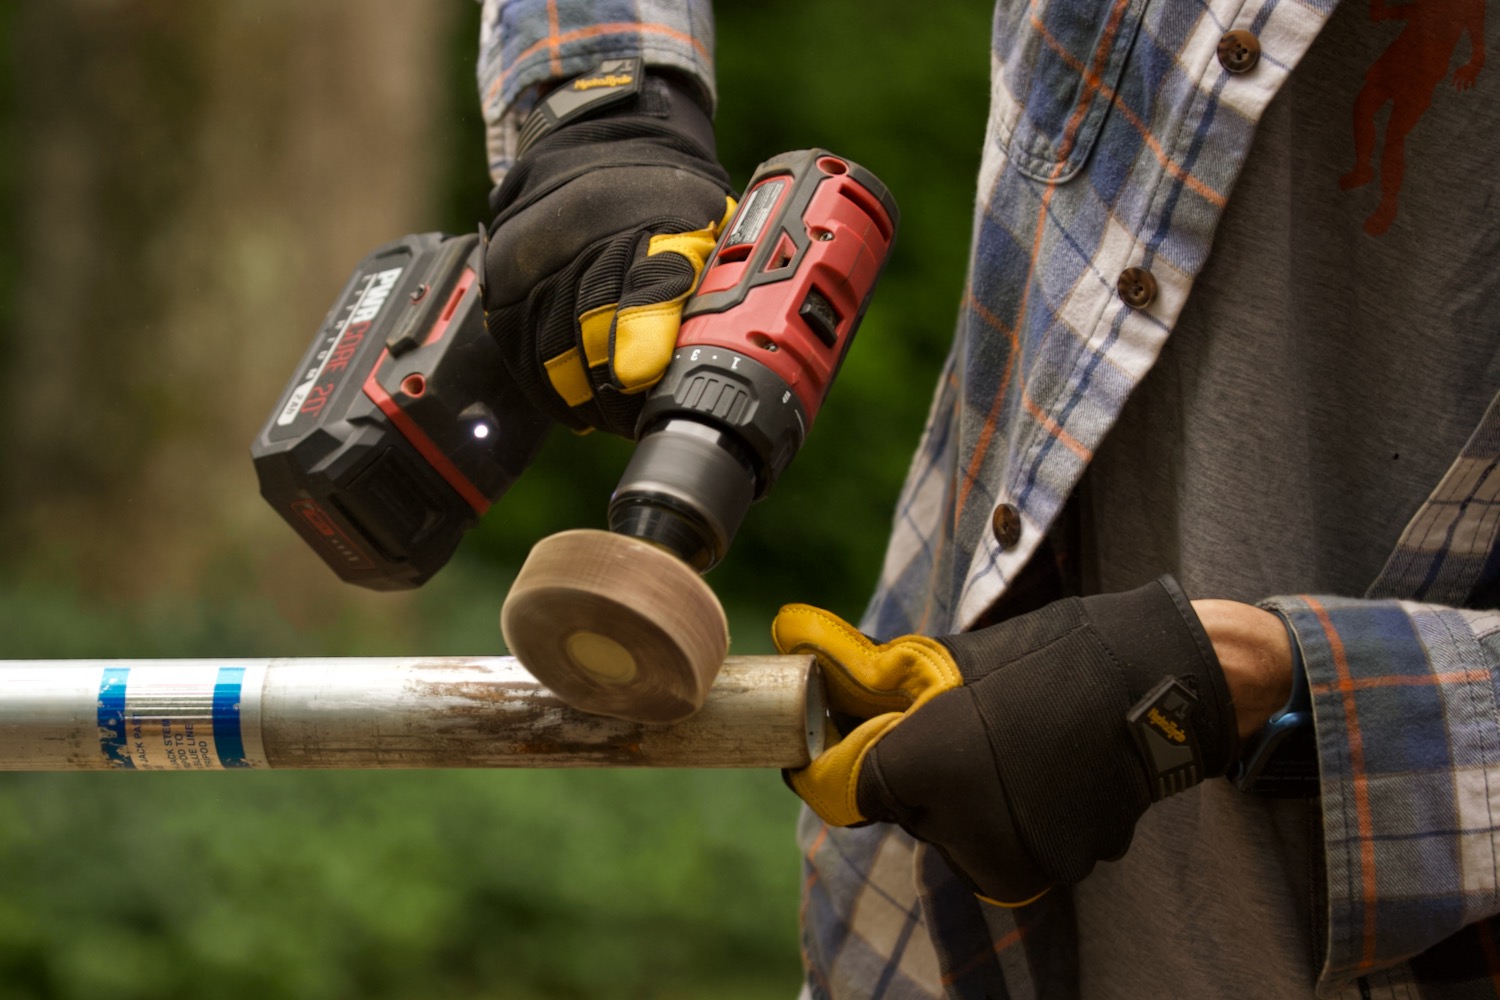
Measure and Mark the Bumper
The first step is to measure the bumper. We need to know how much material to remove and where to make the cuts. It helps to have two people, one to hold the bumper near the truck bed and another to take measurements and mark where to cut. Before moving to the next step, we also confirm that we have mark each edge evenly and don’t overcut.

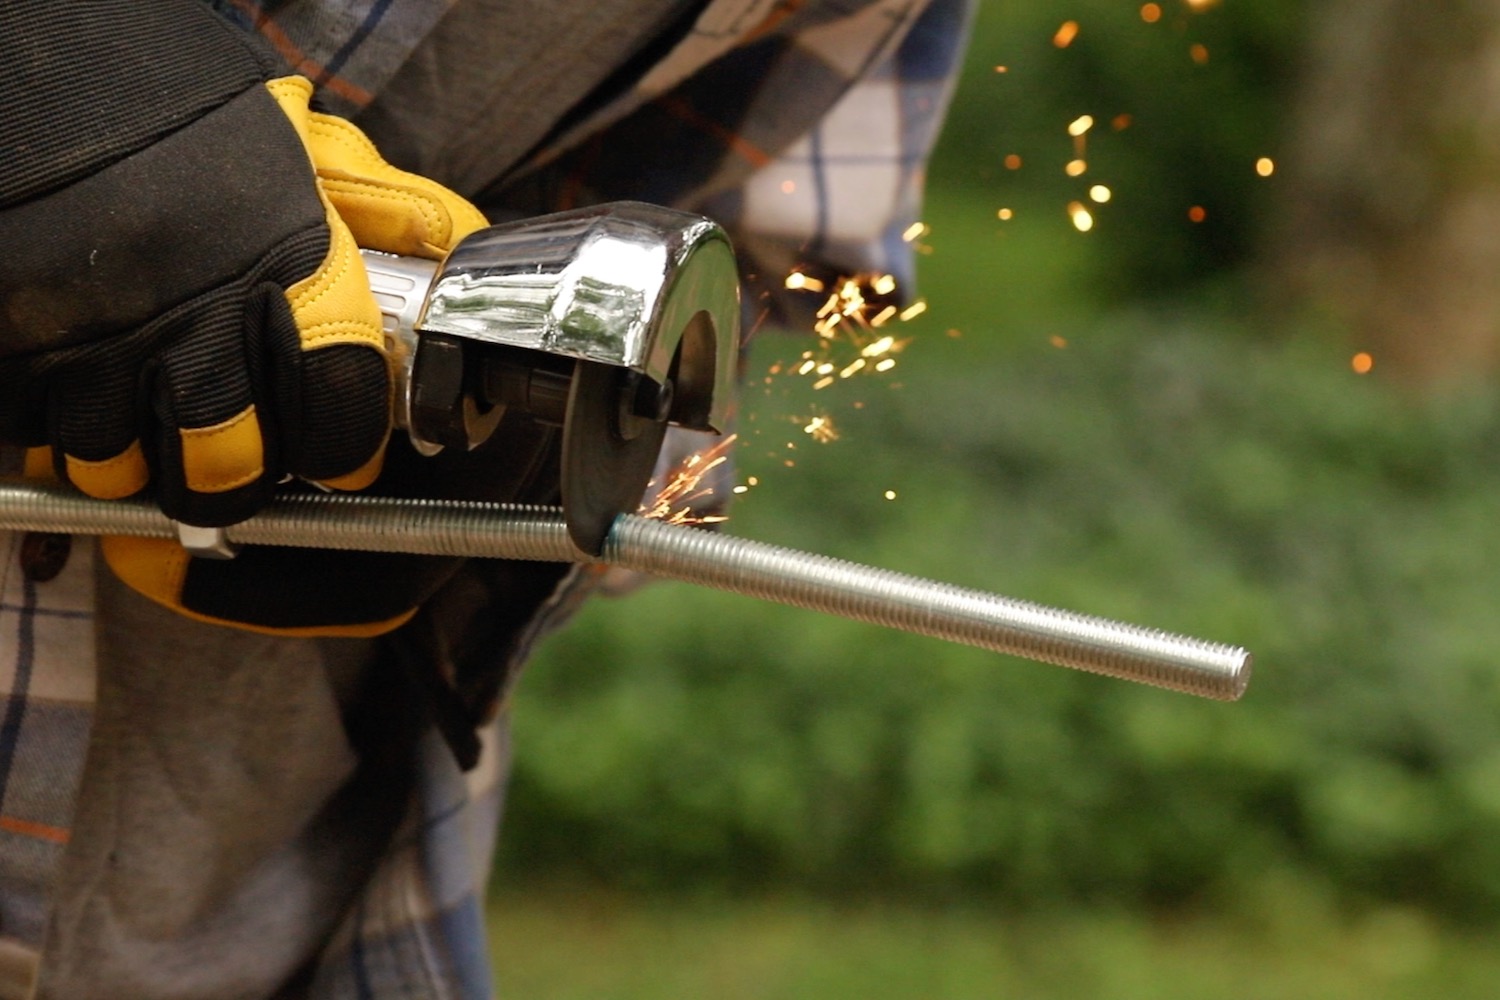
Cut the Bumper
We’re using a pneumatic cut-off tool to follow the marked line on the bumper and cut through the steel sheet. But before we get started, there are a few things we need to do. Since we are using a pneumatic cut-off tool, we’ll be hooking up to an air compressor for power. So we first ensure that we have the appropriate air pressure and position the compressor somewhere close to the workspace without being in the way. Then we make sure the area around us is clear of anything that could be damaged by flying sparks and metal shards. And double-check that we are wearing proper eye protection.
With that out of the way, we can get started. We align the blade with the marked line. Then, start cutting!


Rinse and Repeat
After each set of cuts, we hold the bumper up to the truck bed to check for fit. We measure, mark, cut, and check for several rounds until we have the fit just right. Now we’re ready for the finishing touches.
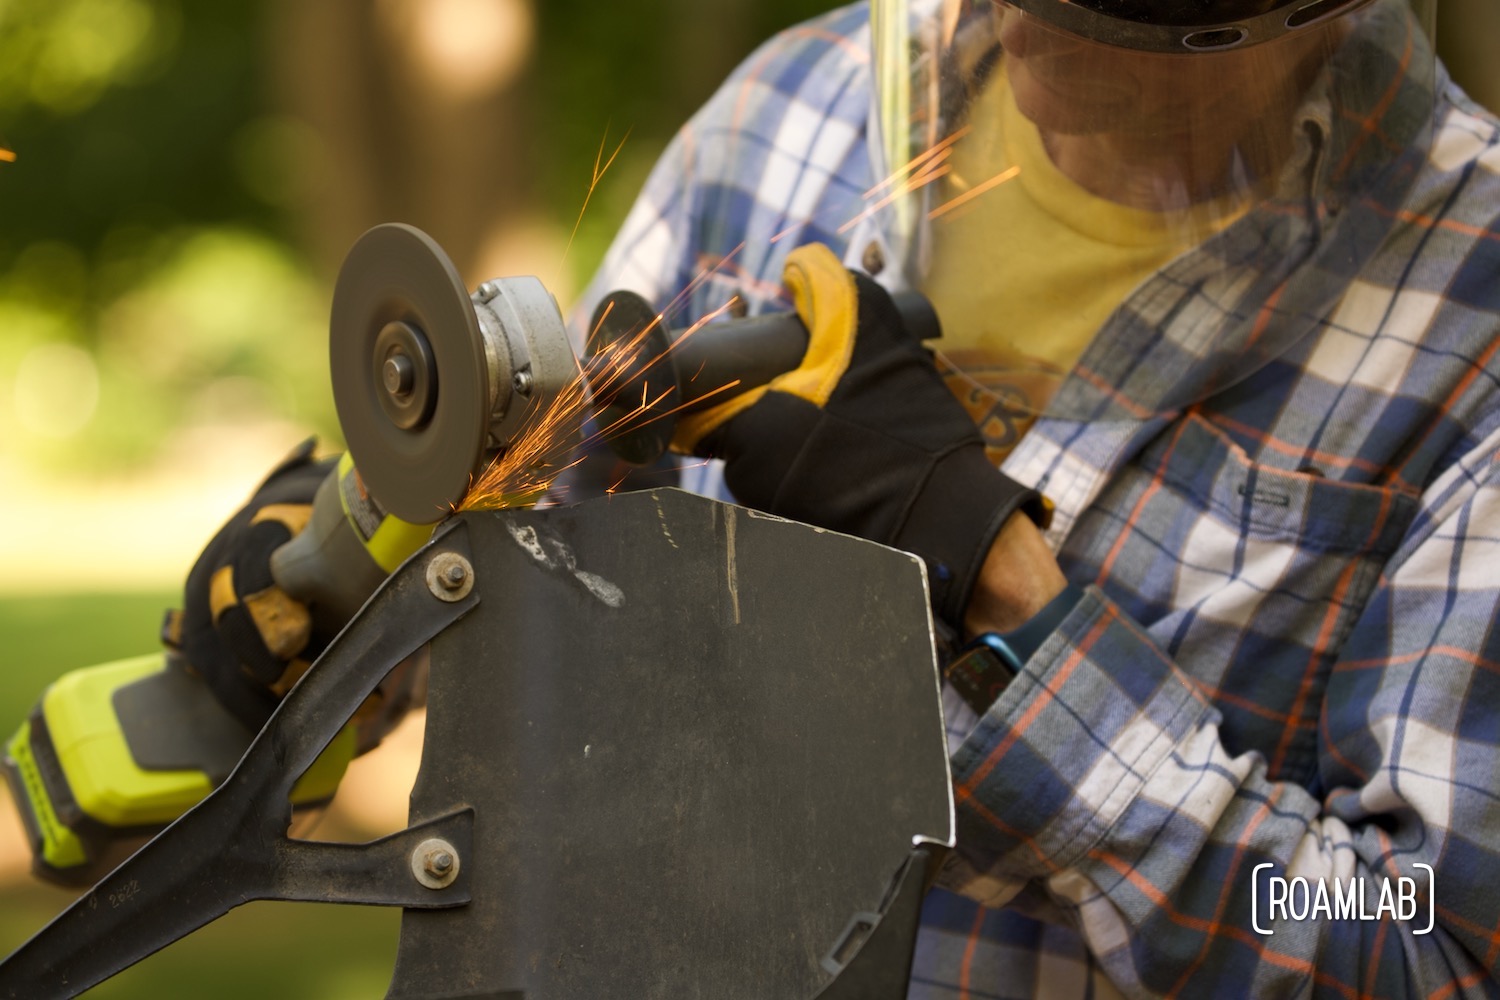
Deburring
Once we are done trimming the bumper, it’s time to remove any sharp edges. We’re using a handheld grinder tool and a metal file to do this. First, we make sure we still have our gloves and safety goggles. Then, start grinding away any sharp edges. Be sure to vary the angle of the grinder to create a smooth rounded edge. Any additional detail work or locations that are hard to reach, we can smooth over using a metal file. It’s slower work, but having a smooth edge is worth the time.

Final Touch-Up
The final step is to paint the steel that was exposed when trimming the bumper. We’re using a black spray paint designed for metal surfaces. First, we clean the surface to remove any dirt, oil, or metal shards. Next, we mask off any areas that we don’t want to be painted. Finally, we spray paint the exposed area. We recommend doing a few light coats rather than one heavy coat.
And that’s it! Now we have a bumper that fits our new truck bed.

That was easy…
We’re pretty satisfied with our old factory bumper now that it’s trimmed to fit our custom truck bed. It took several rounds of measuring, marking, cutting, and checking, but the final fit is nice and snug. The time and attention to detail pay off.
Plus, we get compliments all the time. “Nice bumper,” people will say. “Can I ask where you got it?” And we’ll reply, “Oh, this old thing? We just cut it down to size ourselves.” They’ll look at us with admiration and a touch of envy, which is exactly the response we were going for. So, all in all, we’re quite pleased with our handiwork.
…OK, maybe I’m going a little overboard there. But we are happy, nonetheless.