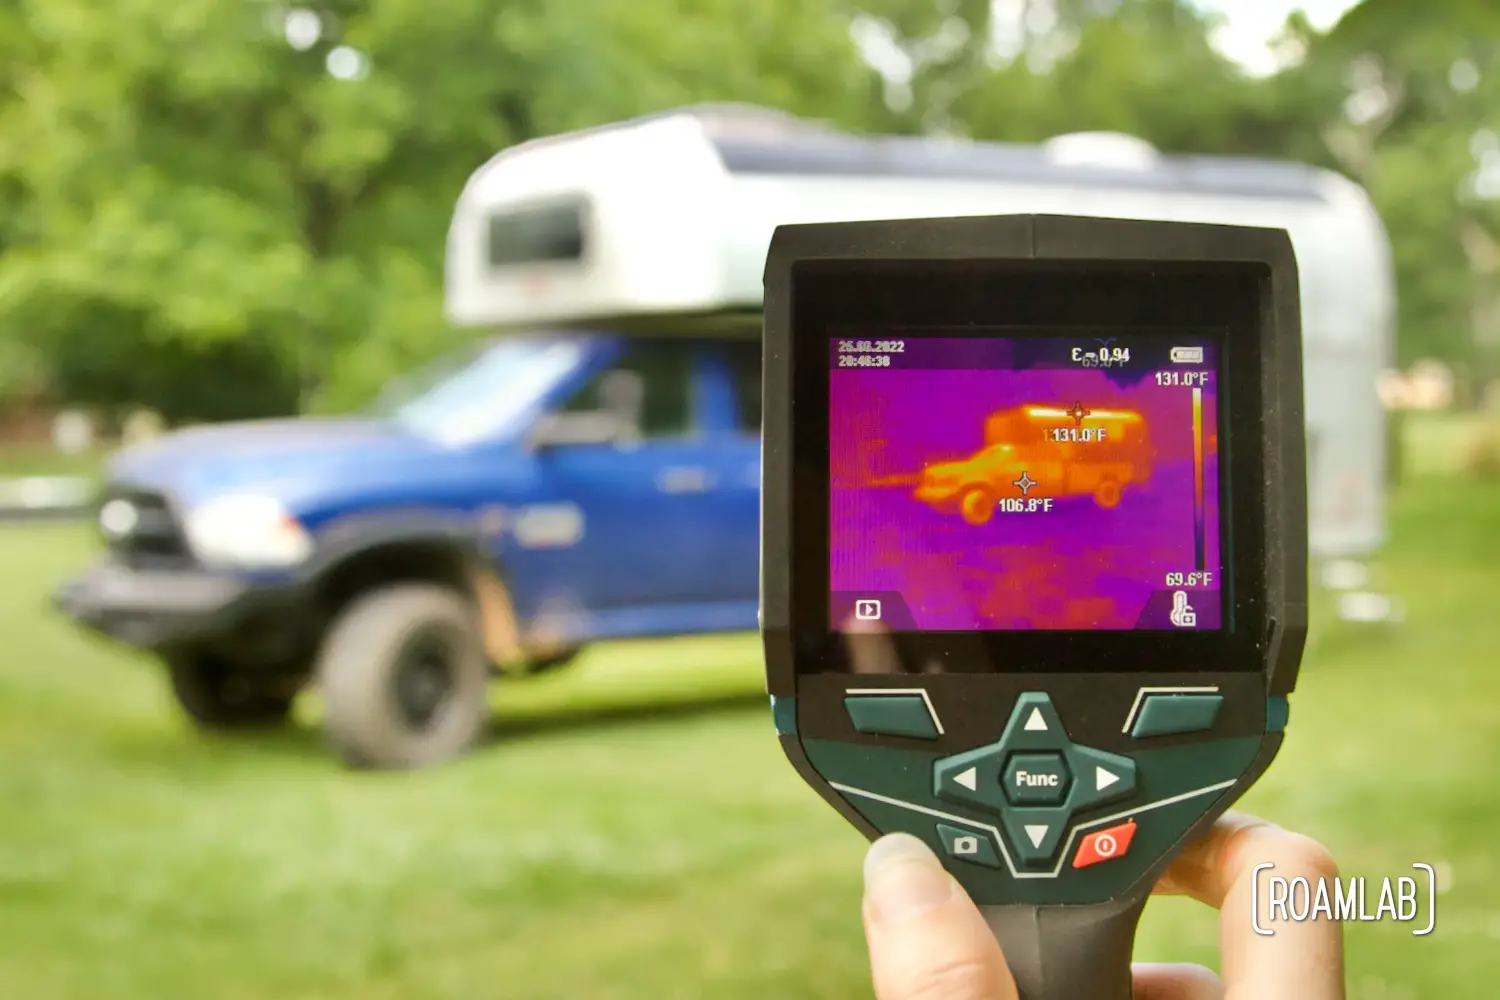
Air Conditioner Stress Test Truck Camper Hot Spots
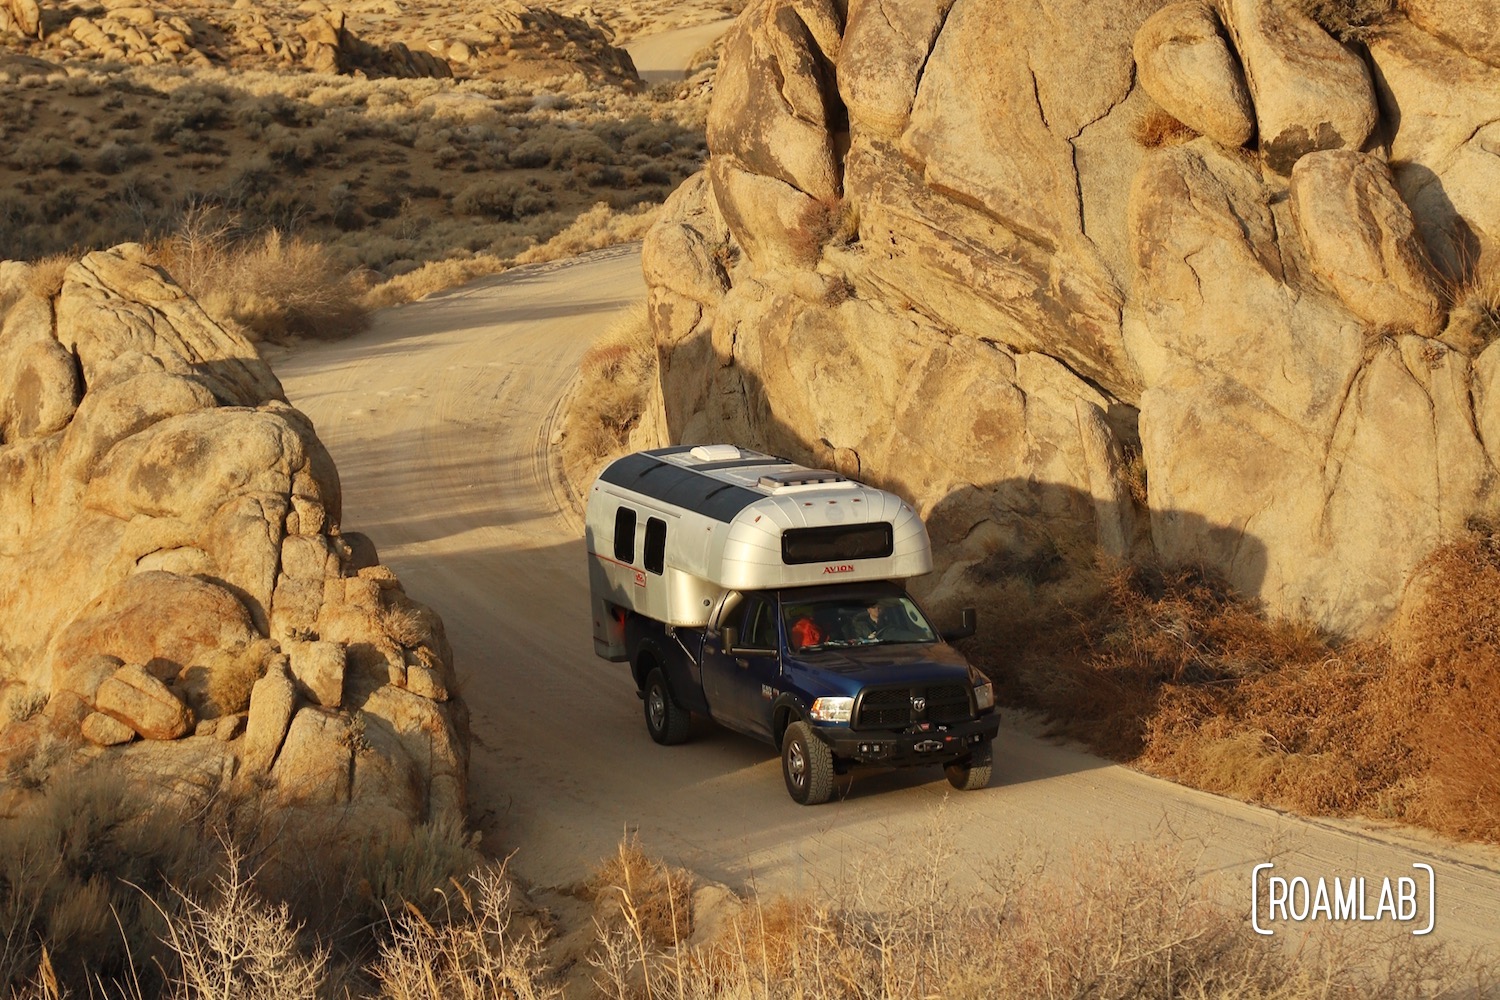
It was 97 degrees Fahrenheit with 35% humidity on June 25 when we position our truck camper in the center of an open field, the nose pointed north, and the rear pointed south. We are running an experiment. With a 5000 BTU air conditioner running full blast we already know what will happen. This heat wave has demonstrated the limitations of our air conditioning arrangement. In the heat of the day, we sit on the floor to take advantage of the little cool air that hovers low in the camper. When we stand, we are overwhelmed by the heat that has seeped in from outside. We could upgrade the air conditioning unit. (We will in the future). But throwing more BTUs at the heat only solves part of the problem. Today, we are establishing a baseline of heat transfer with an air conditioner stress test. We know the problem areas, but how much of a problem is another issue. Today, we’ll find out.
The Challenge
An ounce of insulation is worth a pound of BTUs. I believe that is how the expression goes. In a camper, everything is a compromise. We are constantly balancing the size, power, and output of appliances. After all, we have limited space and power. So we are looking for the smallest, most efficient air conditioning unit possible. That’s what brought us to the 5000 BTU window unit we have been using for the past few summers. It is small and surprisingly efficient. But that comes at the cost of output. We could get a more powerful appliance, but that would take more space and more power. So, before we sacrifice both, we want to focus on what we can do to improve the effectiveness of the air conditioner by preventing thermal transfer.
About Thermal Transfer
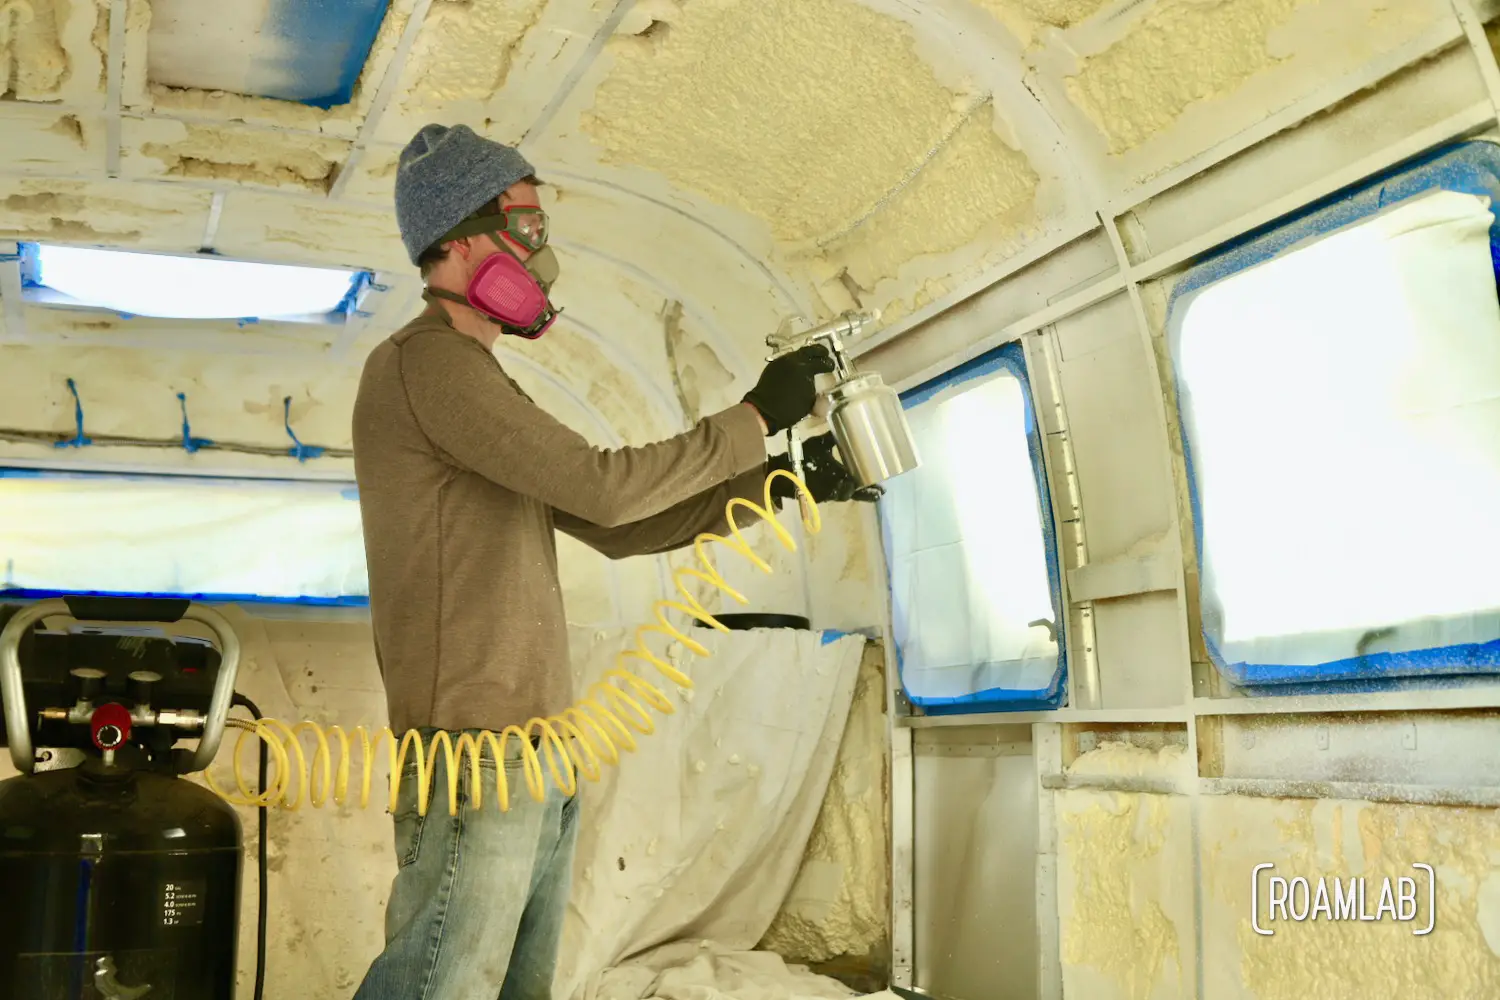
Thermal transfer is the conveyance of heat from one location to another. In the summer, this means transferring heat from outside to inside the camper. To prevent the thermal transfer, we add insulation. The better the insulation, the less transfer that occurs. We went out of our way to fill the nooks and crannies of our camper with closed cell spray foam insulation. It makes a huge difference but does not cover everything. Because along with the spray foam, the space between the outer and inner walls is buttressed with aluminum ribs. And, along with being strong, flexible, and light, aluminum is an incredible conductor of heat. For all the insulation we have sprayed, the aluminum ribs are heat sinks that quickly transfer the outside temperatures into the camper. Last summer, we attempted to mitigate this thermal transfer using Lizard Skin ceramic paint to insulate the ribs. It does make a difference, but not enough.

Read more
We have covered these subjects in detail in past articles. To learn more about our past projects and research around thermal transfer, check out these related articles.

Running The Air Conditioner Stress Test
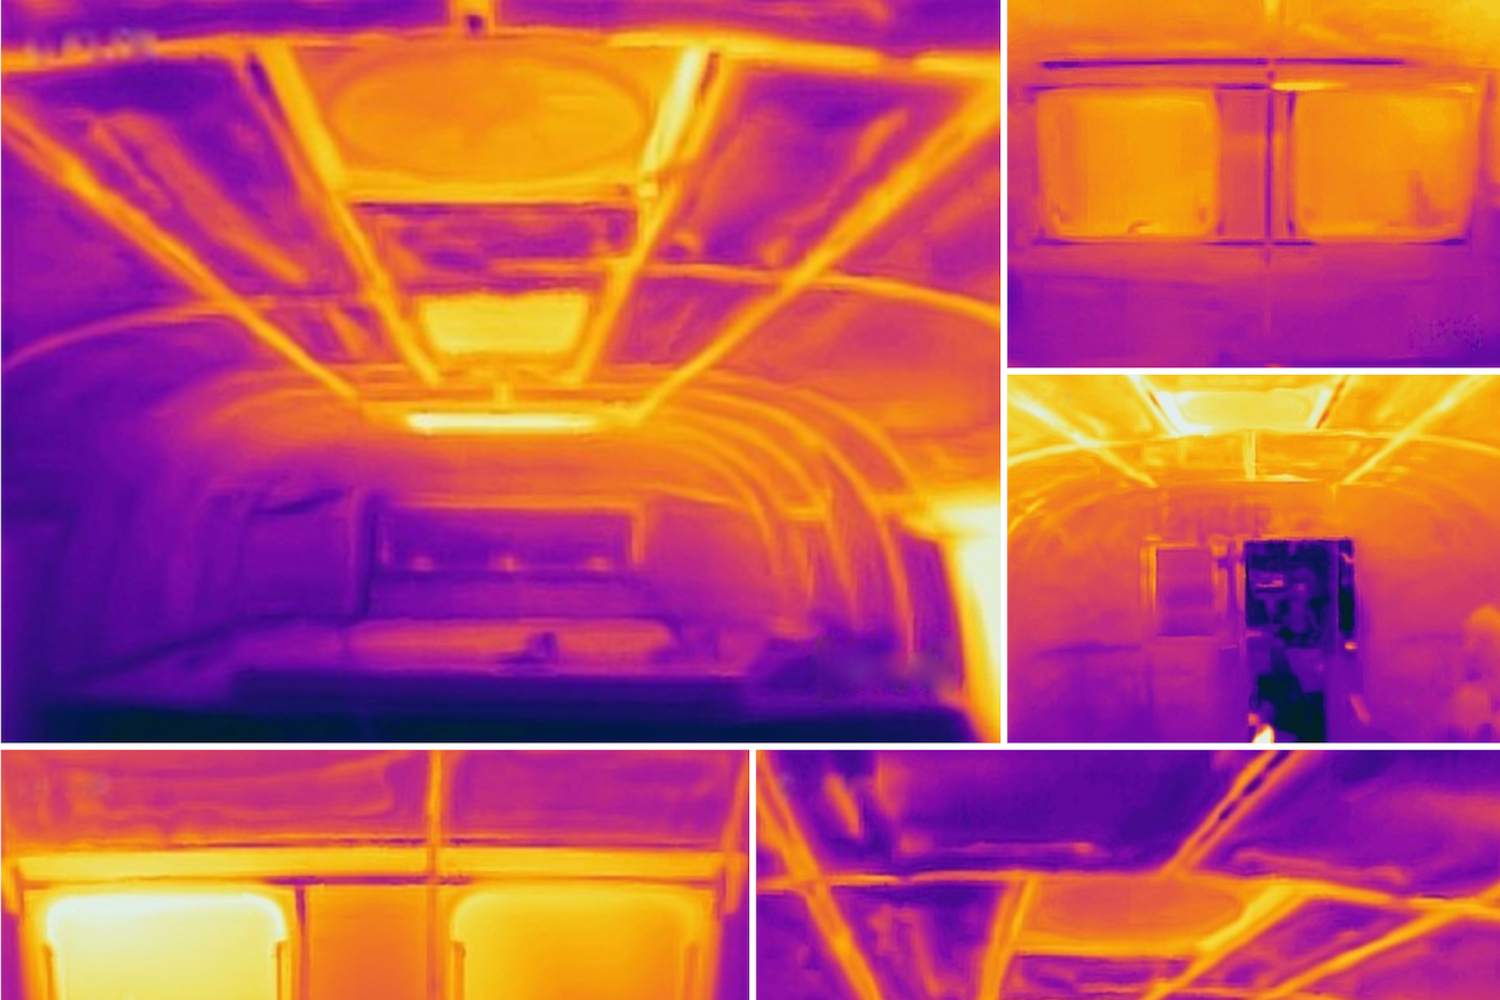
With the camper in place, under the full brunt of the midday sun, we are all set for our air conditioner stress test. We run the air conditioner for two hours and monitor the heat of the camper inside and out. Occasional clouds pass over the sun, and we see the external temperature of the camper roof dip from 160°F degrees to 130°F. What a difference a cloud can make. But as we can’t make clouds, we need other ways to keep the 160°F surfaces from transferring that heat into the camper. And the first step is identifying and prioritizing our problem spots.
Solar Panels
The solar panels are a primary point of focus on the external camper. Along with their position on the roof in the direct sunlight, their dark surface retains excessive amounts of heat. They establish the upper limit of the heat on the camper itself. Under our observation, we witness their peak at 160°F. While the solar panels do have a small air gap between the panel and the roof courtesy of the Velcro we use to mount them, some transfer still occurs. We can see in the pictures inside the camper. The wall space under the solar panel is some of the hottest. So it is not as if the panels are shading the roof.
We have discussed introducing some thermal capture additions to the solar panel. Our solar panels operate between -40°F and 185°F. At 160°F, we are flirting with the upper limit of their usability and the ambient temperature is only 97°F. As a rudimentary test, we spray down the panels to see how much we could cool them down with a hose. After several minutes of spraying the panels, the surface temperature drops by 10°F, but more practical and detailed experiments are called for in the future. It’s not as if we have the water to hose down the panels regularly.


Roof Hatch
While the solar panels experience the most heat from outside the camper, the roof hatch certainly transfers the most heat inside the camper. Even with the reflective sun shade drawn, we register temperatures of 140°F while the neighboring insulation and even the ribs are notably less. Here, we have heat transfer of a far more direct and easily actionable kind. The double-pained hatch window and reflective sun shade are far from enough, but there is a great deal of space between the two that can be filled with insulation. We did have some insulation board there…it didn’t survive this heat wave. So, we are designing a more resilient and easily removable insulator for the future. We’ll be sure to share the project when it is complete.


Ribs
We addressed the super highway of heat transfer that are the ribs in a past post, but it bears repeating. With an external temperature of 97°F and the air conditioner blasting out 60°F air, the ribs are still radiating 107°F from the roof. Fortunately, these are exposed ribs. While our efforts to minimize thermal transfer have rendered mixed results thus far, we still have one remaining opportunity to introduce additional insulation between the ribs and the inner aluminum walls. We are already designing a protocol to test assorted insulators. When we have our results, we’ll share the full report.

Side windows
Like the roof hatch, the side windows allow a great deal of heat into the camper. Being on the side of the camper, they are subject to far less sunlight, but they represent a much larger surface area of the camper’s body. They are also single-paned, transferring much more heat than a double-paned window. At midday, we record window temperatures at 91.5°F compared to the 122.5°F ribs and 83.7°F insulated walls nearby. We have cut out reflective bubble wrap insulation to reduce thermal transfer through the windows, but in this heat, even that is a minor relief. As we build out the camper interior, we will introduce thicker window coverings, similar to our roof hatch approach.

Conclusions from the Air Conditioner Stress Test
There’s a reason that different campers are rated for seasonality. Budget campers are designed for fair weather camping. Tanks freeze in the winter and the interior bakes in the summer. On the other hand, high-end expedition vehicles may have walls that are several inches thick with high-end insulation. We sit somewhere in the middle: quality insulation but only 1.5 inches thick. Which, frankly, is enough. Those sections of the camper that are insulated are holding up fine. Our problems are the heat sinks of extruded aluminum and windows. So, while the process continues to delay our build, this problem will have to be solved eventually, and now is our best opportunity.
At least we now have a list of things to do. We have solar panels to cool. We have windows and a roof hatch to make thicker insulating covers. And we have ribs to insulate…yet again. Keep an eye out for upcoming insulation experiments as we determine our best next steps.