Truck Camper Pass-Through Prototype V1
The upside of motorhomes and vans over trailers has always been the direct access between the driving space and the living space. Forgot something in the kitchen? No need to pull off the freeway and find a parking spot. Just pop back and get it. Truck campers, instead, occupy this odd gray zone where they share a large amount of surface area with the truck it is mounted to but rarely is there a direct connection between the truck cab and the cabin. After all, it is not easy to unite these two compartments without creating new problems. The pass-through can become not just a thoroughfare for people but also air, dust, and rain. Given this complexity, we don’t anticipate solving the pass-through challenge on our first attempt. But, we think it will be worth the effort to have direct access between the cab and the camper. So, rather than calling this our “DIY pass thought post,” this is our pass-through prototype V1.
Types of Truck Camper Pass-Throughs
Before immersing ourselves in construction details, we first have to define what kind of pass-through we want. After all, there are several relatively common methods of connecting the cab to the cabin, and each better suits different rigs and living arrangements. Most commonly, we see robust pass-throughs that permanently unite the truck and camper using an accordion gasket and additional weather and thermal insulation. Ours will be a little different.
Like all those that came before, ours, too, is a reflection of our rig and living arrangement.
- Some of our design is constrained by our truck: The flex between the truck cab and bed means that we need something equally flexible to maintain a seal between the camper and cab, even on rough roads.
- Other constraints are particular to our living arrangements. Since we only have one vehicle, we need to be able to detach our camper from the truck bed at times. That means that the pass-through must be detachable (and sealable) too.
- But, like all pass-throughs, we want to create a weather-resistant connection that seals out dust and water and insulates the interior cab and cabin from the outside climate.
Removable Pass-Throughs
There are several methods of connecting the cab to the cabin. Some are solid; some allow flex. Few are removable. But of the removable variety, the simplest and easiest solution appears to be a foam or inflatable boot that seals the opening between the cab and cabin using compression. Creating an inflatable boot would be complicated, but a foam boot is simple enough. It seems a logical first prototype to test out the pass-through and identify potential challenges. It is simple, low cost, and a fast first prototype.
Then again, compression boots have their problems…
One often noted a problem with the compression boot solution appears to be that any dirt, sand, or other grit kicked up on the trail is at risk of collecting between the boot and the camper or truck body. This can have a sandpaper effect on the surface of the camper or truck body. We’ll be monitoring this effect as we test out the system. With this in mind, we are looking into an additional outer protective seal and an inner seal for a more comfortable transition between the cab and cabin.

Pass-Through Boot Materials
The main challenge for this prototype is choosing and sourcing materials. Namely, we need some form of padding and an outer weather seal to encase it. For our first iteration, we choose to work with a common prototyping material: foam insulation board. It’s cheap, convenient, and easy to shape.
Once shaped, we will need to seal the foam insulation against breakdown from UV exposure or the elements. We read a lot of favorable documentation about using polyurea, but we settle for a more easily sourced sealant from the local big box home improvement store.
To better allow for a compression seal, we will add an airconditioner weather seal, as this highly flexible foam seal will fill in any remaining gaps.
Tools
- Tape Measure
- Saw (hand and table saw)
- Clamps
- Putty knife
Materials
- 2-inch thick foam insulation board
- Foamboard adhesive
- Sealant
- Black Spray Paint
- Air conditioner weather seal


Pass-Through Boot Design
Knowing that this is (only) a prototype takes a lot of pressure off the build process, but that doesn’t mean we want to cut corners. We want this to be a meaningful test. So, not only do we want to build a scale model of what this boot could potentially look like, but we want to be able to test this model to collect meaningful data through a proper shakedown. Fortunately, we have the perfect opportunity to test the boot in two weeks: Overland Expo East. That gives us enough time to carefully shape the foam, fit it, seal it, and install it in time for a week-long trip to Virginia and back.
First, we need to shape a foam form that will snuggly fill the gap between the camper and the truck cab with an opening to travel through. We will roughly follow the outline of the Breezer Window that we installed earlier to allow us to open and close the rear cab window easily. That means the boot itself will be around 5 feet wide and 1.5 feet tall. The truck cab rear window has a slight slope from the roof to the truck bed, so the boot thickness mirrors this angle, starting at 6.5 inches at the top and ending at 4 inches at the bottom.
This large boot allows us a lot of support to then max out the interior opening to take full advantage of the Breezer Window: 10 inches tall and 54 inches wide. Unfortunately, this doesn’t quite match up to the camper window, which is taller at 13 inches, and narrower at 37 inches. Still, between the two, we should have enough room to wiggle through. Though, it certainly is a reason to watch our figures to ensure we can fit.
| Height | Width | |
|---|---|---|
| Truck Rear Window (opening) | 10″ | 54″ |
| Avion Cab Window (opening) | 13″ | 37″ |
| Boot (opening) | 10″ | 37″ |


Building the Pass-Through Boot
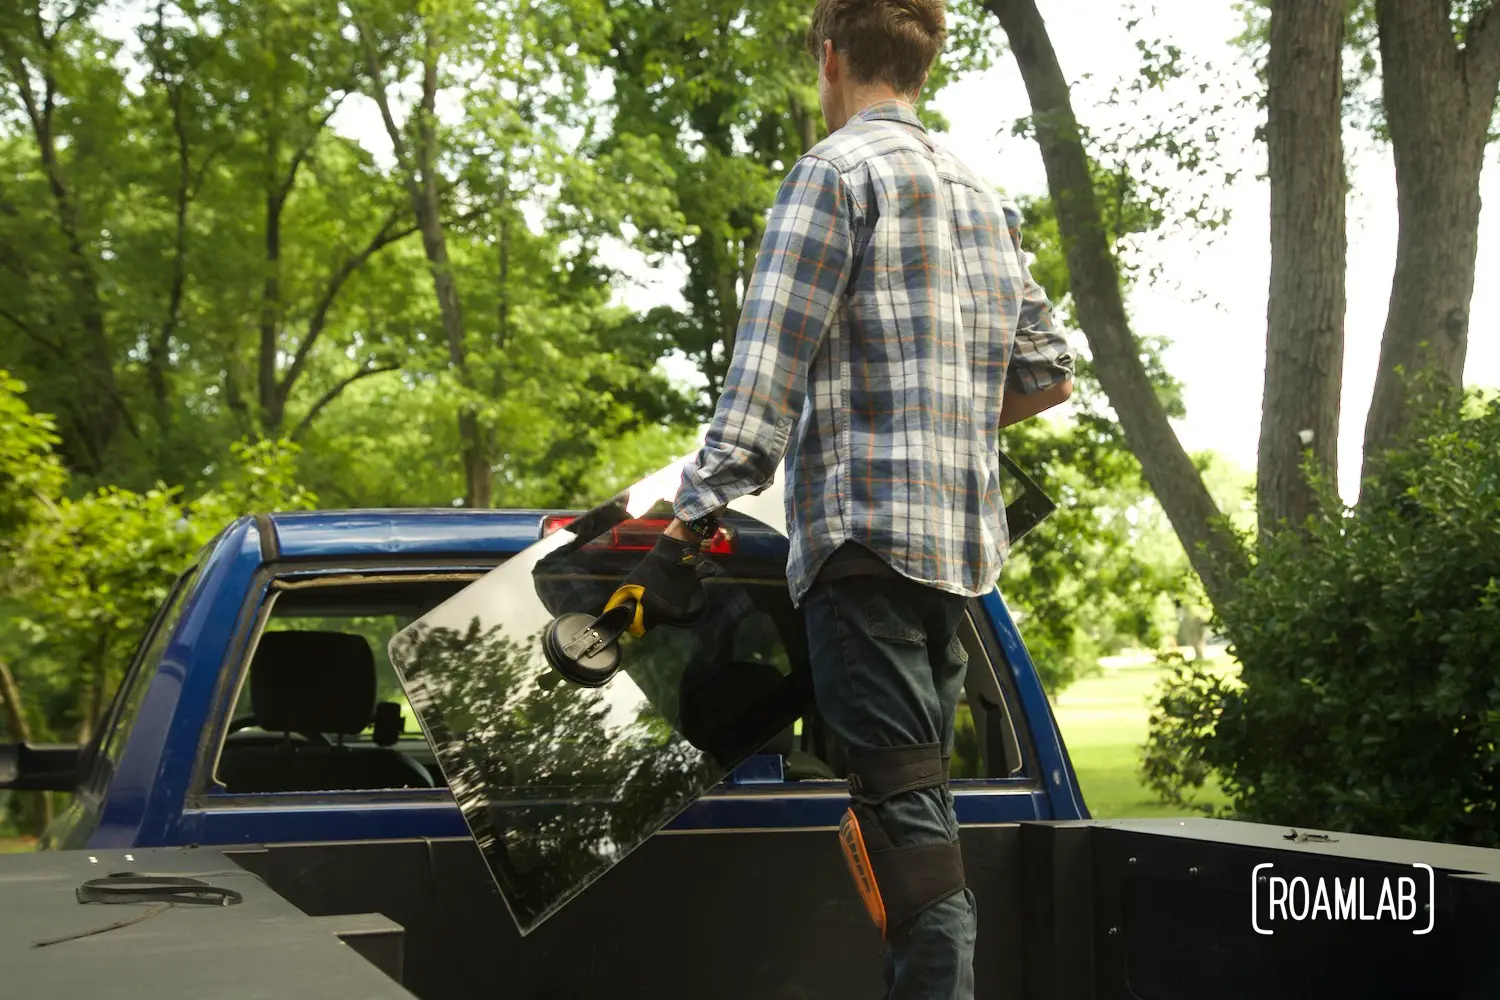
We build the boot with a 2″ thick foam board. To evenly fill in the carried gap between the camper and cab, we cut out two templates matching the Breezer Window outline and fill in the difference with foam pieces trimmed on a table saw to reflect the angle of the truck window. Once all the pieces are glued together, we are able to test fit the boot by sliding the foam between the camper and truck and then trimming away parts that prevent the boot from fully sliding in place. When we are done, the fit is so snug that we have to lift the camper out of the truck to pull the boot out and move on to the next step: sealing the foam core.


Sealing the Foam Core
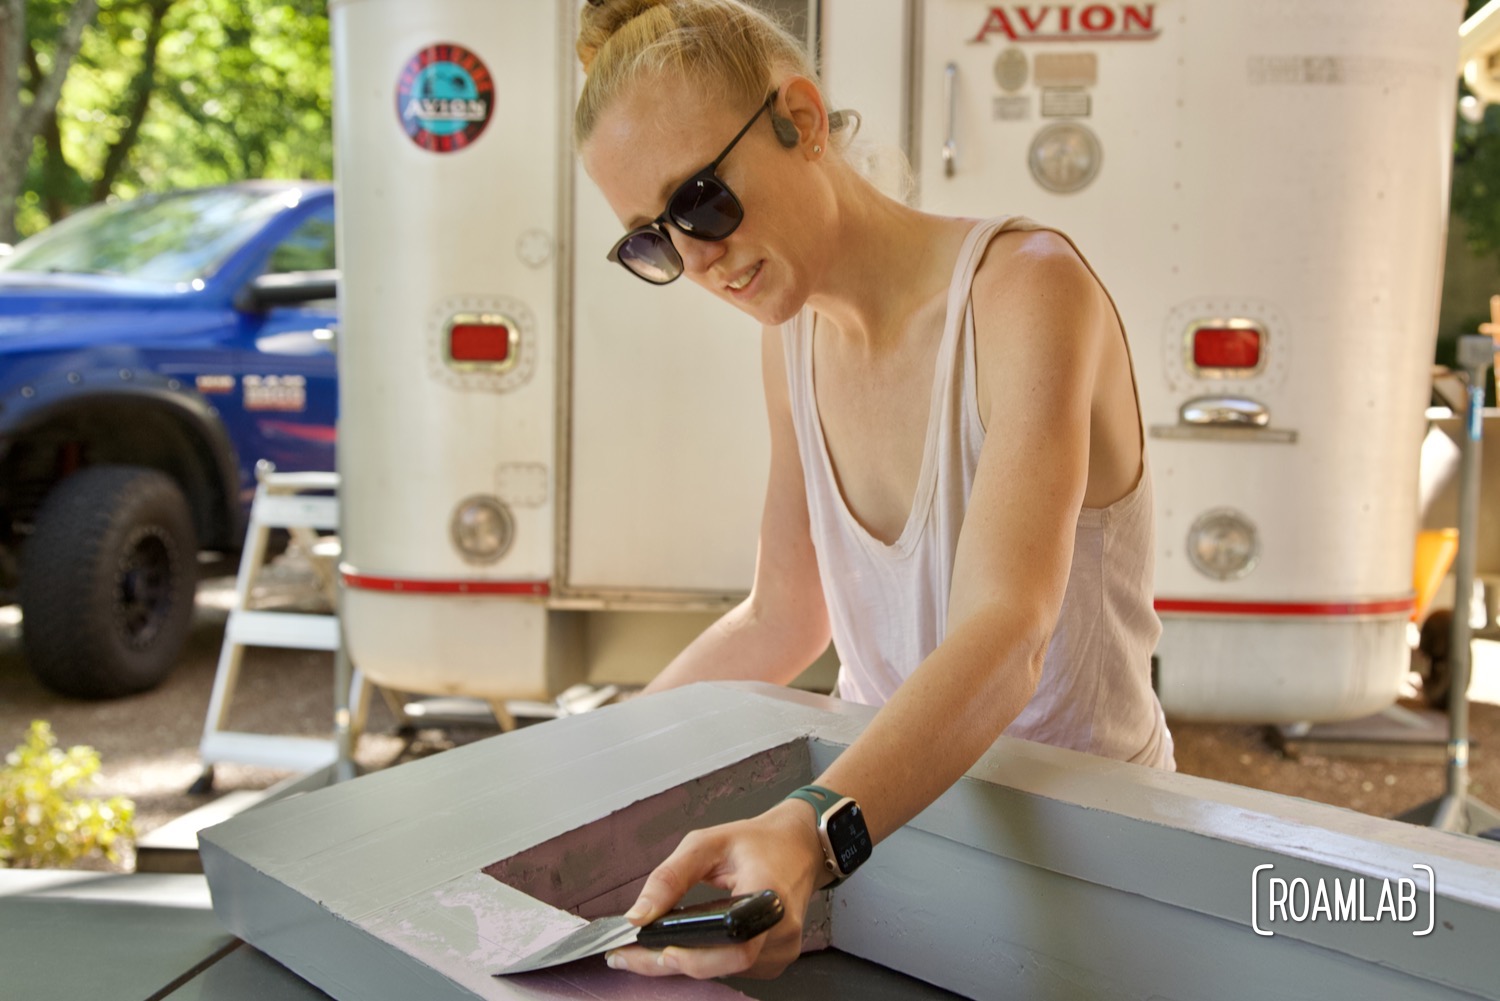
Foam is great for insulation and easy for prototypes, but it’s not meant to be left out in the elements. This open-core insulation can be broken down by UV rays and saturated with liquid. So, we need to seal it. Unfortunately, this insulation foam reacts to aerosol. So most spray sealants can eat away at the foam before the substance meant to protect it can do its job. In addition, foam is also resilient to many types of adhesives. So many sealants will peel off.
After extensive research, we encounter polyurea, which appears to be the ideal sealant for outdoor foam forms. But all the sources we find charge hundreds of dollars for the paint. This may be useful material for a final version of our boot, but it’s too expensive for an initial prototype. So, we take a risk and buy a series of sealants from our local home improvement store and give them a try. It takes three tubes to coat the foam. Each tube is a slightly different shade of gray/white. Once we are finished, we coat the entire piece with a final thin coat of rubber paint.


Filling the Gaps
While the boot’s fit is so snug, we have trouble removing it. It isn’t equally snug everywhere. The back window not only slants out between the roof and the truck bed, but it also curves slightly out between the driver and passenger sides of the cab. The difference is less than an inch. But that’s a big difference when trying to steal the gap from cold, dust, and rain.
That said, it would have been challenging to perfectly fit the boot to fit both dimensions, as that would mean the ends would be too wide to slip between the narrow center point between the truck and the camper. Instead, as our final part of building the prototype, we line the inner and outer edges with an airconditioning weather seal. This foam material is incredibly spongy and is designed to seal gaps from a quarter inch to an inch. Perfect for our applications.
Once lined, the boot is ready for installation.
Installing the Boot
As a compression boot, the prototype has to be installed as part of the process of mounting the truck camper. Before we lower the camper into the truck bed, we slide the boot between the camper and cab windows and occasionally pause while lowering the camper to confirm that the boot is evenly sitting in the gap. It’s a tedious and error-prone process. Not ideal for a long-term pass-through, but enough to get us to Overland Expo and back.

Pass-Through Boot Conclusions
After driving out to Virginia for Overland Expo East 2022 and exploring some back roads across the Carolinas and Georgia, we return to our workshop with many lessons learned. The boot fits beautifully and didn’t shift notably during our week-long shakedown. The foam material was pleasant to rest on while crawling through and highlights the difference between it and the hard surfaces of the battery box in the camper and refrigerator in the rear center of the truck cab that we transfer our weight. One significant and straightforward upgrade will be to add padding to the top of the refrigerator.
Difficulty Mounting the Boot
From the start, we begin noticing problem points as we mount the truck camper on the truck. While we did add Velcro to hold the boot in place while mounting the camper, the air conditioning insulation added to seal any gaps pushes the boot away from the camper with enough force to prevent the Velcro from effectively adhering. Instead, one of us had to hold the boot in place while the other backed the truck into place with the camper. The micro adjustments needed to wedge the boot between the truck and the camper properly reinforce our need to design a better attachment point to hold the boot in place while mounting the camper on the truck or design a boot that can be installed after the truck and camper are mounted.
Sealing out the Outside
The air conditioning seal successfully closed up any drafts, but the imperfectly matched opening on the camper side meant that the seal placement sat above the meeting point for the camper and boot. It still helps insulate but doesn’t buffer the squeaky rubber meeting the aluminum. On the highway, this doesn’t make much of a difference. But on a rough dirt road, we hear a lot of squeaking.
We do seem to hear more traffic noise while on the highway and the sound of items shifting in the camper. In the long run, this seems like a reason to introduce a removable barrier on the truck side to help muffle noise when we don’t need access to the camper.
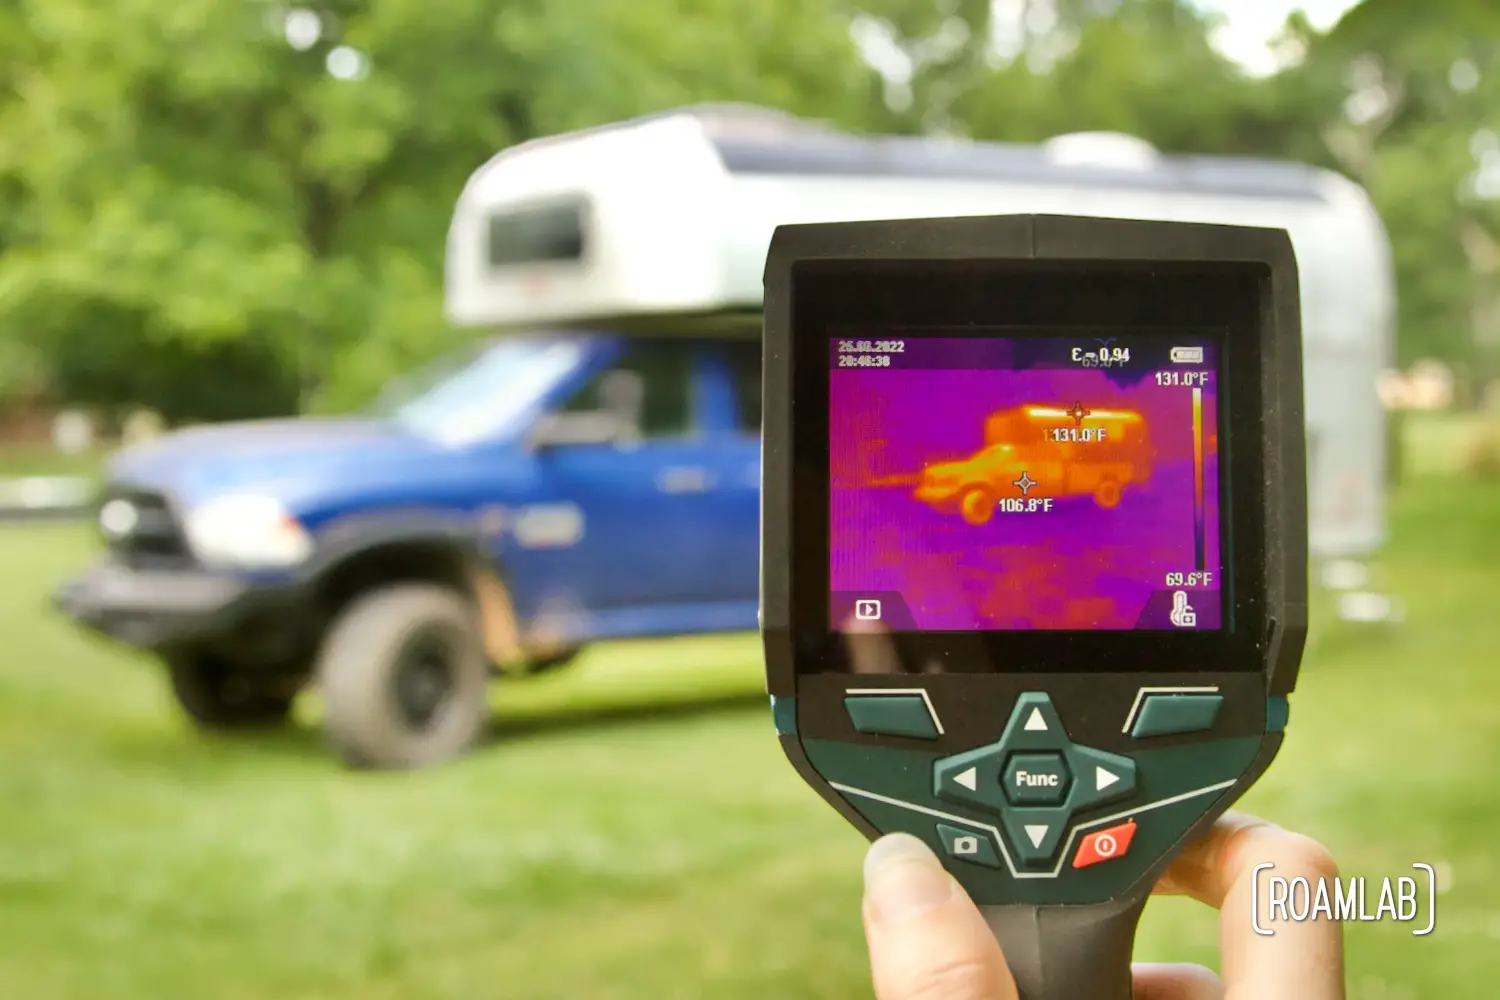
An Opening that Transfers More than People
The pass-through is great for access between the cab and camper but terrible for thermal transfer. The glass and steel box that is the truck cab creates a draft between the warm camper and the cold cab. Fortunately, the eventual upholstery of the dinette will not only thermally insulate the camper from the cab but offer visual privacy from outside looky-loos peering through the windshield.
Electric Connections
Currently, the alternator cables and a 120 connection travel through the pass-through to charge the camper batteries and power the cab refrigerator respectively. In the long run, we will need a more discreet wire run to minimize the risk of jerking and chafing for these high gauge wires.
Wear and Tear
While we did seal the foam core with putty and paint, the current arrangement doesn’t age well, even with only a week on the road. The rubber seal is already peeling away from the foam core at some points. It’s an imperfect combination and definitely not the final design.
Pass-Through Next Steps
Overall, the boot works but is far from perfect. In the long run, we are leaning towards using an accordion gasket to connect the cab and cabin. But before we can transition to that, we will need to build receivers on the truck and camper windows that we can connect to. One downside of the gasket is that it won’t do the double duty of insulating the pass-through as the foam insulation board did. Instead, we will want to add additional layers around the gasket for sound and thermal insulation. Until we build out those parts, though, I think we’ll keep using the foam boot because we certainly like it better than having no pass-through at all.