One of our favorite purchases in the last few years has been our ebikes. We take them across the country, riding along mountain roads and sandy beaches. To make room for them, we removed the rear seat of our truck cab and created a dedicated location to store them while traveling. They are more than just a form of recreation, they are a tool for scoping out rough trails and making quick trips. So, when we start experiencing trouble with the motor on one of our bikes, we are ready and willing to do the work to keep our bikes in tip-top shape. We are able to order a replacement motor from the manufacturer but installing it will be up to us. Fortunately, it is not nearly as difficult as we anticipate.
A note on ebikes: As with any popular consumer product with multiple manufacturers, not all ebikes are designed alike. The precise location of motors, batteries and other components vary by make and model. We are working on a Paselec PX1 ebike. But we have found, in researching our ebike, that they often do have a lot in common. So, in the interest of sharing, I’ll try to keep these directions as general as possible.
Equipment
Before we start dismantling the ebike to replace the motor, we first need to collect all the equipment needed to complete the process. This means more than just the wrench and screwdriver needed the access the motor but also tools to splice the wires back in place.
Motor Replacement
- Wrench
- Screwdriver
- Torque wrench
- A block of wood, rubber, or other firm material that won’t harm the metal components
Reconnecting Wires
- Wire cutter
- Wire stripper
- Needle nose plier
- Heat gun
- Shrink wrap
- Wire connectors
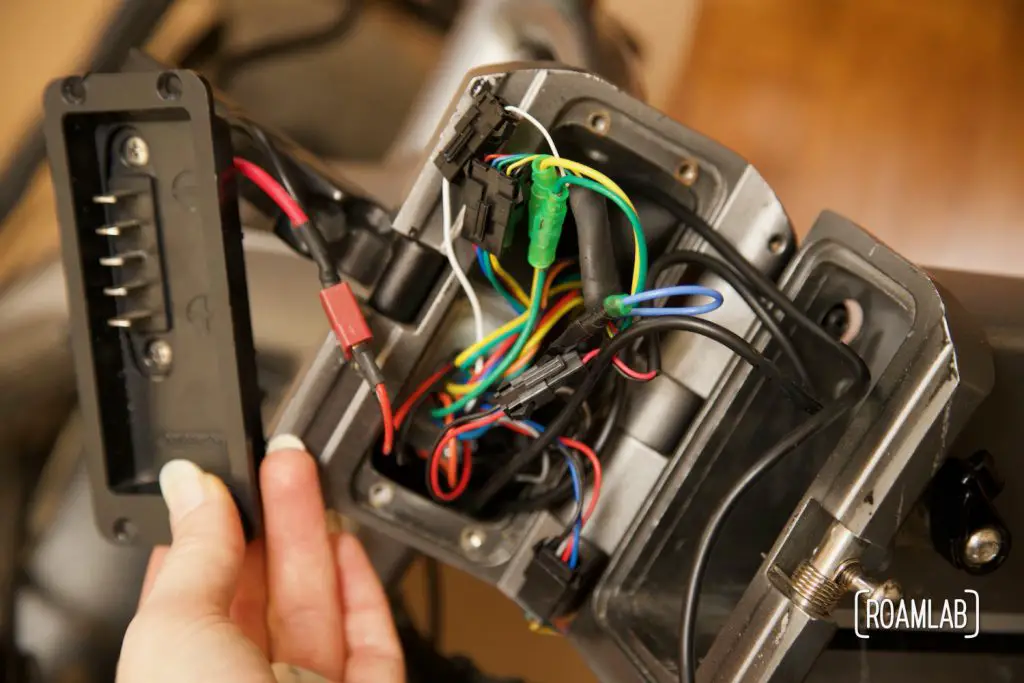
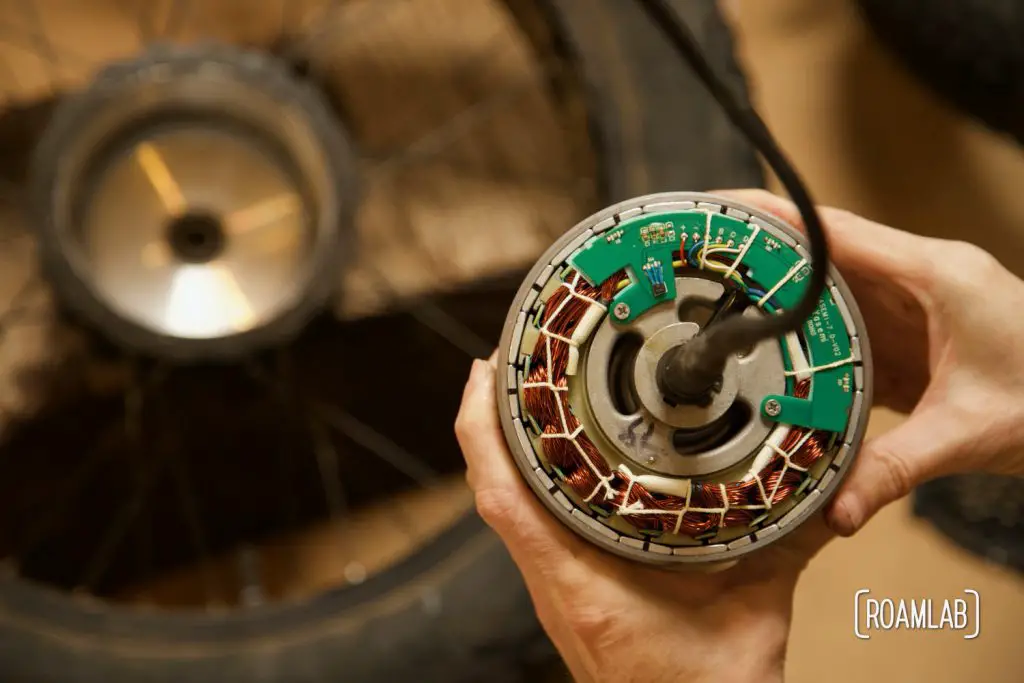
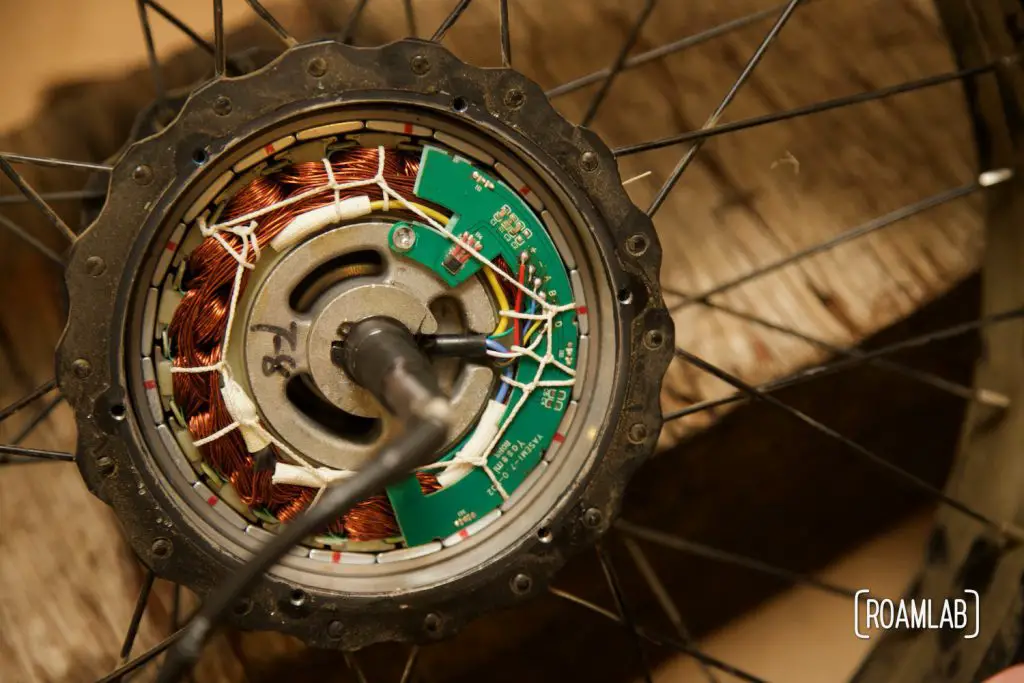
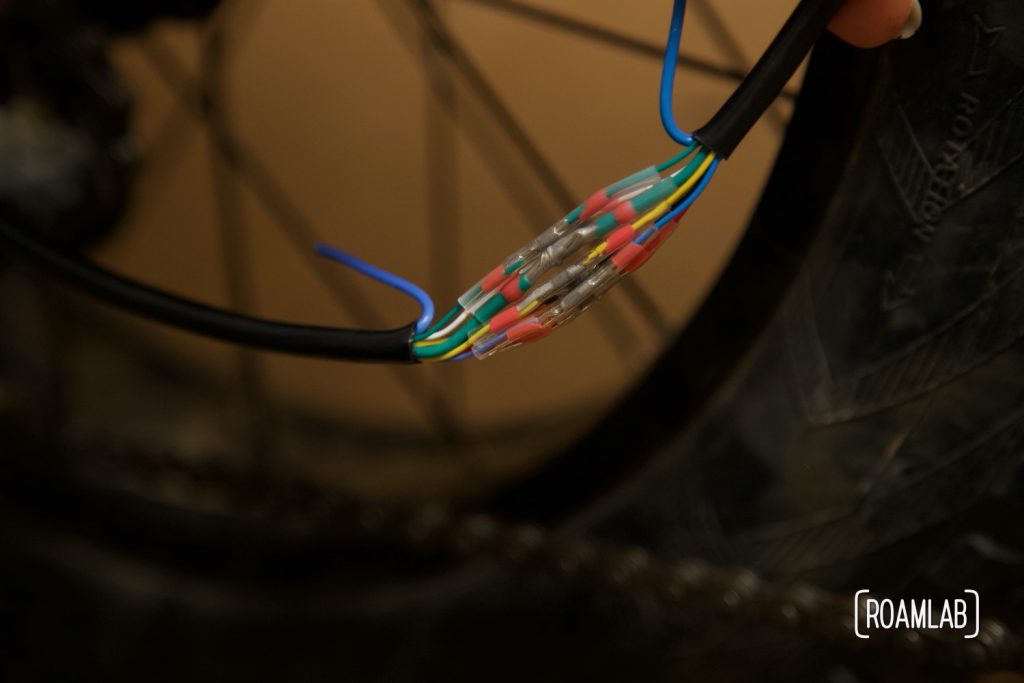
A note on wiring the ebike: When we receive the new motor, the cable that connects the motor to the ebike’s power and other electric components includes bullet connectors attached to the 9 individual wires. These replace connectors from the original motor and cable and can be plugged back into the receivers that are part of the ebike’s original wiring.
Since we purchased the ebike, however, we split the original rear cable to splice in a standard 9-pin ebike cable connector so that we can easily remove the wheel for maintenance without stressing the cable. So, when the time comes to replace the motor, we aren’t using the convenient connectors that came with our new motor cable.
For those that are looking at this post for guidance on how to reconnect the motor using those connectors, however, it is a relatively simple matter of removing the plate in the battery well to access all the wire connections.
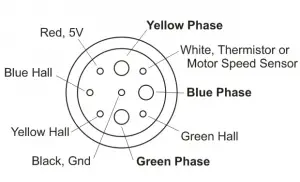
Wiring colors do vary somewhat between ebikes and cables. However, we have been generally lucky with matching wires by color. We used the Z910 connector, which is a fairly standard connector, common among low power hub motor systems and whose wire color mapping matches our bike cables. According to ebikes.ca, “The blue, green, and yellow lines are phase lines, the other 6 lines are hall current sensors, where the white lines are speed measuring signal lines.
“
Removing the Old Motor
The motor in our ebike is located in the hub of the rear wheel. To replace it, we have to remove the wheel from the bike frame. The wheel itself is removed like most rear wheels from bikes. However, since this is the rear wheel with a motor inside, it also has a cable that connects the motor to the battery and auxiliary controls in the bike frame. So, first, we have to disconnect the motor’s electrical connections.
Disconnecting the Motor Cable
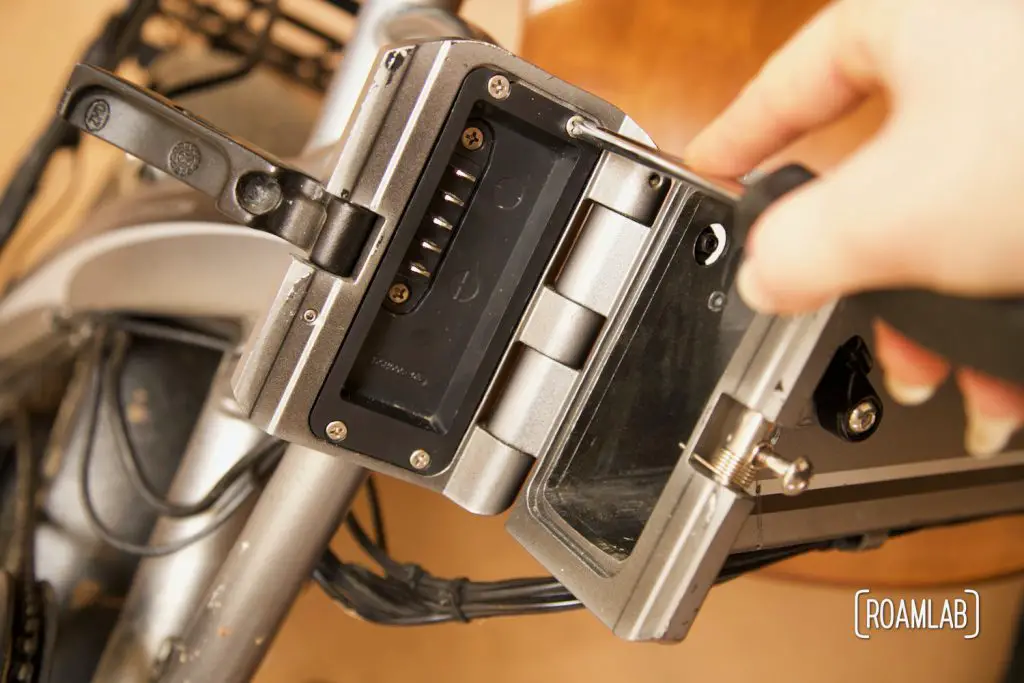
As with any electrical project, the first order of business is to ensure that the wires we will be working with are not live. Power off the bike if it’s on and then remove or disconnect the battery. Many e-bikes on the market have a simple 9-pin connector plug that can be pulled apart to disconnect the wheel from the frame. Unfortunately, our bike model does not.
We chose to mod our bike to add the 9-pin connector. So, we simply disconnect the motor cable from the rest of the bike. For those without a connector, we still have good news. The wires have their own connectors inside the bike frame. To access them, open the battery compartment in the body of the bike. Disconnect each individual wire. You’ll notice there are three larger wires using green bullet connectors and six smaller wires. Disconnect the wires and pull the cable loose from the frame.
Removing the Wheel
With the cable freed, we need to remove the wheel. The wheel itself is removed like the rear wheels of most bikes This is easily accomplished with a wrench, loosening the axle nuts that secure the wheel to the frame. Then, lift the frame away from the wheel, careful not to harm the cable on the bicycle chain.
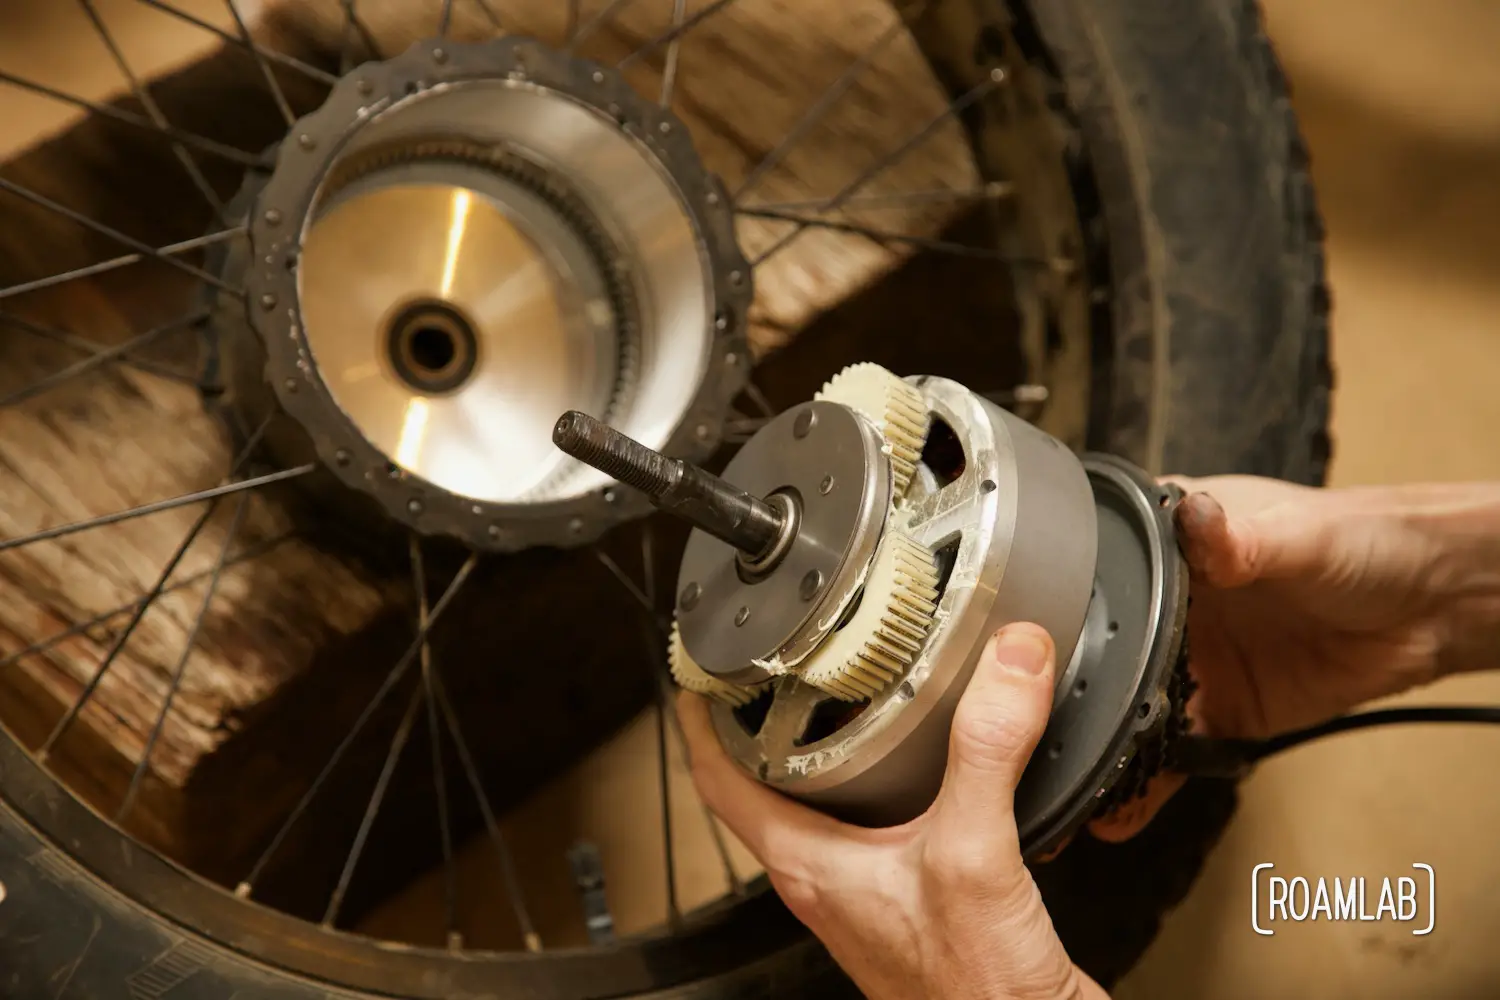
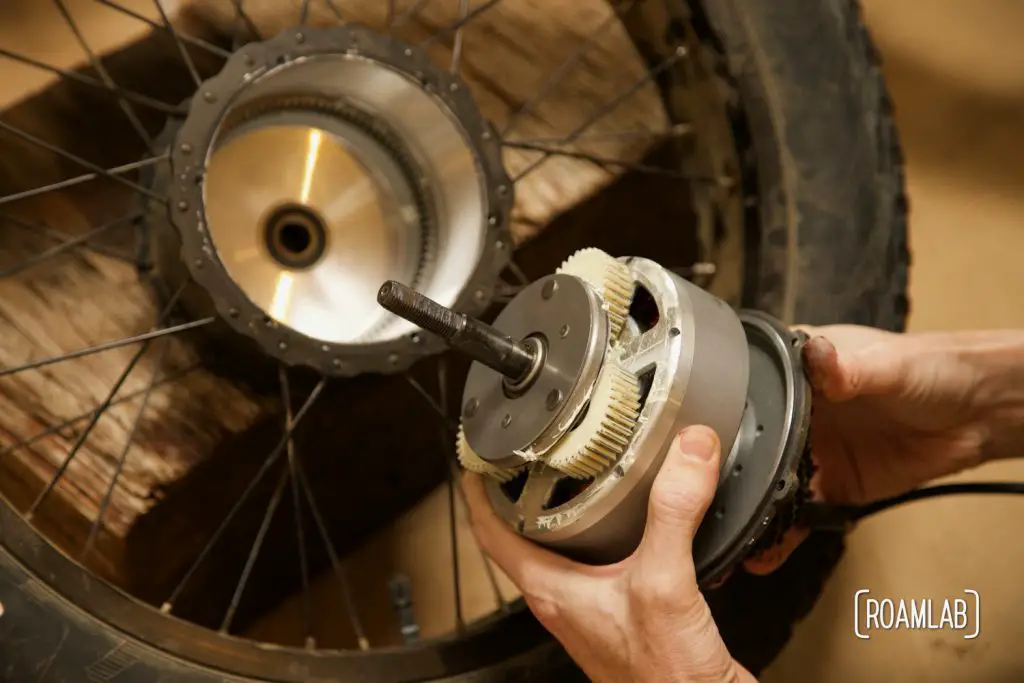
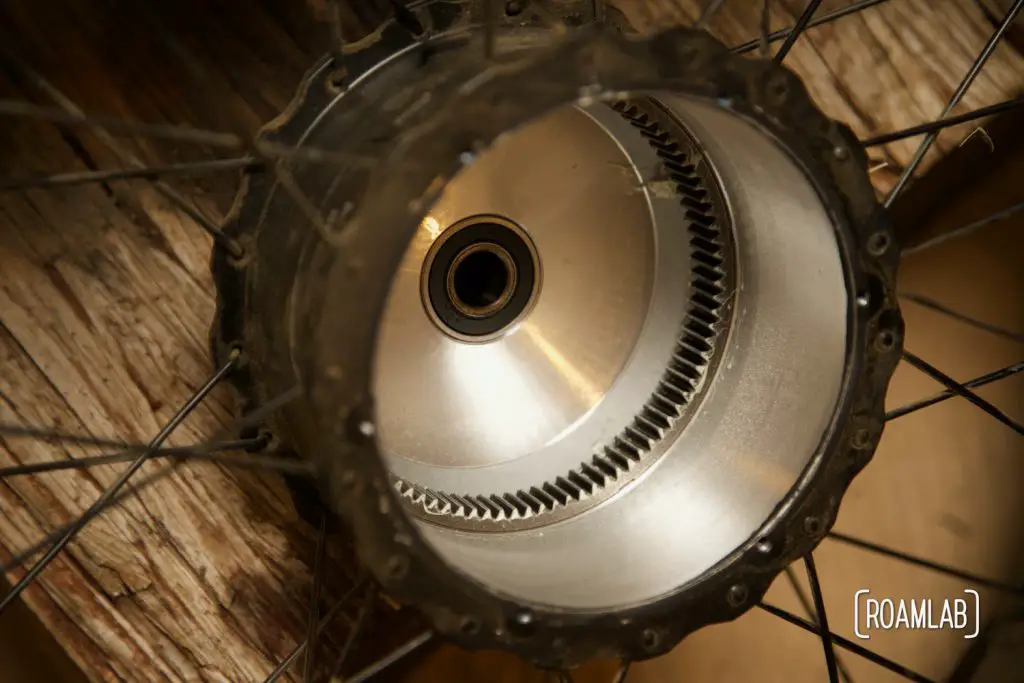
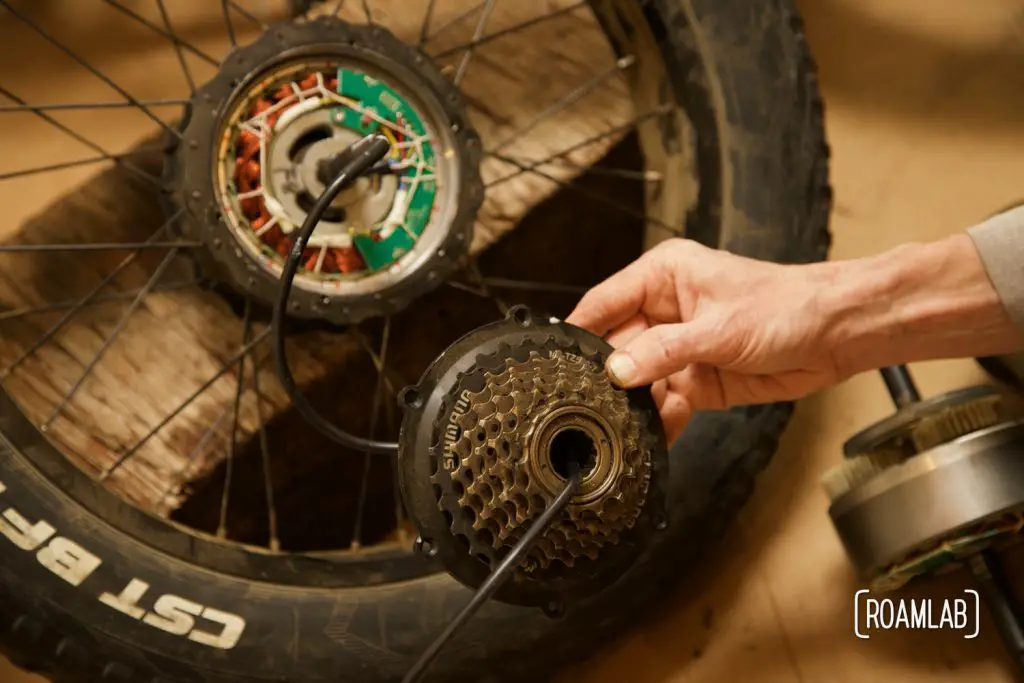
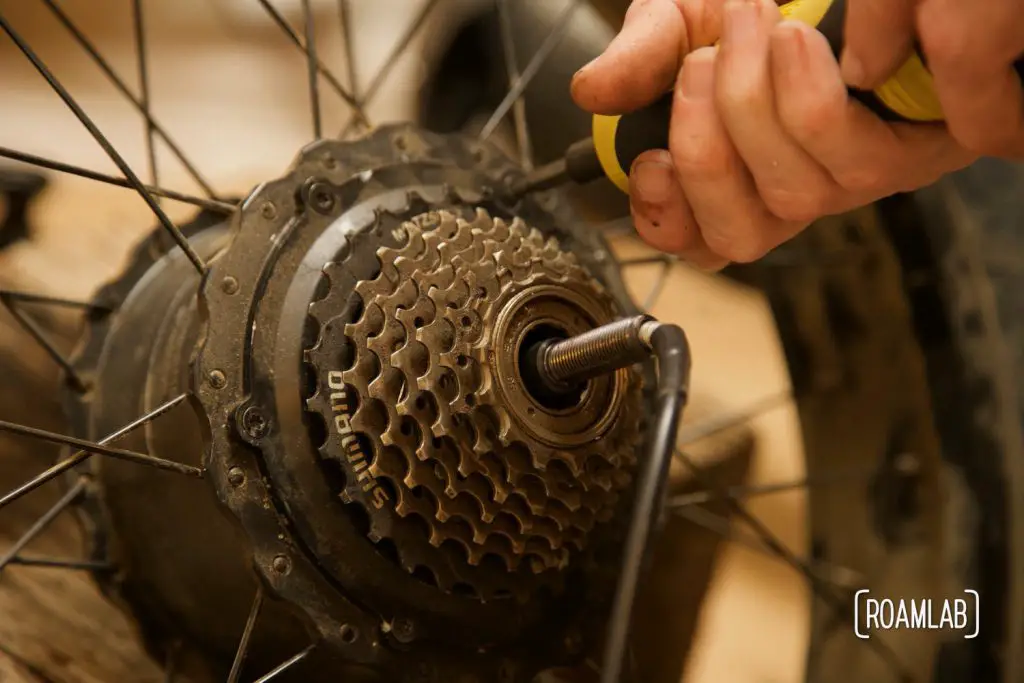
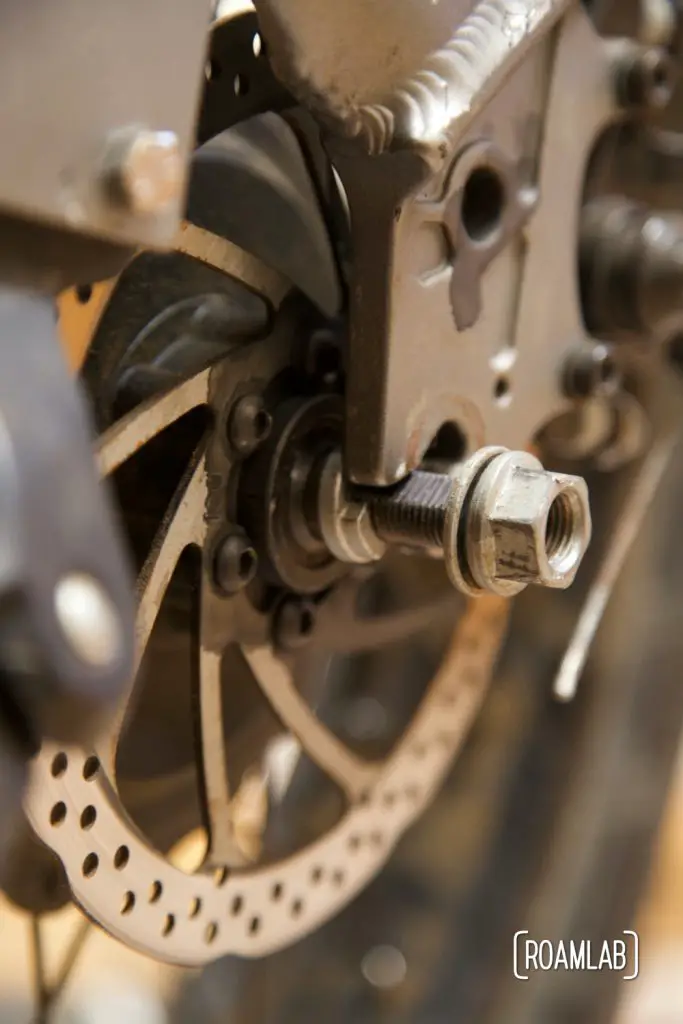
Removing the Motor From the Hub
The motor is surprisingly easy to remove from the wheel hub. We thought we would need a sprocket wrench. But it turns out that the sprocket is easily freed by unscrewing the six bolts that secure the sprocket to the wheel hub. This may not seem like much of a release. The sprocket will still feel tightly attached to the wheel hub. But a firm tap to the axle end on the opposing side (the side with the disk brake rotor) will displace the motor. We used a block of wood so as to not damage the axle.
Once loosened, the motor easily slides out of the wheel hub. Gently work the sprocket unit free from the motor unit and you are now ready to install the new motor.
Installing the New Motor
Installing the new motor is a fairly simple process in reverse. Gently but firmly slide the motor (gear side down) back into the wheel hub. Thread the cable of the new motor through the sprocket unit. Then secure the sprocet unit in place by replacing all the bolts. We used a torque wrench to ensure that the bolts were firmly seated.
Remounting the Wheel
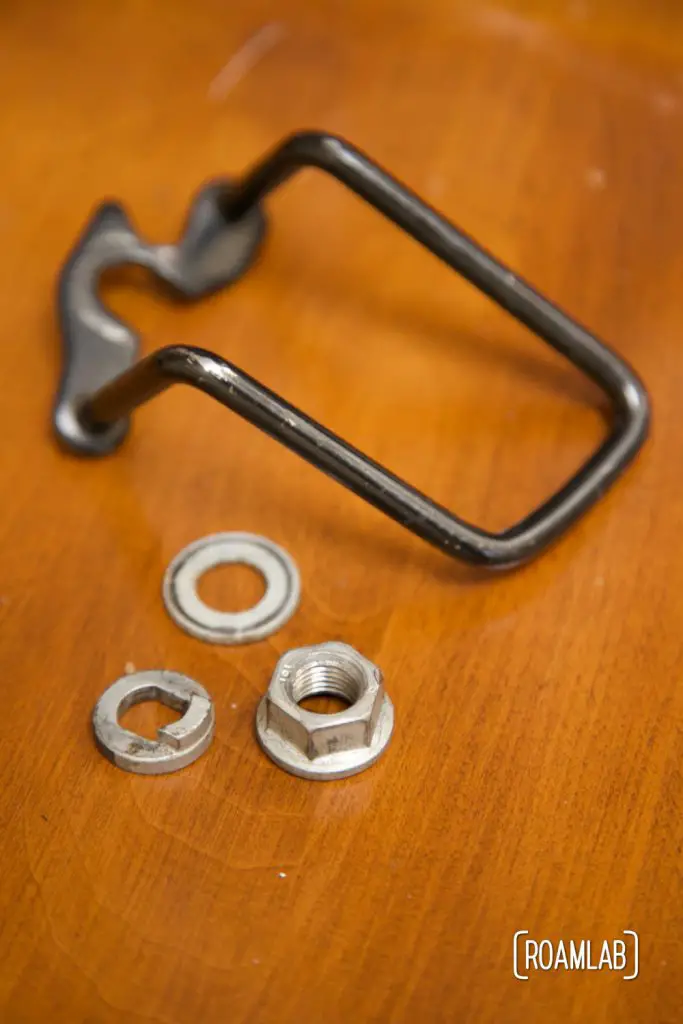
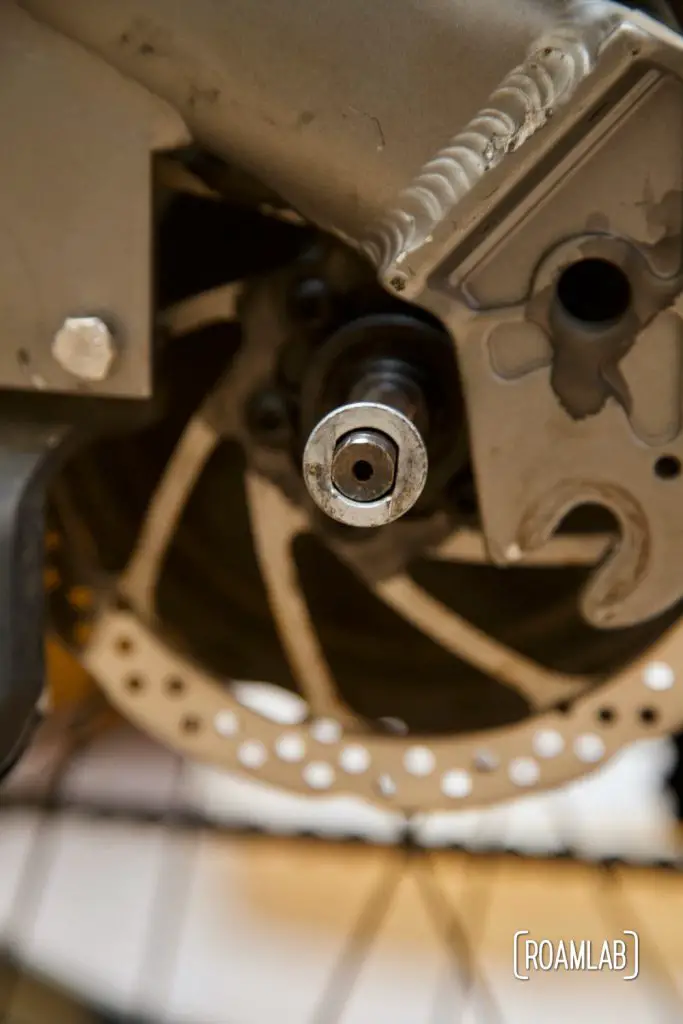
With the wheel in one piece, now it is time to reattach the wheel to the frame. This is probably the most awkward step, as both the wheel and frame are heavy and we don’t want to harm any cables or electrical components in the process. To prepare, position the hub motor axle torque washer, lock washer, and nut on each axle side but do not tighten the nut. Be sure the torque washers are both positioned in the same direction, with the notch down. Fitting these back into bike frame is a little awkward. It helps to have an additional set of hands so that one person can make sure the torque washer and sprock are seated without damaging the power cable on one side. Meanwhile the other person can make sure that the opposing torque washer and brake disk rotor are properly seated on their side.
Once the wheel is fitted back on the frame, tighten the axle nuts and spin the wheel to make sure it isn’t encountering any excess resistance.

Rewiring the Bike
With the wheel back on the bike frame, it’s time to reconnect the wires. We don’t want to dive too deep on the wiring on the motor as this can vary greatly by model. Since we already added a detachable 9-pin connector to rear wheel cable, we spliced the new cable into the connector. Personally, we recommend adding the connector, even if it the motor did not originally have one. But that does call for some basic comfort with securing wire connections.
For those who want to return the bike to its factory shape, you can access the factory plugs inside the bike frame by removing the battery connection plate as we discussed earlier.
All Done
With the wheel back in place and cable connected, the bike should be operable. Reeconnect the battery and turn on the bike. If everything went right, the bike should opporate as usual.
Overall, we found this project incredibly enlightening. We’ve learned a lot about ebike construction in the process of this motor replacement. In the case of future malfunctions, we feel far more prepared to fix the bike ourselves. In fact, our other bike is in need of a quick fix as well, as soon as the replacement part arrives.