When purchasing a lithium battery for an RV, there are more than just battery cells in that opaque plastic box wrapped in branding and warning labels. There is likely a battery monitoring system (BMS) which monitors, controls, and reports on the health of your battery. We are building our own battery. That means we need to add a BMS to manage the cells.
What is a Battery Management System?
A battery management system (BMS) is an electrical component that enables a pack of individual battery cells to operate as one. It protects individual cells, safeguards against extreme conditions, and is essential for multi-cell stacks such as ours. BMS features vary by model, but we tend to rely on the BMS to ensure that the battery is operating within safe conditions by monitoring the battery’s charge state and temperature. Using balance leads—thin wires that connect to the positive terminals of each cell—the BMS can manage the health of individual battery cells and ensure that they evenly charge and discharge. Ideally, the BMS will also be able to report the battery health by connecting to an informational display or application.
The necessity of a BMS depends on the type and arrangement of batteries you are using. For our 16 LiFePO4 batteries, the BMS protects the individual cells by keeping each cell’s voltage within a safe range. It monitors the cell temperature to shut off charging when the stack gets close to freezing, and continuously balances the cells through their charge and discharge cycles.
Choosing A BMS
As with most electrical systems, selecting the right BMS comes down to what kind of battery you are building. What is the voltage and amperage of the battery? Will the battery cells be arranged in series or in parallel?
Our battery cell arrangement is a technical and economic decision. We have sixteen 180 Ah 3.2V battery cells. At the time we are shopping, we can’t source a BMS that could work for all 16 cells without limiting our current to 120 amps. Theoretically, such a BMS would also be prohibitively expensive. The high amperage it would have to handle would make it so expensive that buying two smaller BMS units will be cheaper.
By splitting the 16 cells into two separate 8 cell 24-volt battery banks, we can have one BMS for each stack without limiting the capacity of the system as a whole. This split is also convenient as the battery cells get heavy. Splitting the cells into two sets with their own BMS keeps the weight of each battery low enough for two people to move easily and also provides some redundancy in case one of the battery stacks has issues.
Preparing the BMS
Our BMS isn’t the plug-and-play component that we often expect for consumer electronics. We don’t have step by step directions or an FAQ support service. Fortunately, a bit of digging online helped us identify the steps required. To have our BMS up and running, we will need to (1) crimp ring terminals to the BMS leads, (2) balance our battery cells, (3) connect the BMS to the battery cells, (4) attaching temperature sensors to cells, and then (5) connect and configure the BMS through a phone-based app.
Equipment
- Protective goggles
- Wire stripper
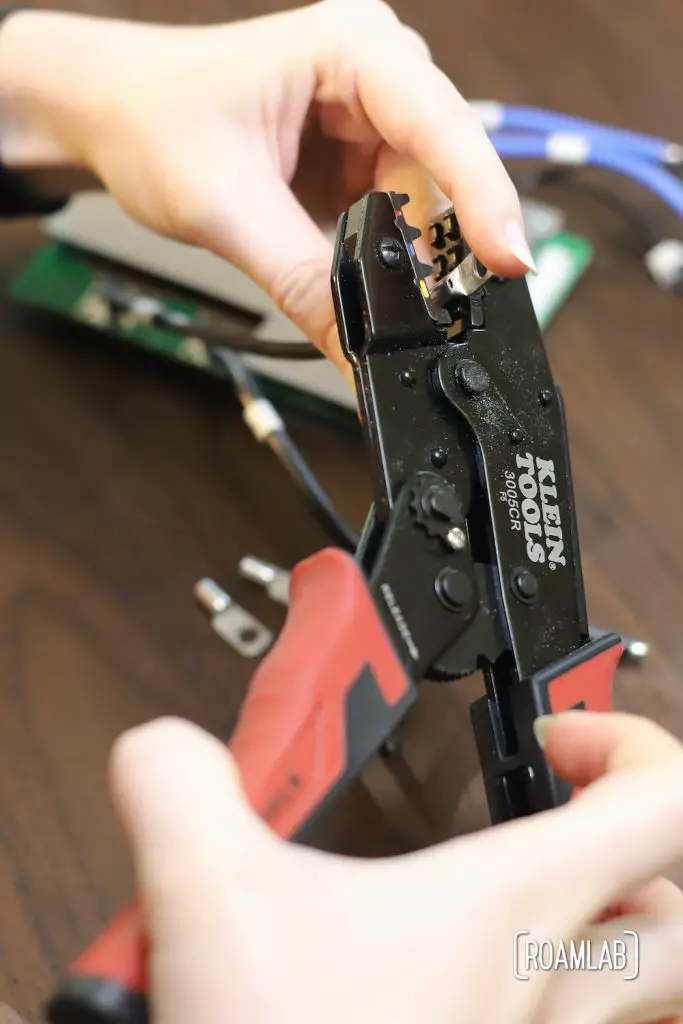
- Crimper tool
- Heat shrink
- Heat gun
- Wrench
A note on safety: this is an electrical project with the risk of sparks and shorts. Be careful when working around live wires and secure terminals to avoid possible shorts. Be sure to always wear protective eye gear.
Prepare The Leads
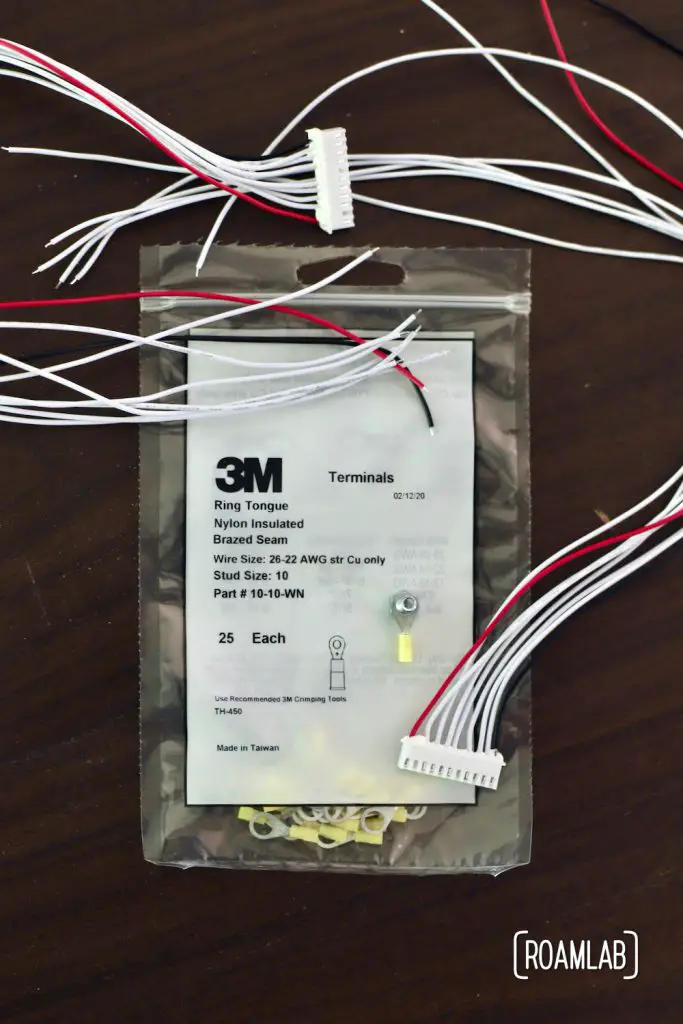
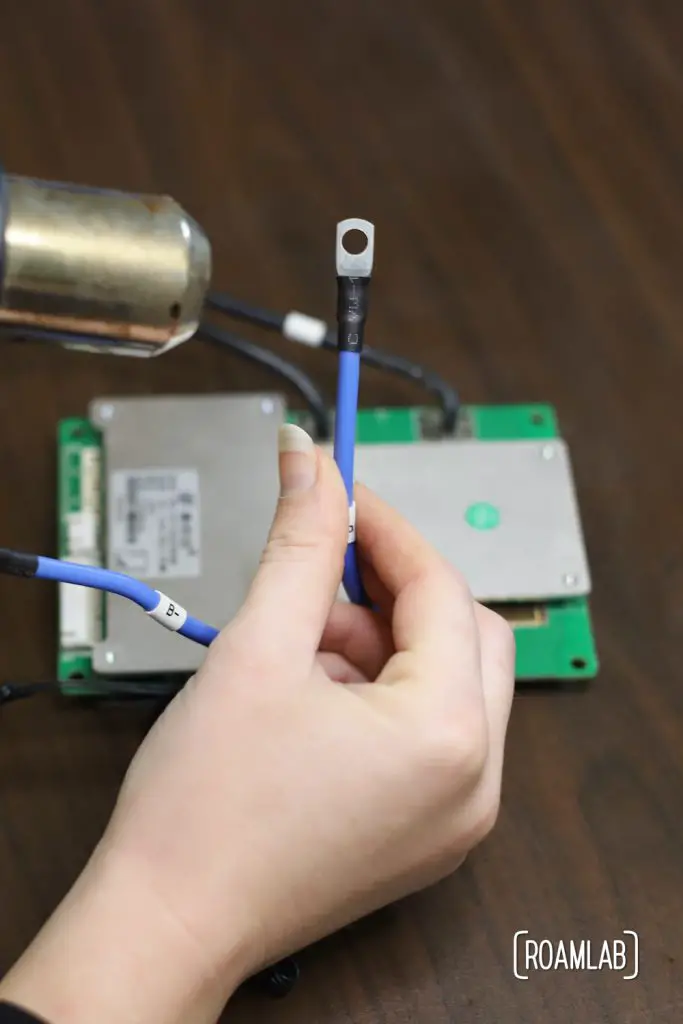
Our BMS came with tinned leads, likely to be directly soldered to other components. However, given our use case, we want the flexibility to attach and unattached these leads as we experiment with our system. So we are crimping nylon insulated ring tong terminals on each wire. The BMS balance wires are tiny (24 AWG), but we want to be able to attach to the large bolts on the batteries. So we have to special order ring tonge terminals for 24 AWG wire and a size ten stud.


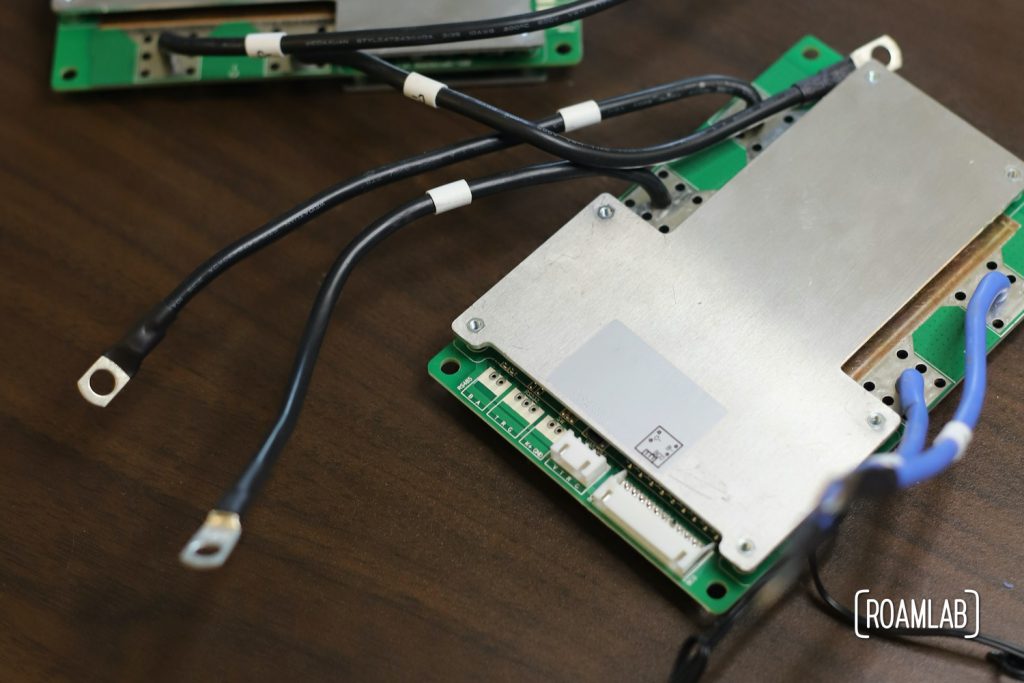
The B- and C- main power wires are much more straight forward. Funnily enough, the positive and negative connections are each supported by a set of 10AWG cables. We have seen some users add more wires or replace them with higher gauge cables to enable a higher current connection. So far, the factory design is sufficient for our purposes. Still, we may revisit the position once we have had the opportunity to test the wires with high current appliances such as our induction stove and electrical water heater. At the moment, we stick to stripping and attaching ring terminals to each wire and finish off the connection with heat shrink.
Preparing the Cells
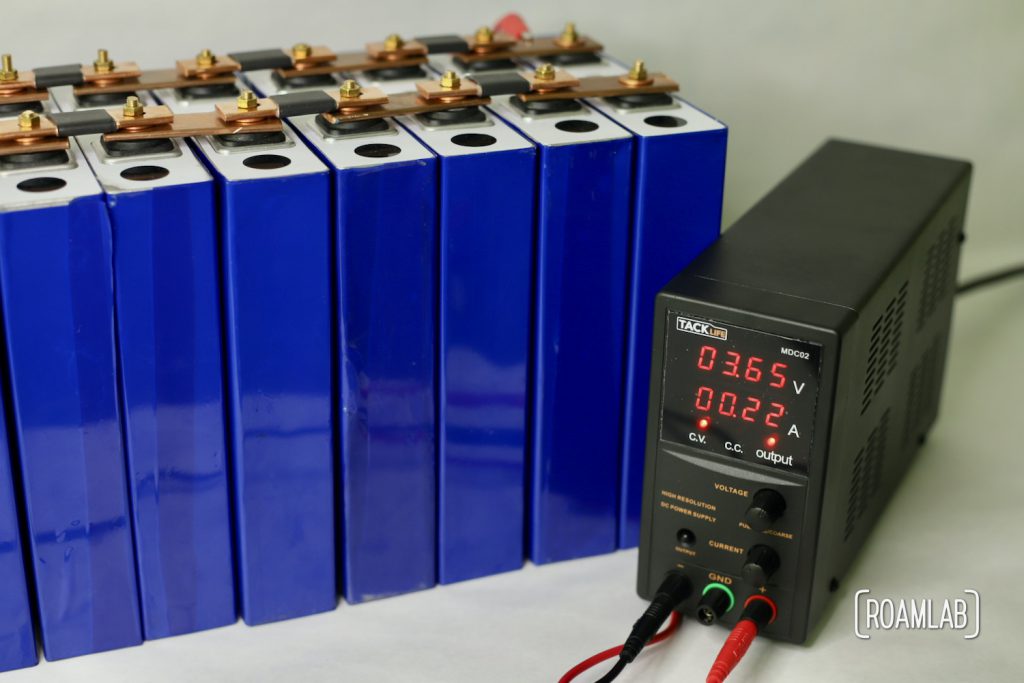
It may seem counterintuitive, but before attaching the battery cells to the BMS for the first time, all the cells must be within a safe voltage range of each other. Yes, we are effectively balancing the batteries before hooking them up to the Battery Management System. But this helps minimize any risk of damaging the cells that have significantly different voltages. You can read about this process in our post about Cell Balancing.
Connecting the BMS to the Cells
Now we are ready to hook up the BMS to the battery cells. The order that we do this is critical to minimize the risk of harming the BMS, battery cells, or yourself with an electrical short. While wiring conventions between BMS’s may vary, the wiring in ours is pretty standard.
We start with the balance wires. There should be a BMS balance wire for each of the positive cell terminals in the series (beginning with the red wire) plus one black wire that connects to the final negative terminal in the stack. In our case, we have eight cells, so we have nine wires.
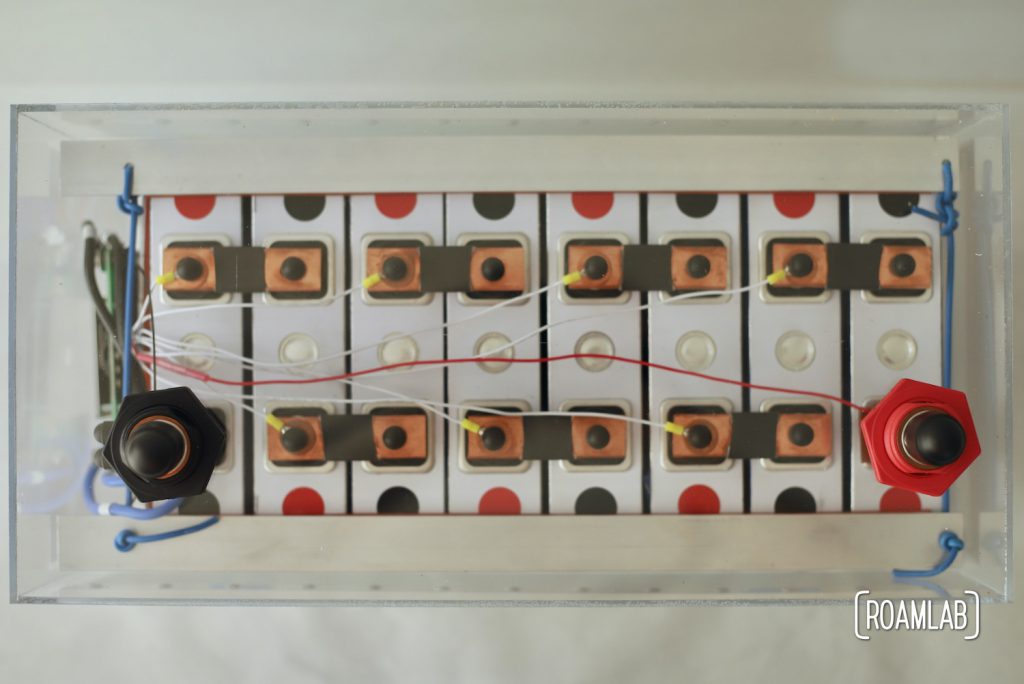
Make sure that this set of wires is NOT attached to the BMS while you are connecting them to the cells. We start with the red wire, which we secure to the first positive terminal in the stack. Now, we work our way down the stack so that each successive white wire attaches to the next positive terminal. When we reach the last cell, we conclude the series by connecting the black wire to the final cell’s negative terminal.
With the leads in place, we can reattach these wires to the BMS. The BMS should startup using the power from the batteries.
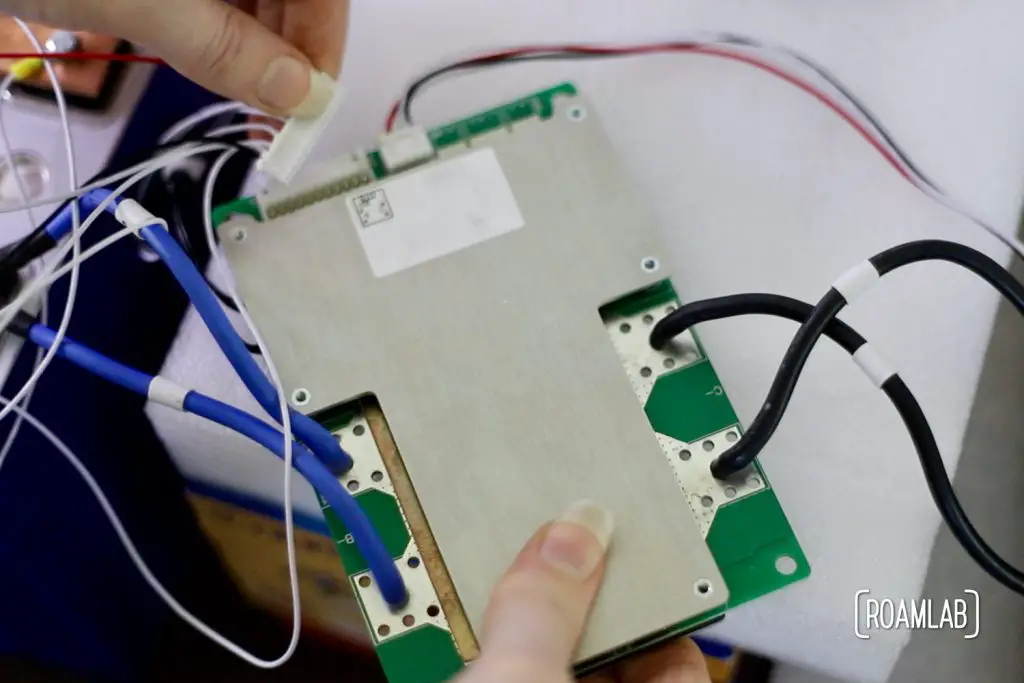
Next, we hook up the thick gauge wires on the BMS. Our BMS has two blue 10 AWG wires labeled B- and two black 10 AWG wires labeled C-. The number and thickness of your wires may vary, but the B- and C- labels are what matter here. Take all the B- wires and attach them (that’s two in our case) to the same negative ground terminal as the black wire. The C- wires will connect to the negative terminal of the battery box.
With this arrangement, we can charge our battery by connecting a power supply to the first positive cell terminal in the stack and the C- wires on the BMS. We’ll address the long term battery terminals when we install everything in our custom battery boxes and finally complete our lithium battery build. As it is, we have one last step in configuring our BMS.
Attach Temperature Monitors to Cells
Our BMS comes with two temperature monitors for the battery. These two temperature monitoring wires attach to opposite sides of the cells, as far apart as possible. Such placement should improve the BMS when the temperature drops near freezing.
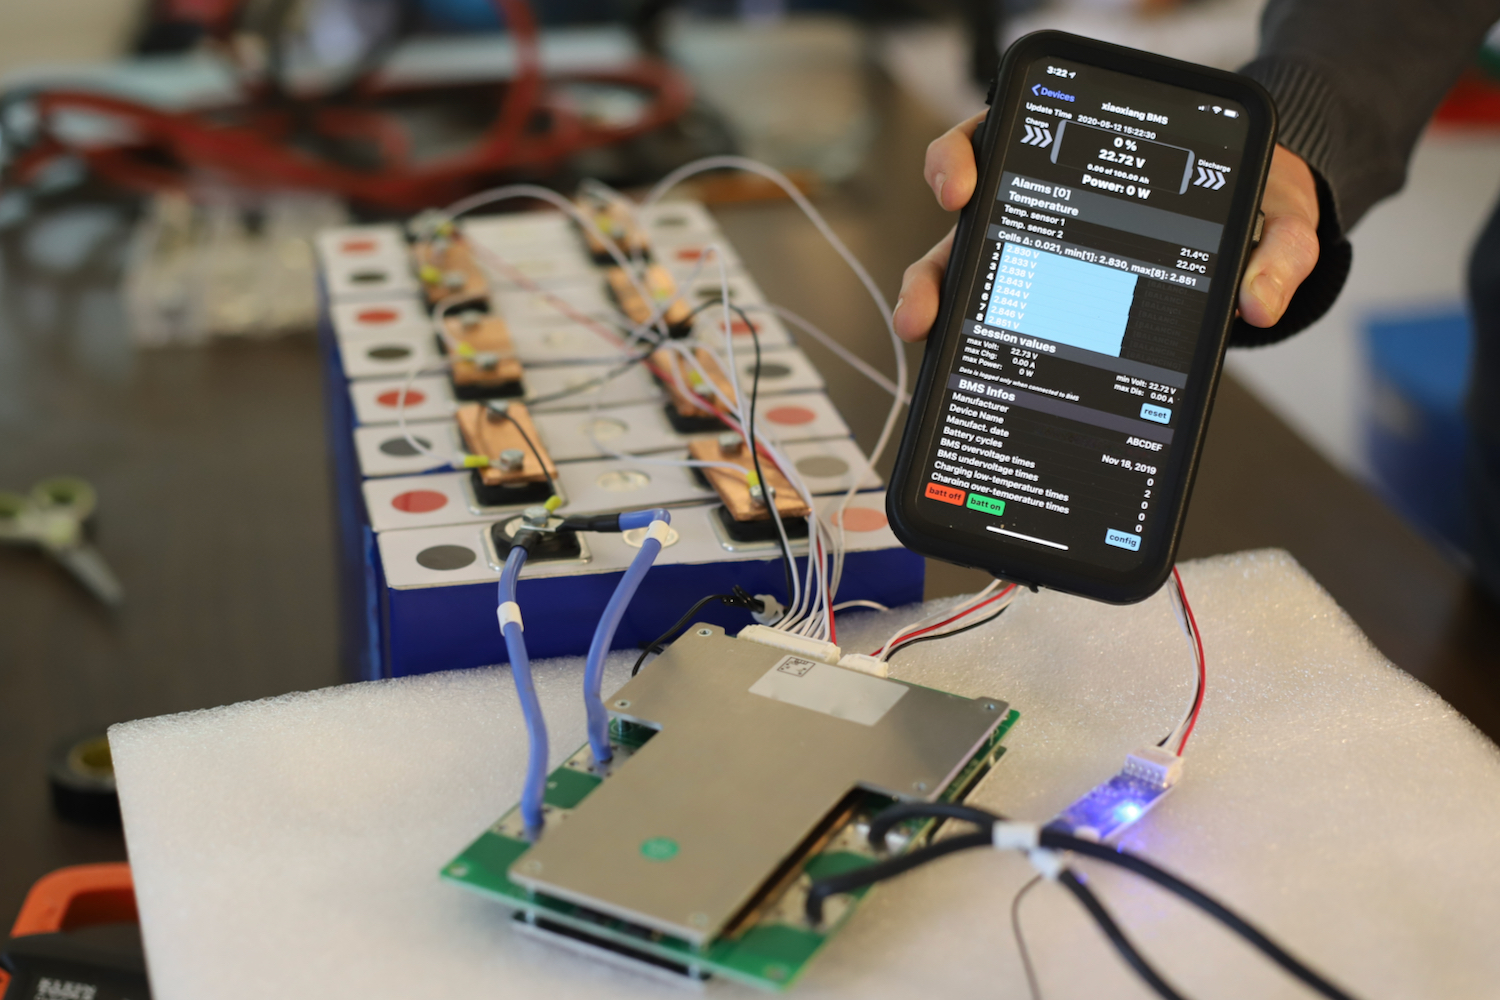
Formatting the BMS
Our BMS comes with a Bluetooth module. We can hook up the Bluetooth and now connect out phones to the BMS and see it start to work. There are a lot of confusing BMS apps out there. We are using the xiaoxiang BMS iOS app by Lucas Deszynski. While we can see a lot right off the bat, there is some configuration we have to do before leaving the BMS to its own devices. These are settings that we control through our app.
With the BMS systems up and running, we are ready to assemble our lithium battery.


What bms are you running? And is the Bluetooth built in or an add on board?
Hi Chris!
At the time, we had to import a 24V BMS. Now, we would order the 24V BMS from Overkill BMS (https://overkillsolar.com/product/bms-100a-8s-lifepo4/). Bluetooth came with the BMS as a separate board with a simple built-in three-pin connector.
“While we can see a lot right off the bat, there is some configuration we have to do before leaving the BMS to its own devices. These are settings that we control through our app”.
When you say ‘through our app’ is that an app your developed or xiaoxiang BMS iOS app?
Yes, indeed. It can be a bit confusing but it’s been working for us, thus far.