Refurbishing The Avion Truck Camper Fiberglass Pan DIY Camper Renovation
Timelines are an exercise in wishful thinking. I remember this lesson from my former life as a code monkey. But it’s never been more obvious than when renovating a camper.
We have a departure date set and it is coming up fast. But little things keep pushing back our progress.⠀Six months ago, I thought we would have a working kitchen and bathroom by now. Two months ago, I thought we would have rebuilt the bed by now. At this point, I’d be happy to just have the pan of the camper resting firmly and securely on the truck bed.
Most of the Avion’s exterior is aluminum. But, the very base of the camper, hanging off the truck bed, is made of fiberglass. It wedges in between the interior flooring and the exterior aluminum pan and holds the back water tank. In replacing the floor, we also had to remove this pan to remount it to the new floor.
Cleaning The Fiberglass Pan
With the floor completely replaced, we take this opportunity to clean up and refurbish the pan before uniting it with the new floor. Cowboy power washes the interior and exterior. Stripping away years of grime.


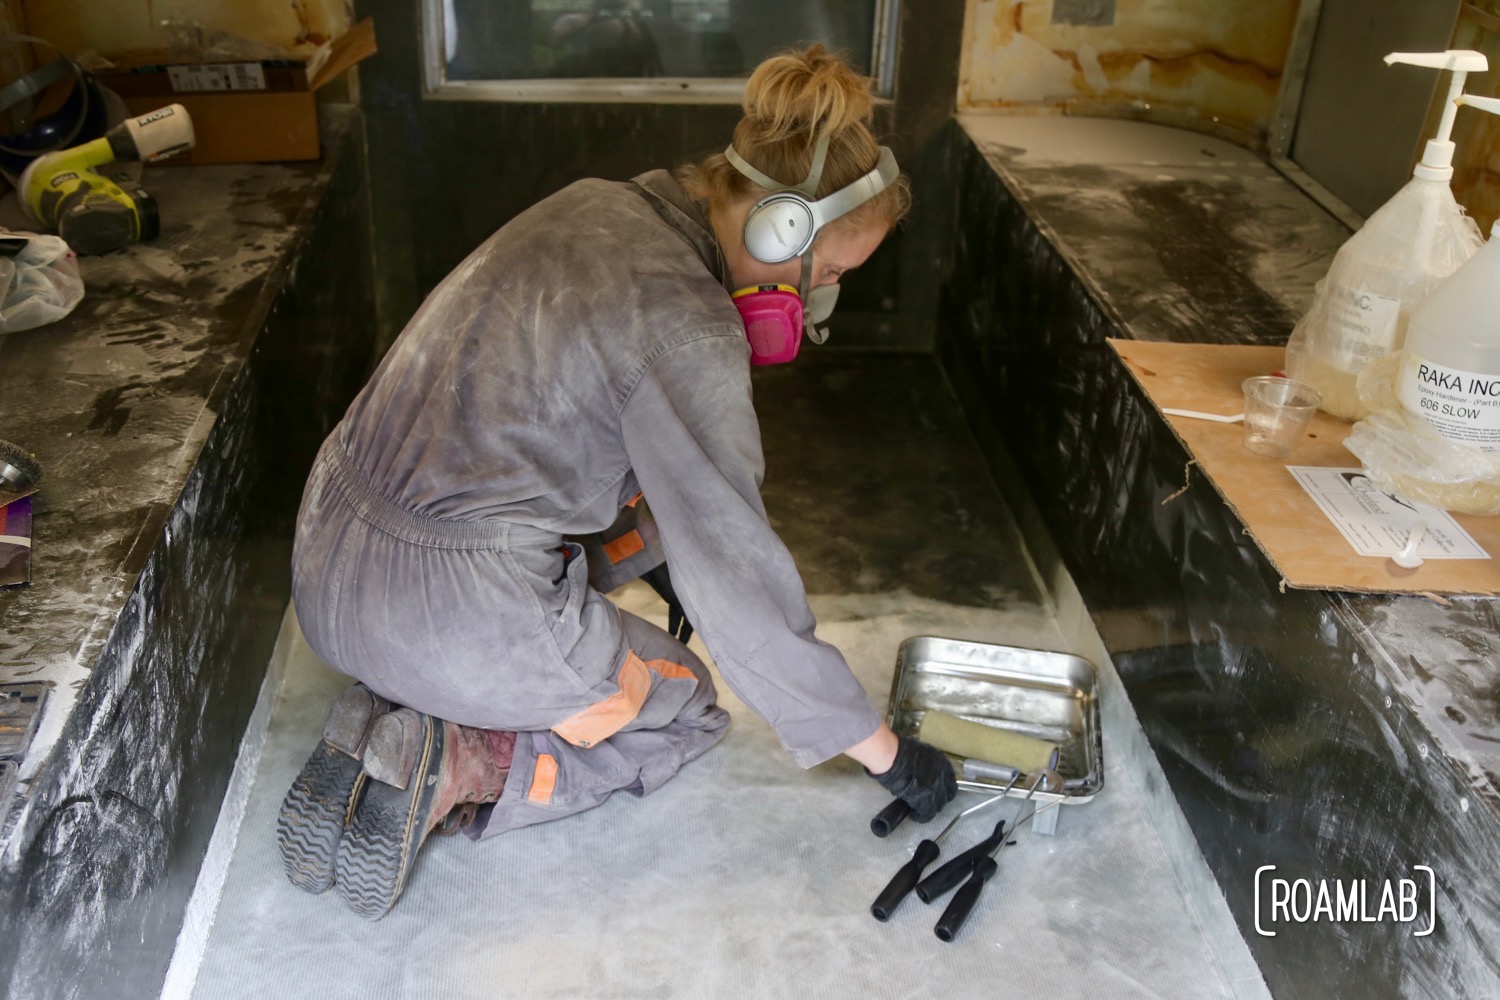
Fiberglassing The Pan
We had hope to strip off the old paint and add a complete new layer of fiberglass and paint to strengthen the pan. Despite vigorous use of the sanding attachment on my multitool, the old paint was not easy to remove or rough up. I assume this indicates that it was / is an excellent paint. Either way, I do not have the time to prep the entire surface with such resistant paint. We settle on roughing and reinforcing the edges with strips of fiberglass and remounting the pan.


Remounting The Fiberglass Pan
We had thought it would take an afternoon to remount the refurbished pan. It takes three days. The new floor is slightly too wide to fit the pan so we have to cut away slivers of floor to resize it.


Some time in the future, we will need to remove this pan again to insert either the refurbished or new blackwater tank. But, until, then, I’m happy to have the pan back in place.

Michael Sullivan
Hello
Came across your posts, you have done an amazing job on your camper. Thank you for posting it.
Just bought my first camper avion c11 .
Mostly original including orange fabric and curtains, but like older campers needs updating. I do not have steps , do you know where I might find one? I have the cutout for it.
Thanks Mike
Lexi GoForth
Hi Mike, Welcome to the Avion family!
You have an exciting project ahead of you. I’m rather torn, though, on your steps issue. You could check our eBay or Vintage Trailer Supply. But, honestly, unless you have a vintage truck or other low riding vehicle to cary your Avion, I think you should seriously consider shopping for a new set of stairs. Modern trucks ride a lot higher than the original stairs are designed to support. I consider that extra clearance to be a plus but it means we rely on a ladder to get into the camper rather than the stairs that came with the camper.
If you are determined to stay original to your camper, you can also take a look at the Avion Truck Camper group on Facebook or on RV.net and see if any of them are willing to sell theirs. It’s worth noting that, like many RVs at the time, not all Avions are made with the same parts. Avions from the same year can have different light fixtures and other hardware based on what was convenient at the time of manufacturing. When we compared our 1970 Avion C11 with the 1970 Avion C11 on display at Jack Sisemore Traveland RV Museum and chatted with the eponymous Jack Sisemore, we were surprised to discover that a lot of the differences between our camper and his were introduced on the manufacturing line.
Just a little food for thought.
Good luck!